FIN 135 Unit 3
FIN 135 Unit 2
FIN 131 Unit 3
FIN 131 Unit 2
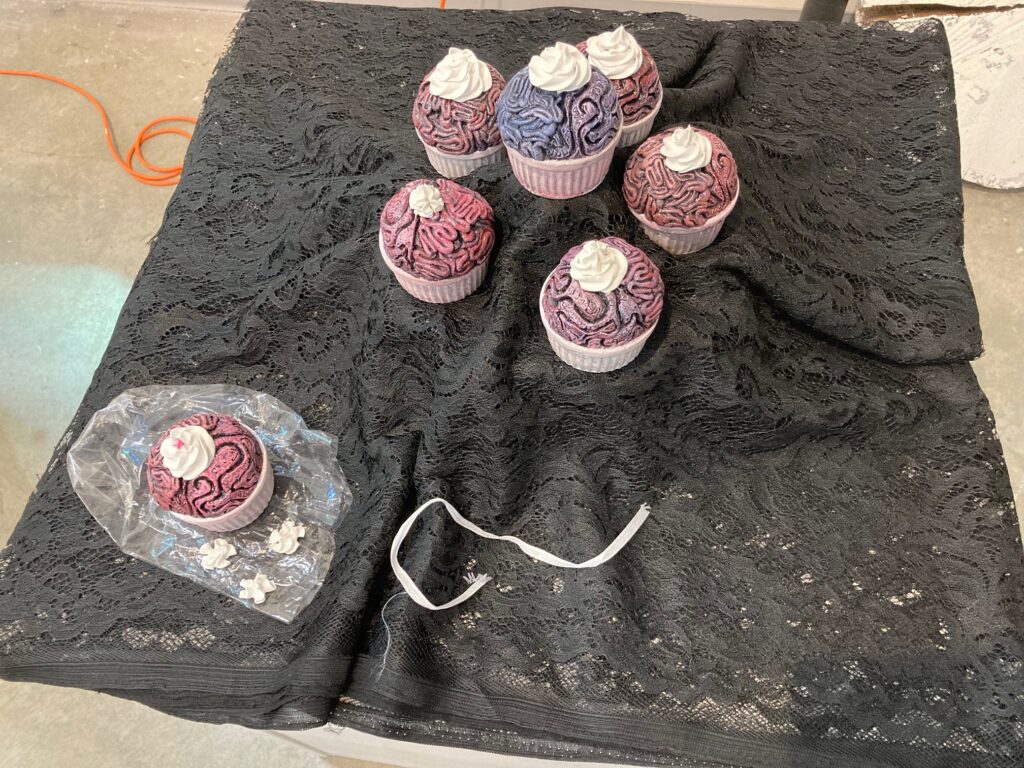
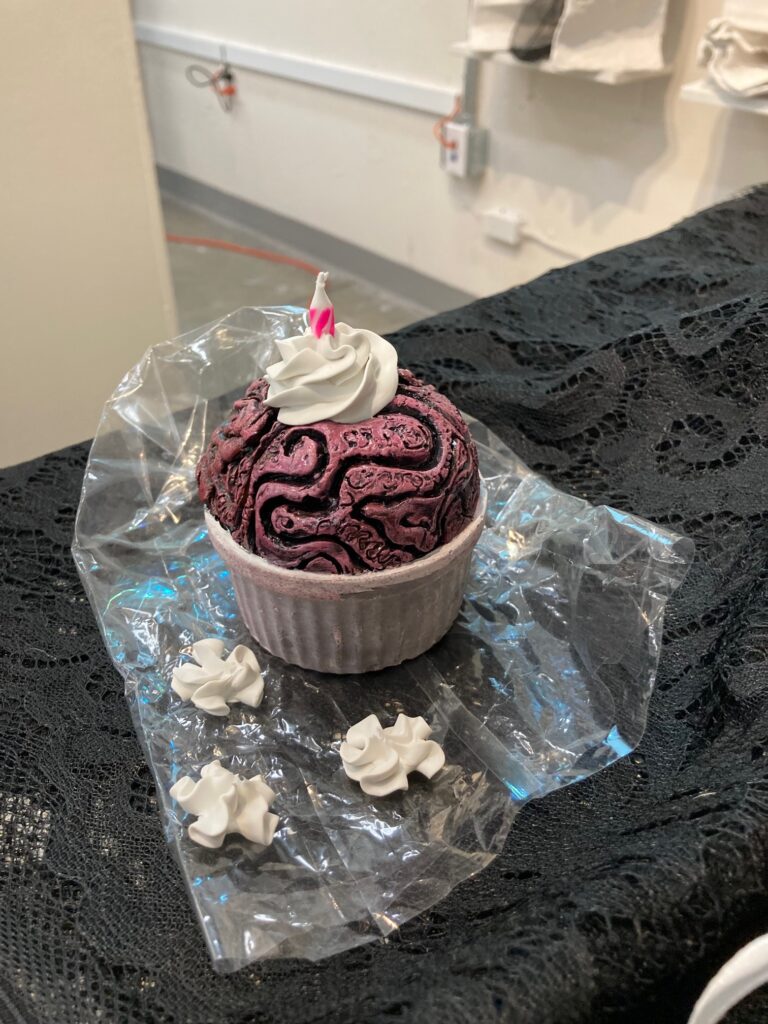
UNIT 2 explores the relationship between art and environmental sustainability with the theme “Waste Not, Want Not.” For this unit we are to think critically about the materials we use, the stories they tell, and their impact on the environment. We are to work with found or alternative materials, and consider the possibilities in everyday waste. The solo project is titled “Everything Can Be Anything“. There is a second collaborative project that is focused on learning metal shop techniques, titled “Being Human – Making a Monster“, see page 2 for more on that…
EVERYTHING CAN BE ANYTHING: Research Inquiry Attached below is a pdf with a record of my thoughts on reviewing the artist links provided by Angela.
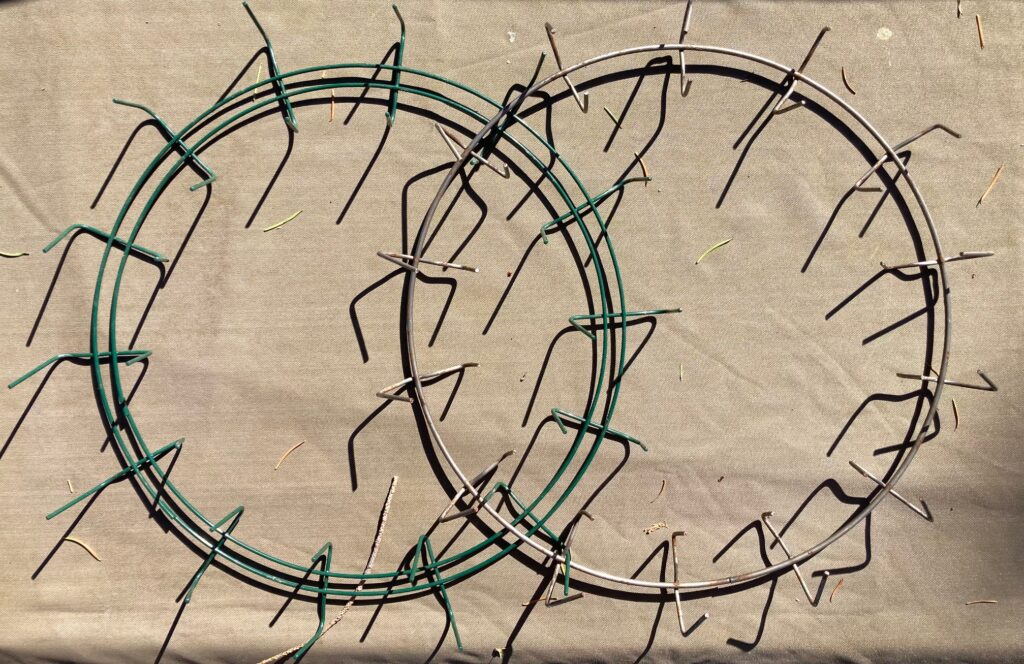
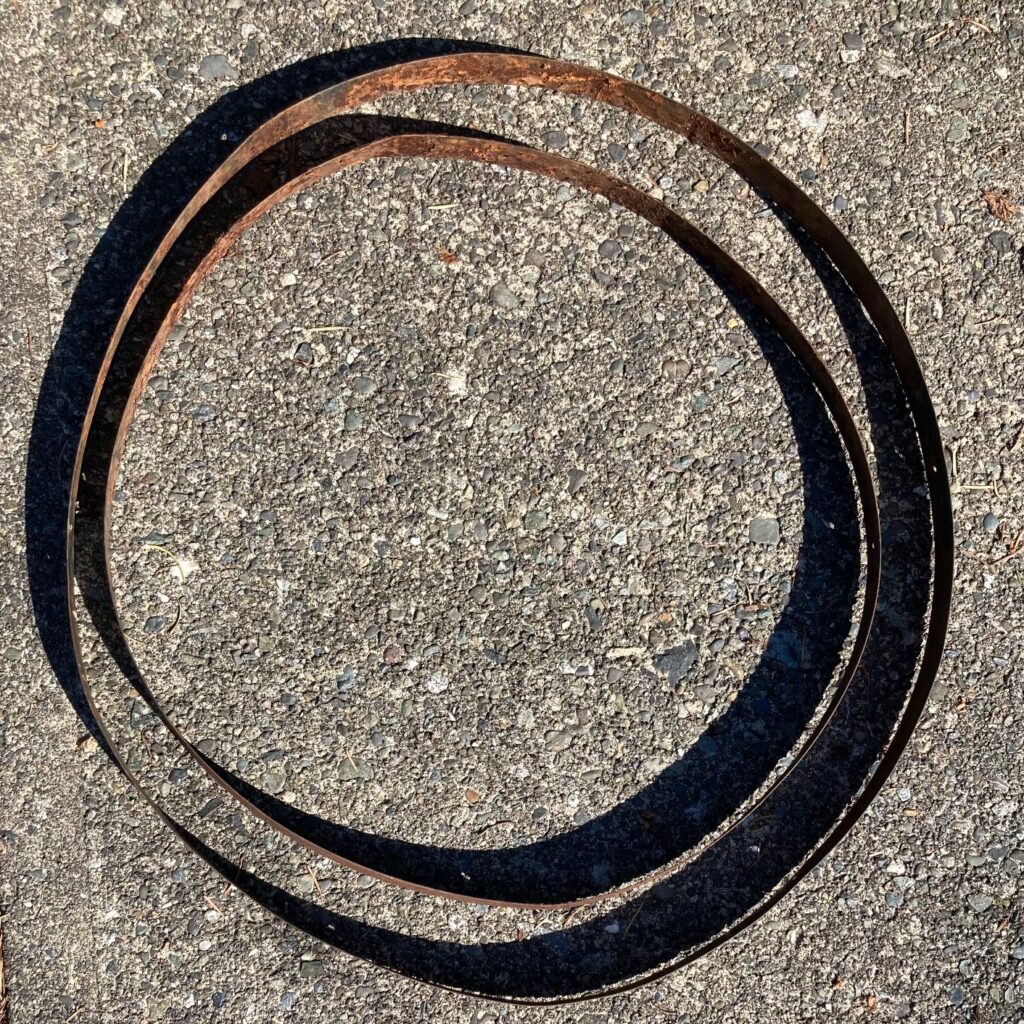
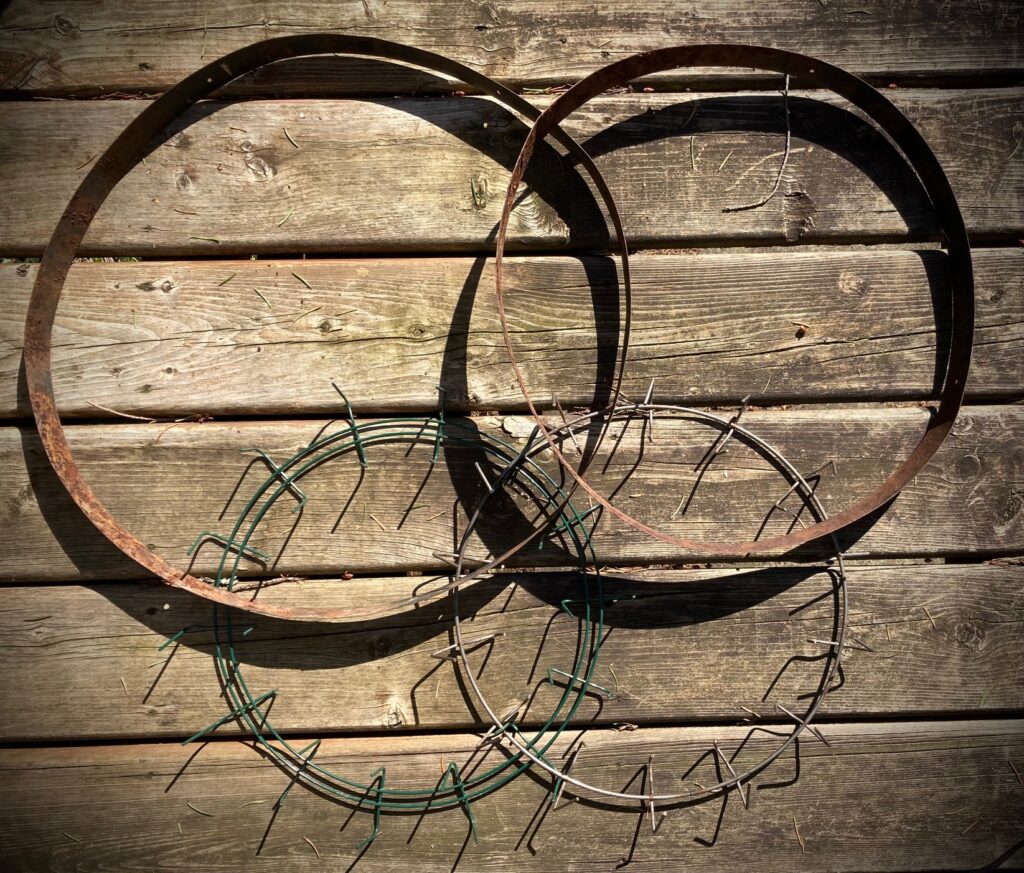
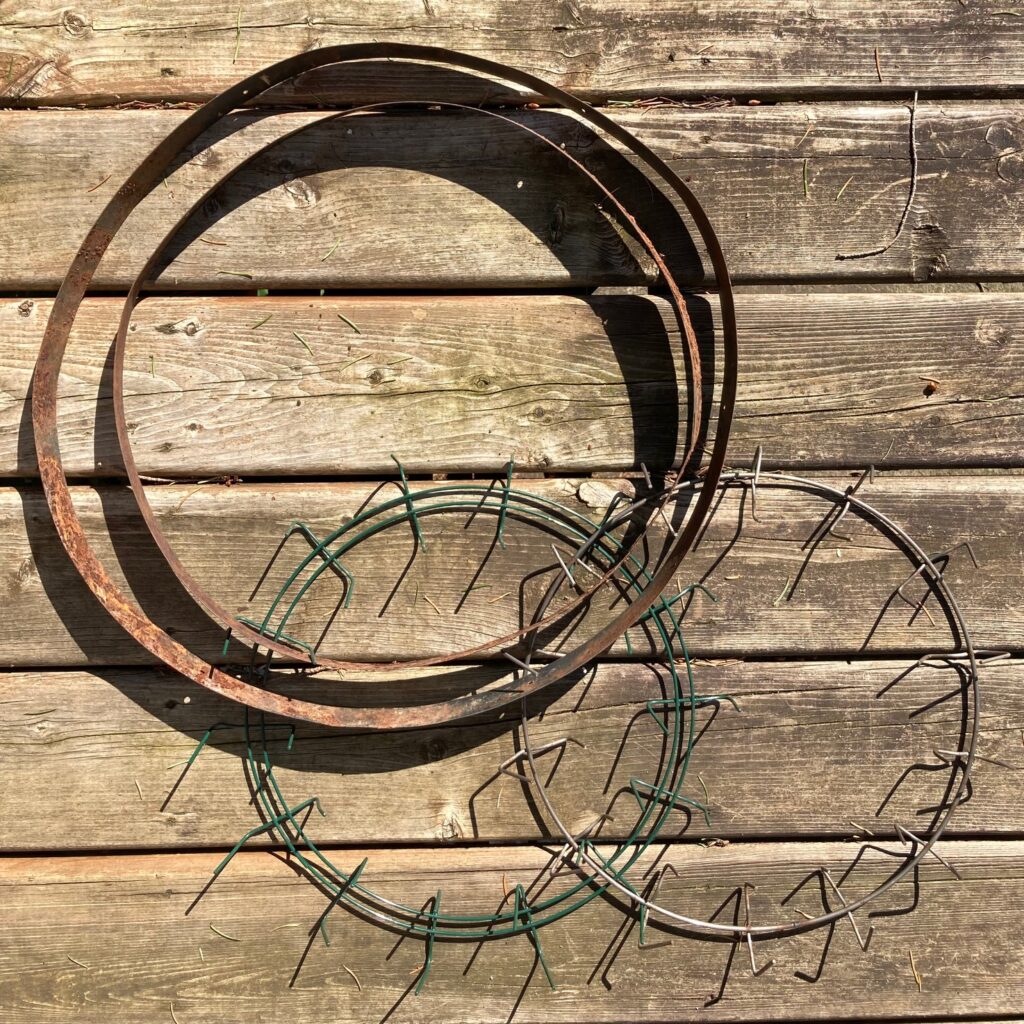
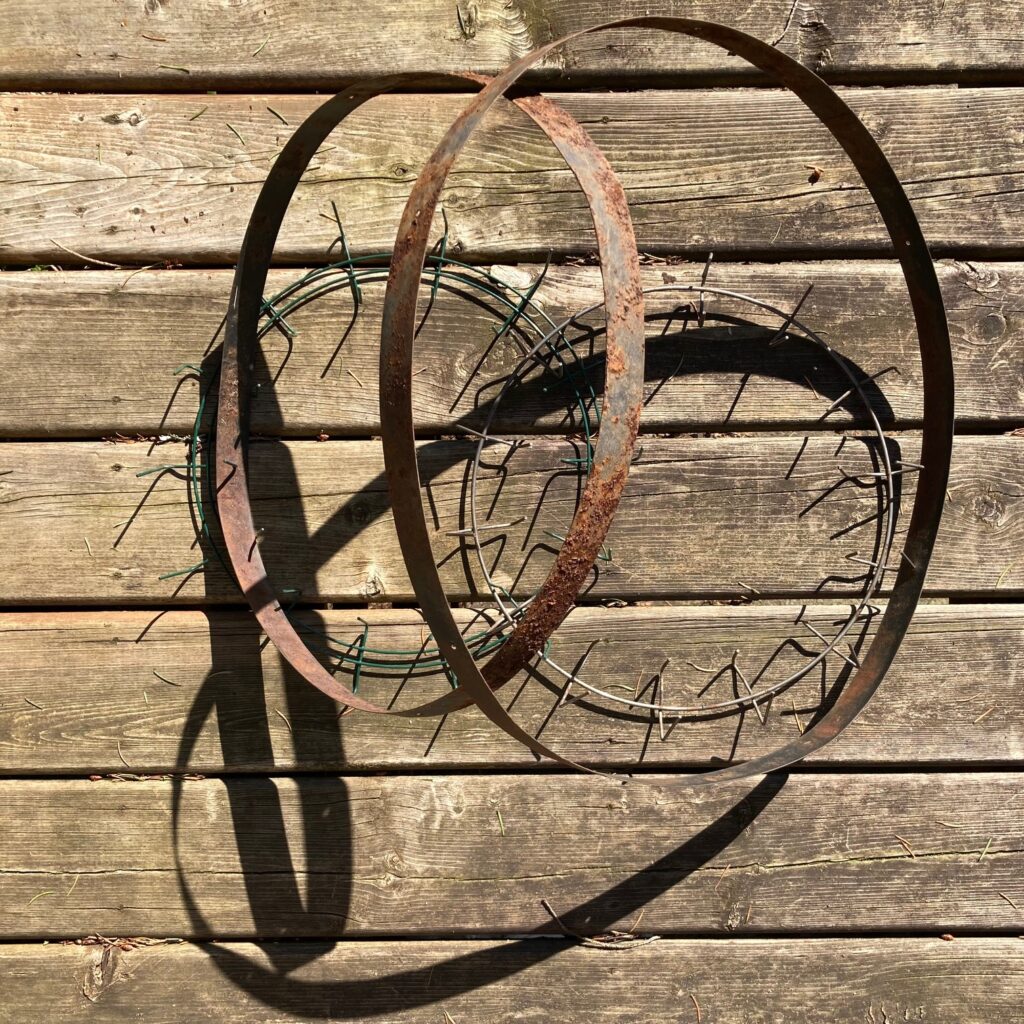
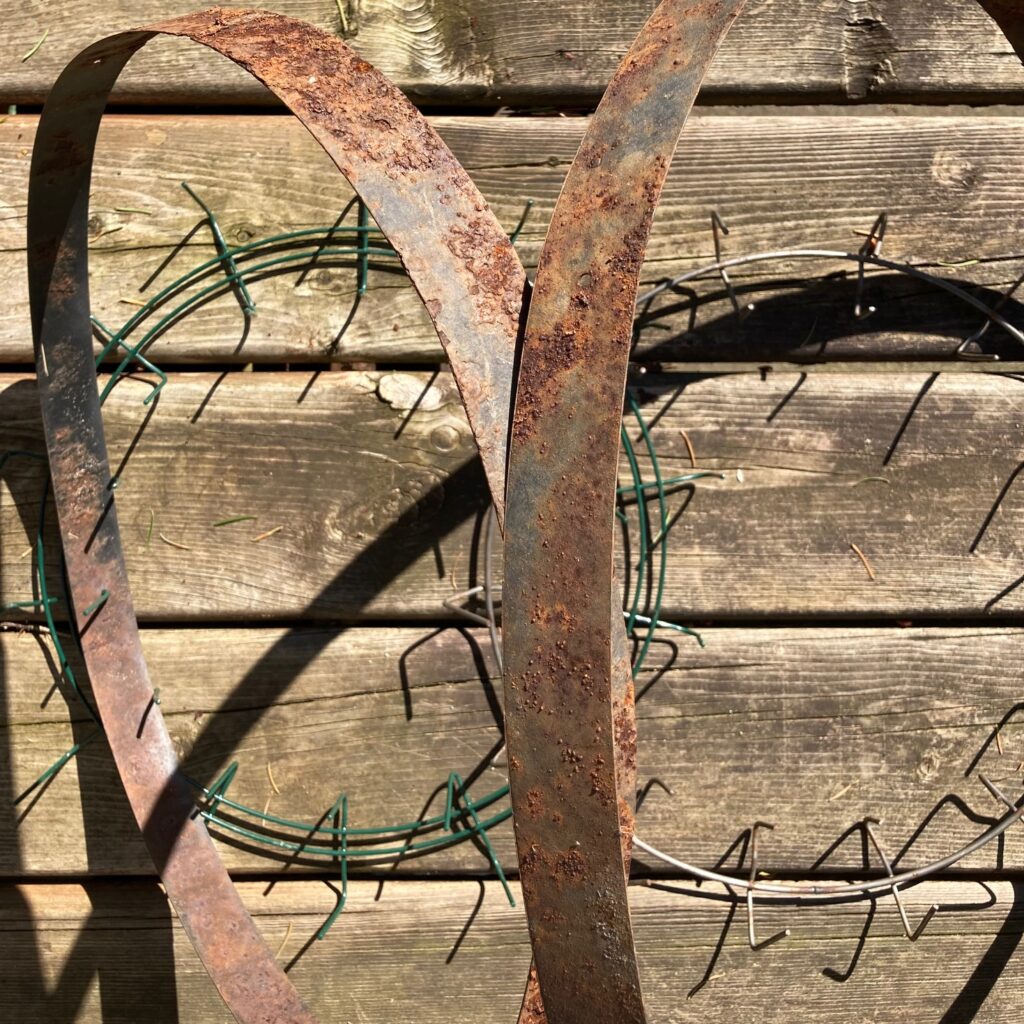
U2-Research-InquiryIN MY OWN WORDS: I’m inspired to ponder items that I’ve kept around the yard or house for no obvious reason, but keep noticing (similar to Willie Cole walking by the discarded iron so many times). The first two sets of items are rusting hoops from a half-barrel that rotted away, and two metal circular frames used to make wreaths. I realized I had repeatedly decided not to recycle them, as though waiting to see what they were for. Decided to bring them into my office to up my exposure to them, handle them when the mood takes me, and just see what happened. After a few days of this, here is my first photo shoot with them…
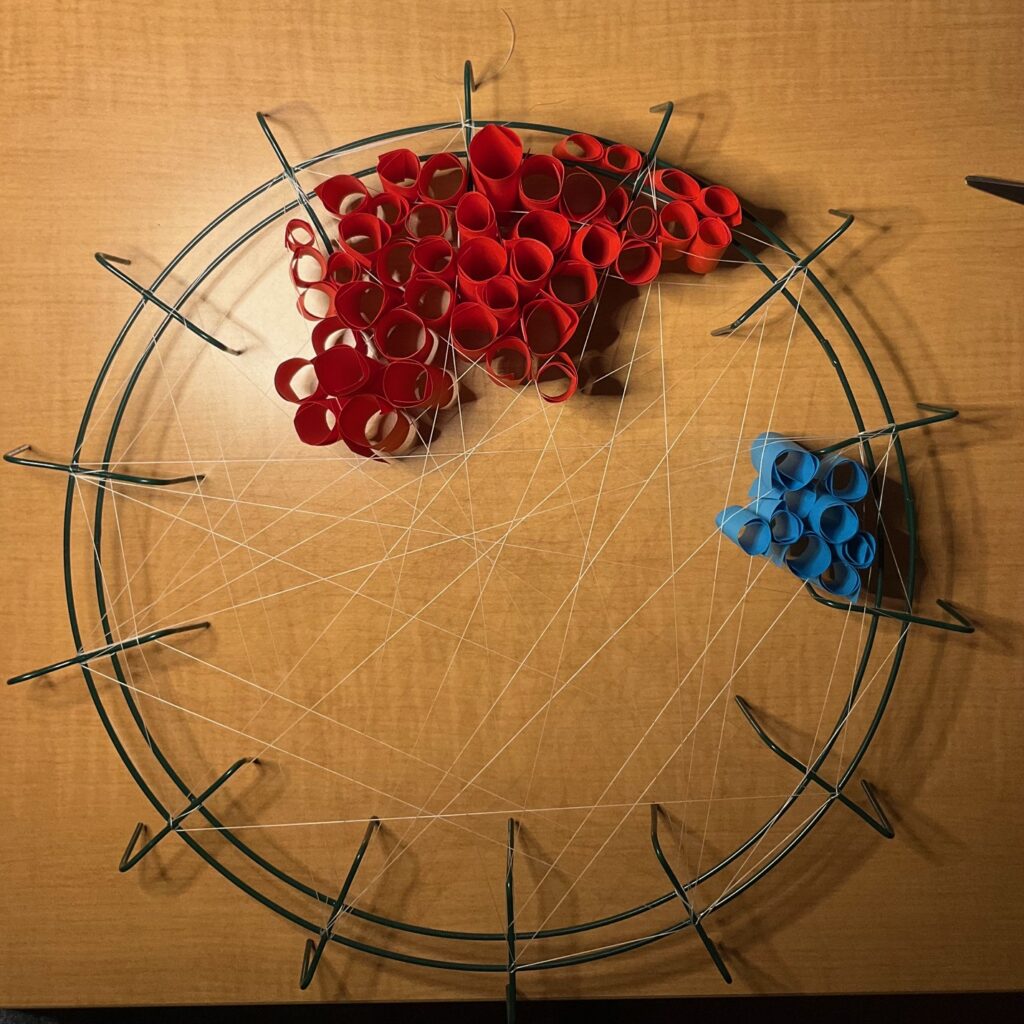
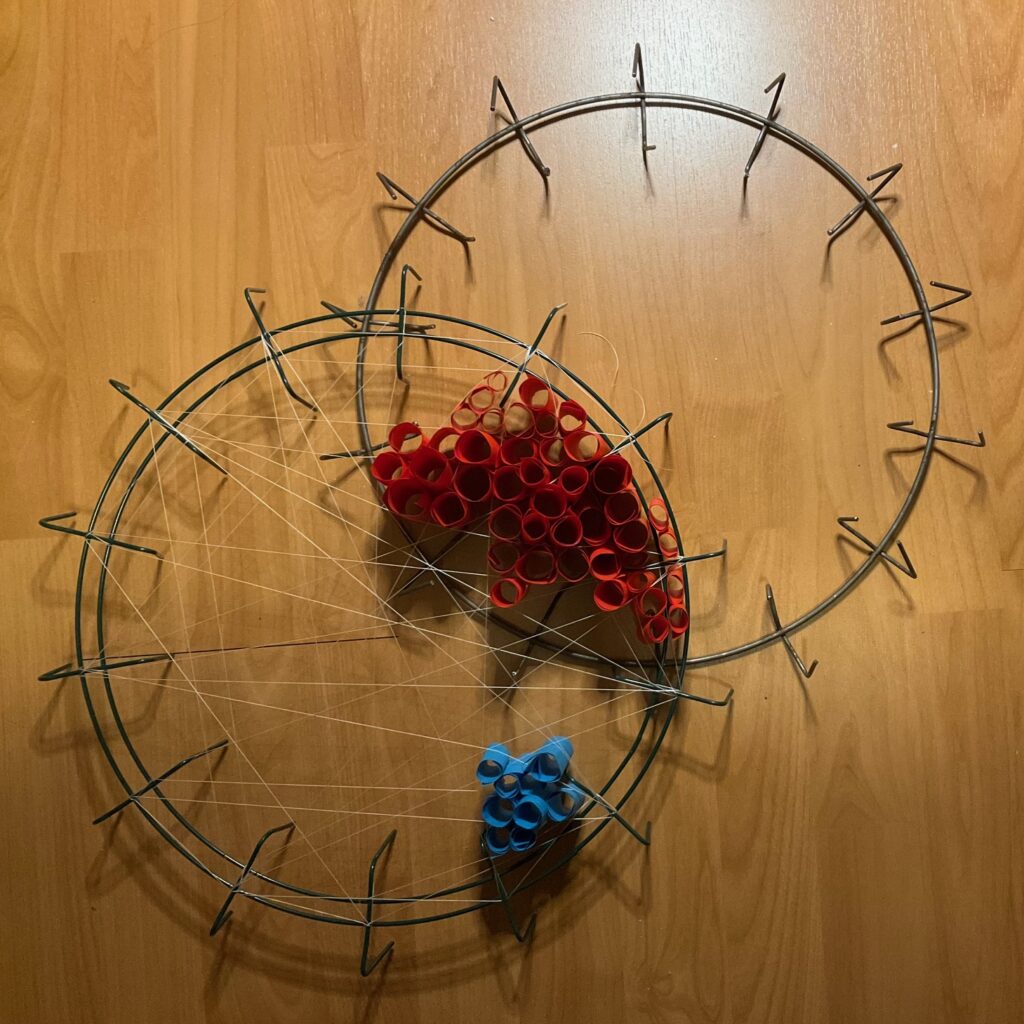


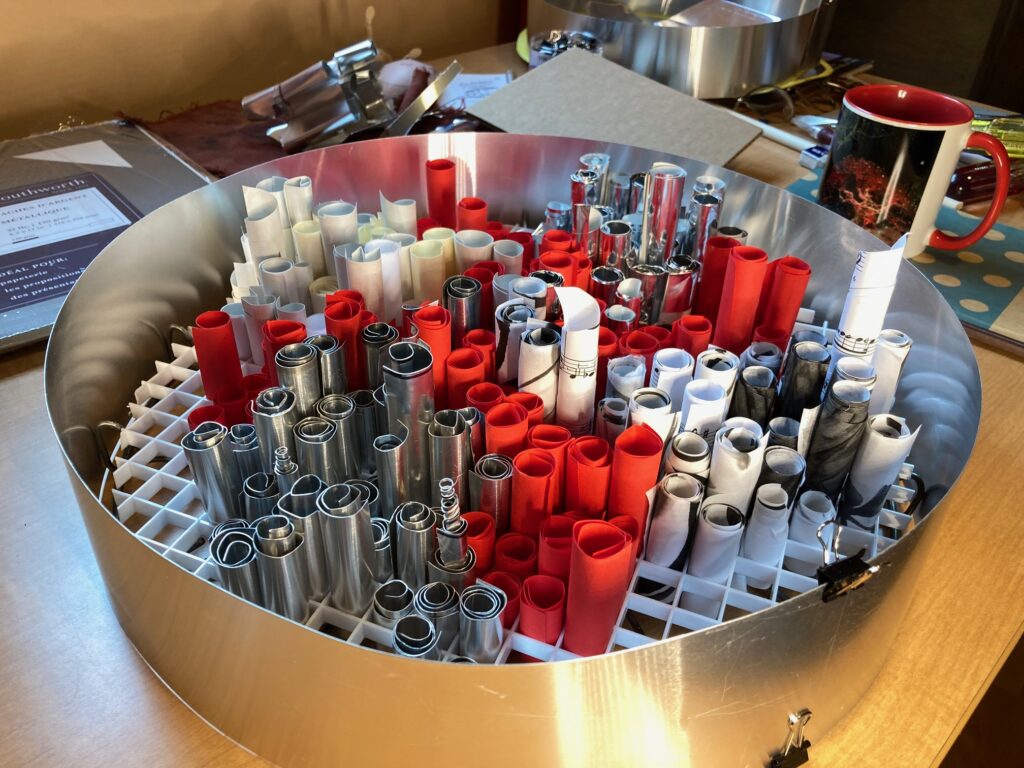
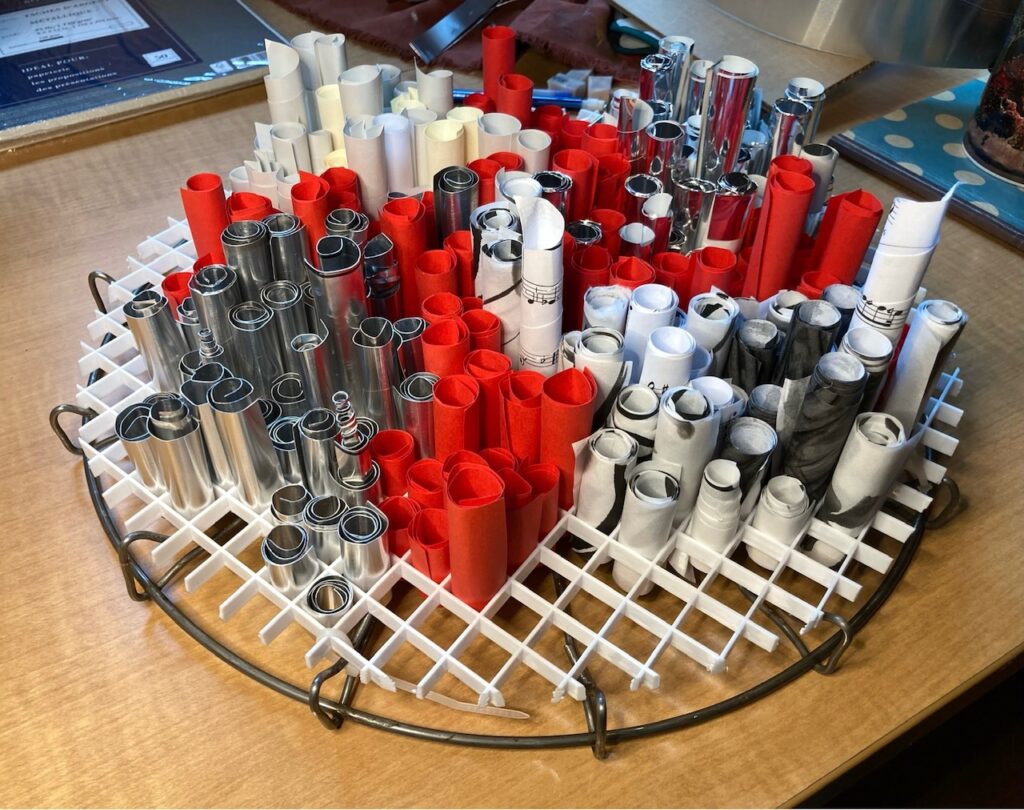
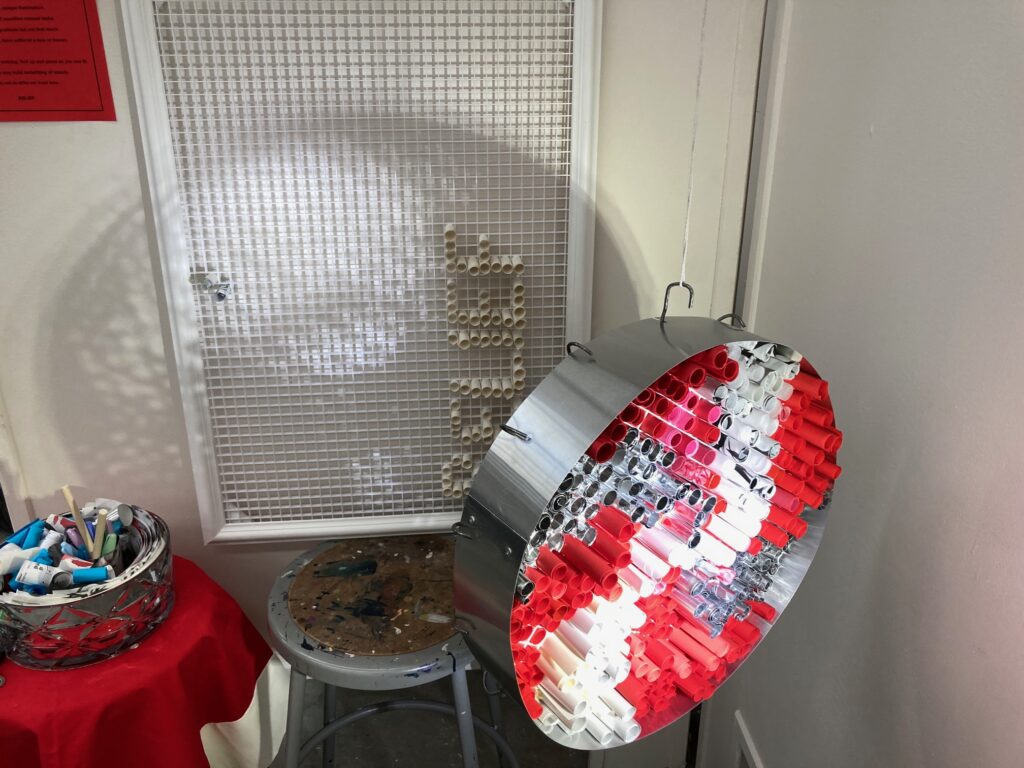
Next stage: came across a collection of coiled-up strips of red paper from an earlier art piece by my partner Rick, that I couldn’t get myself to toss out. Made me remember his template of the plastic grid (an 2 x 4 insert for a dropped ceiling) and wonder if I could roll up other materials, preferably cast-offs, to stick in the little square pigeonholes. Tested some scrap aluminium flashing from the metal shop — yes, with effort they could be rolled to size. Further tests with different-quality reflective, opaque, or translucent materials , pigeon-holed into a round of the plastic grid cut to fit the circular frame, the whole shebang suspended to allow light to play through it. Below… some examples of materials testing…
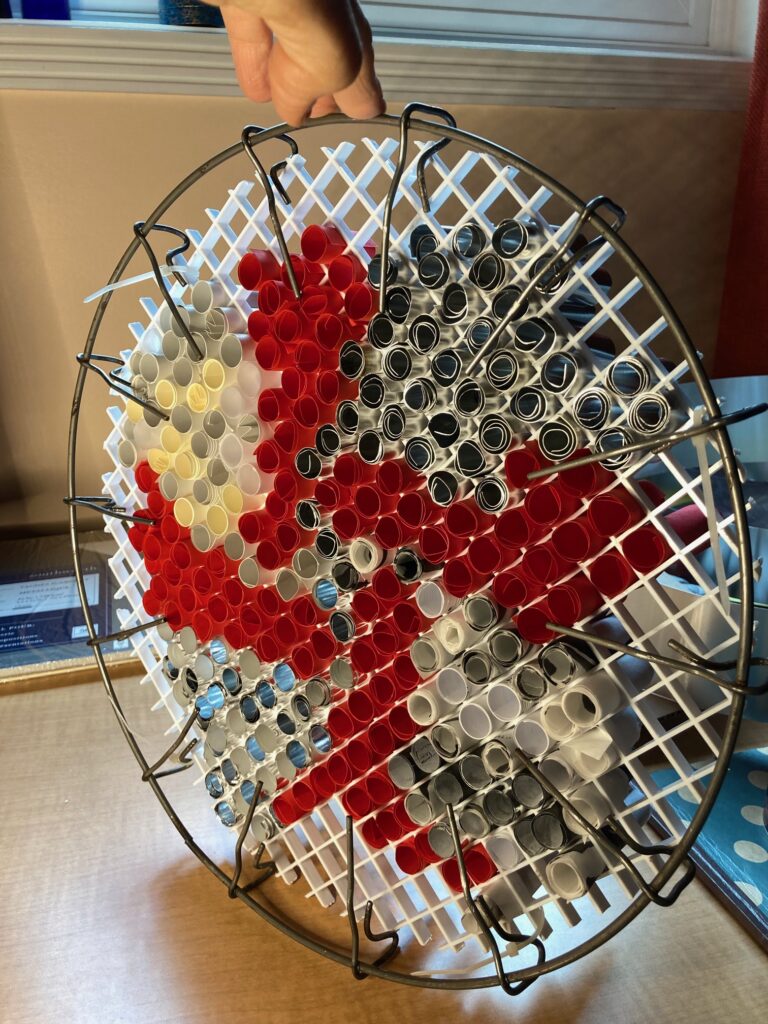
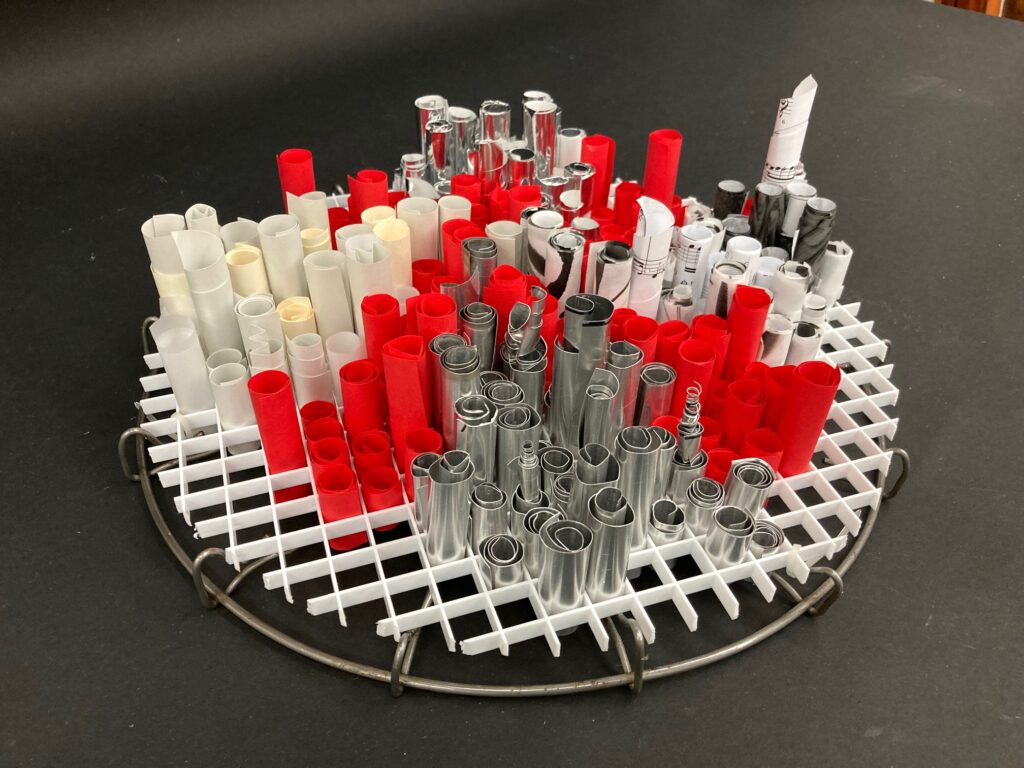
Evolution — things keep shifting. Have spent the the first week of April in process with the art work, yes, but also with the deaths of a dearly-loved aunt and uncle. As I rolled coloured paper and tucked the rolls into cubbyholes, I found myself deeply comforted by this repetitive manual task. All along, I have been interested in the relief of this piece — the undulating shapes and shadows and contours, particularly with the play of light across the piece. This week, my thinking shifted toward the relief that the piece offered me, and the relief for my aunt and uncle at the death of their choosing, on their terms, holding hands at home in their own bed. I also wondered how others might respond to an offer to participate in creating relief. Here is my first attempt to put those thoughts into words… further editing needed, perhaps with input from peers at our Critique April 10. Is the work called Relief? Creating Relief?
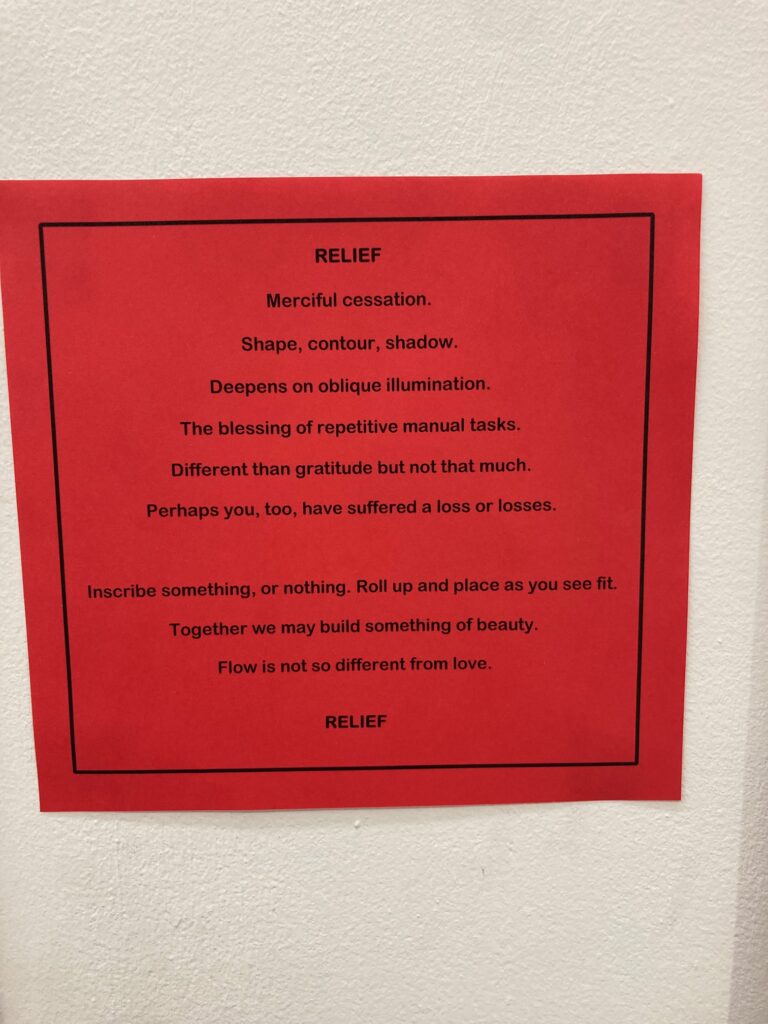

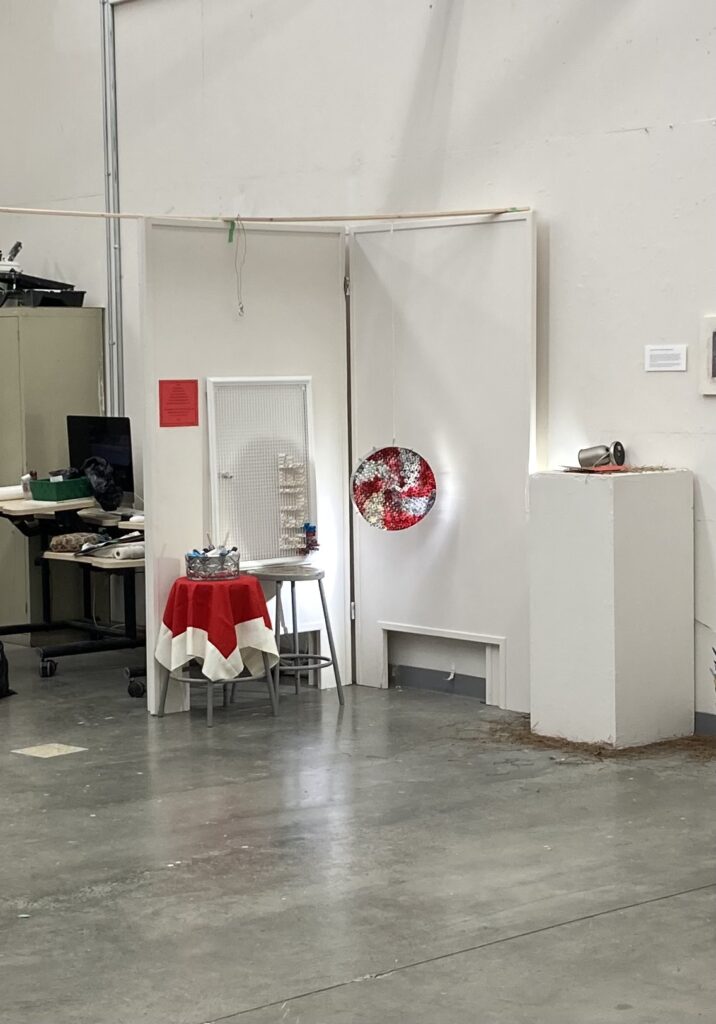
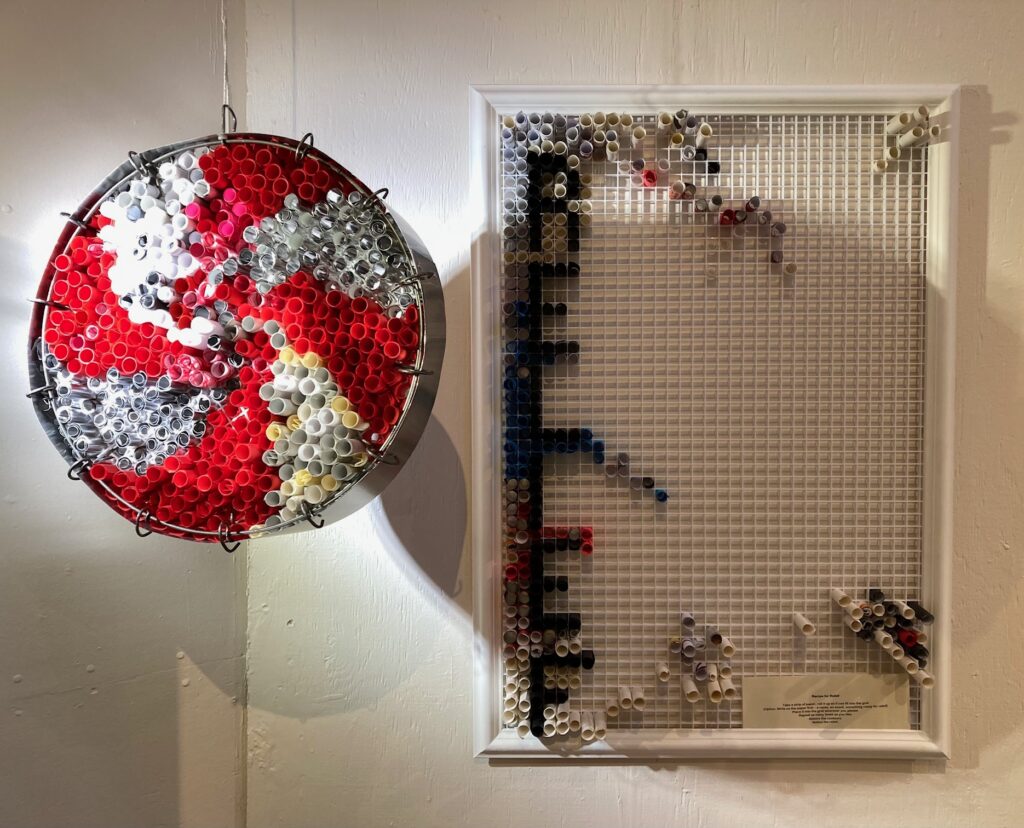
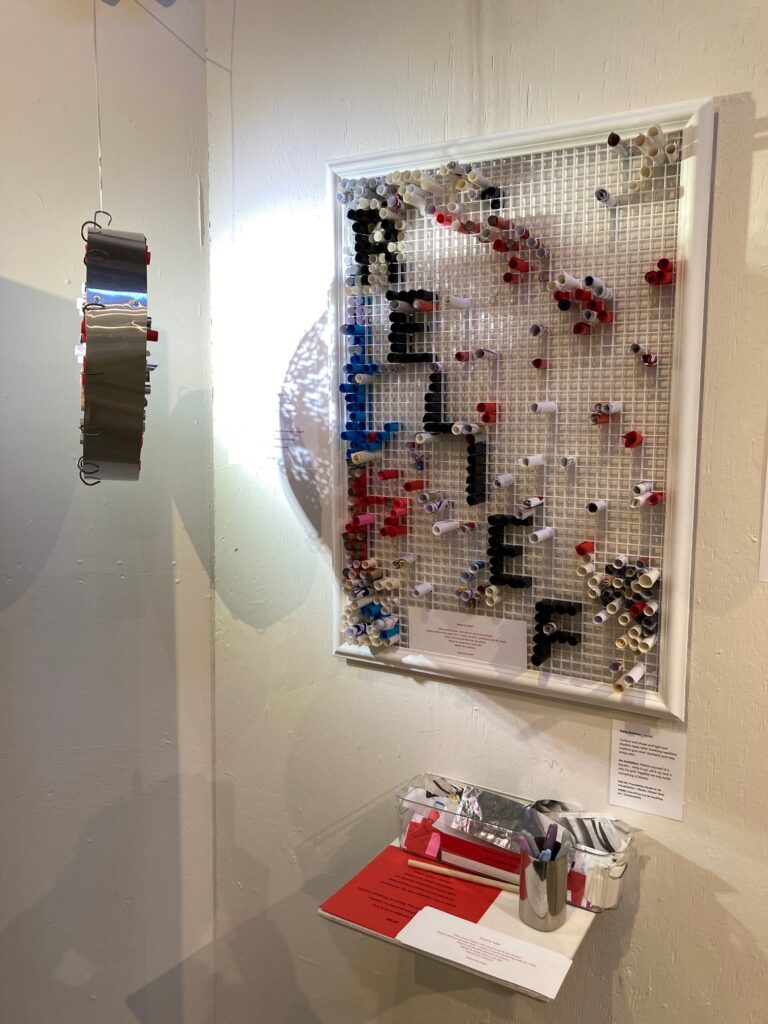
Next steps: have created a framed rectangle out of more plastic grid, larger than the circular piece seen above. Idea to mount it on the wall, illuminated by a spotlight that travels through the circular piece (suspended from ceiling, free to spin). Hoping the light will do double duty: interesting play across the relief of the suspended piece and interesting shadows cast on the wall grid. I imagine seeding the wall grid with some pieces of rolled paper, and to provide a large basket of pre-cut strips multi-coloured paper (sourced from recycle bins), a writing surface and some markers, a rolling tool. The text, in whatever finalized form it takes, will be adjacent to the interactive rectangular grid. Will ask input from peers on how the invitation comes across, tweak the set-up as needed. Below is a quick mock-up made without installing the pieces, trying a side-angle of the spotlight and the circular piece at torso-height. For discussion in class…
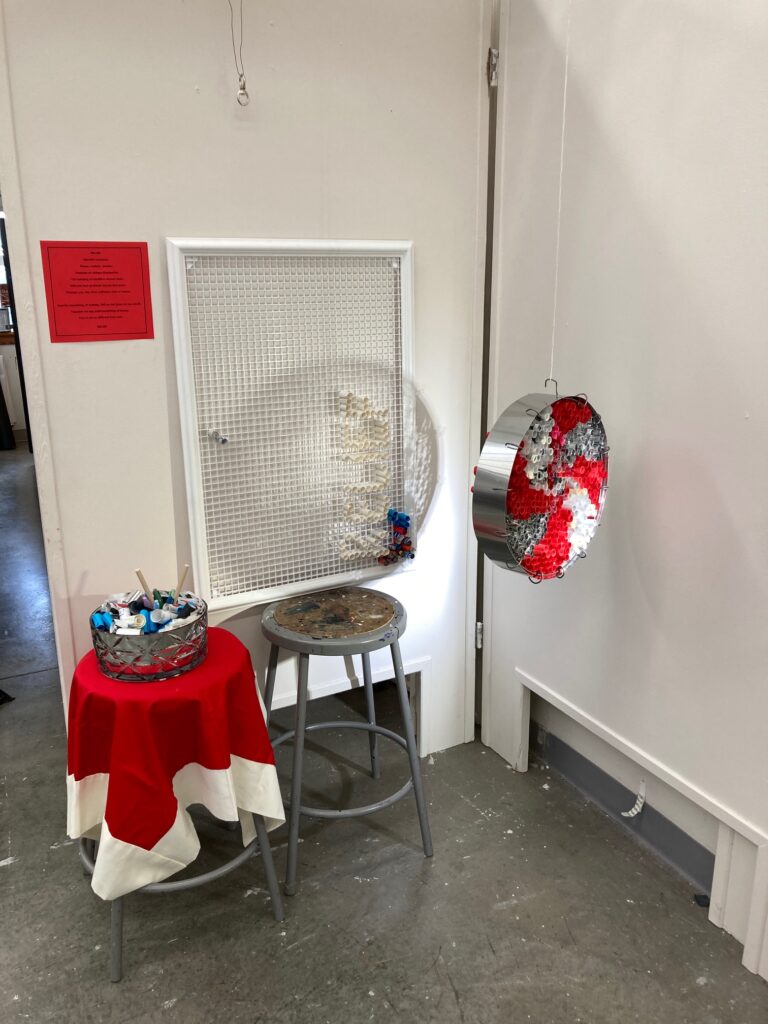
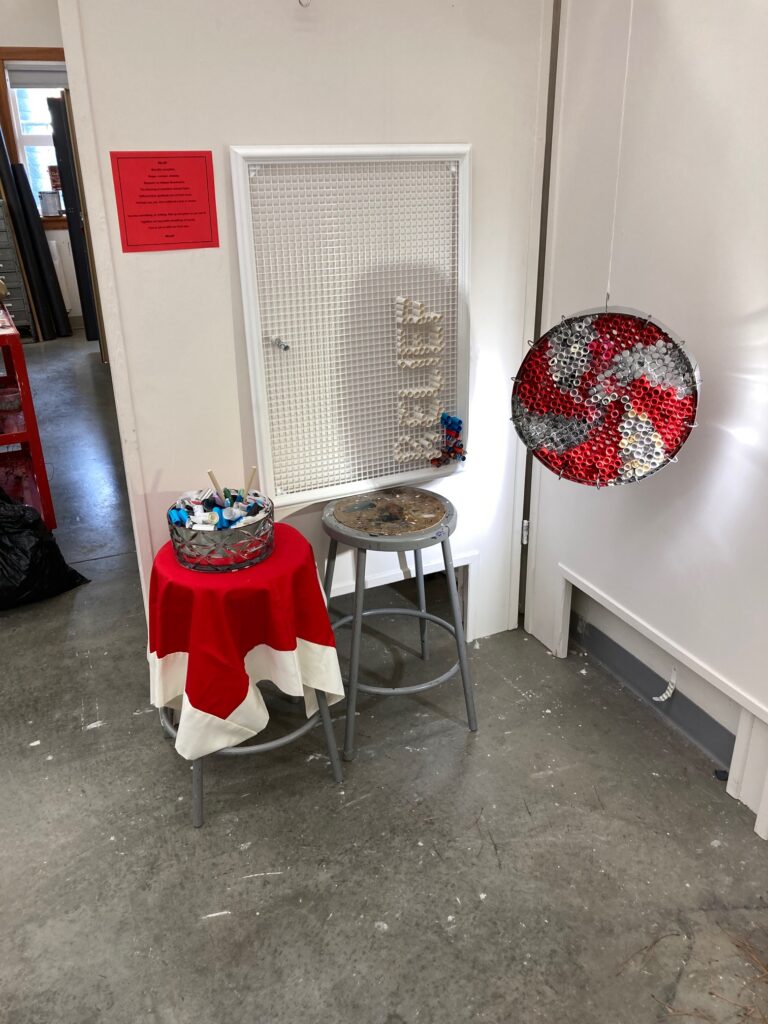
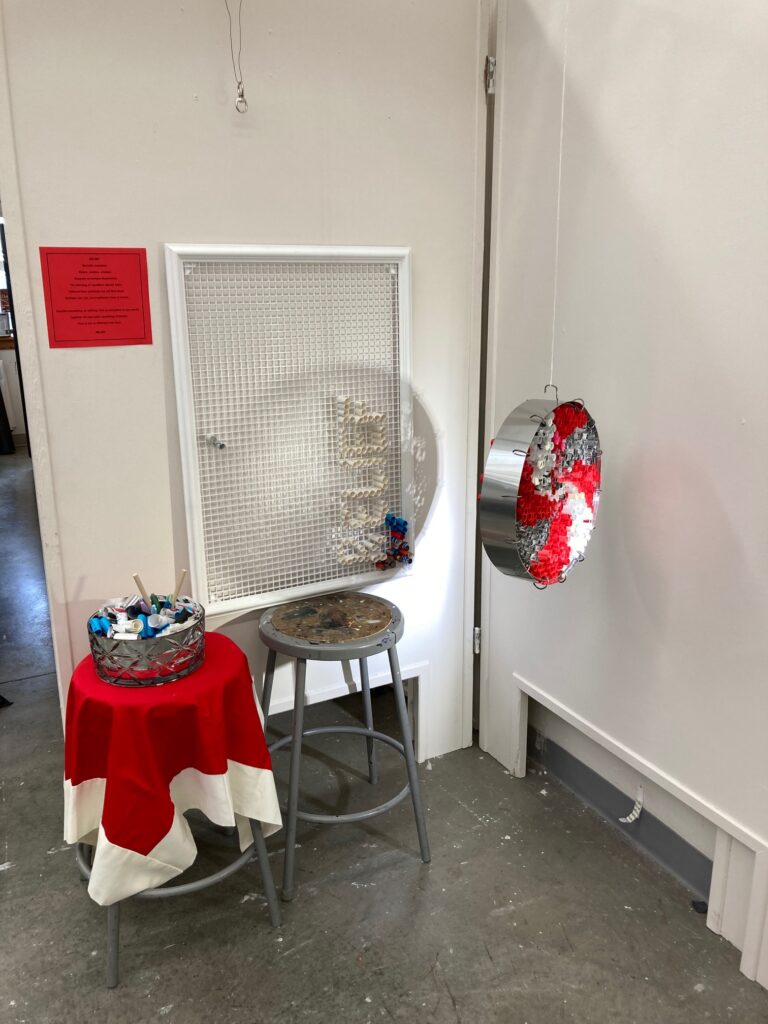
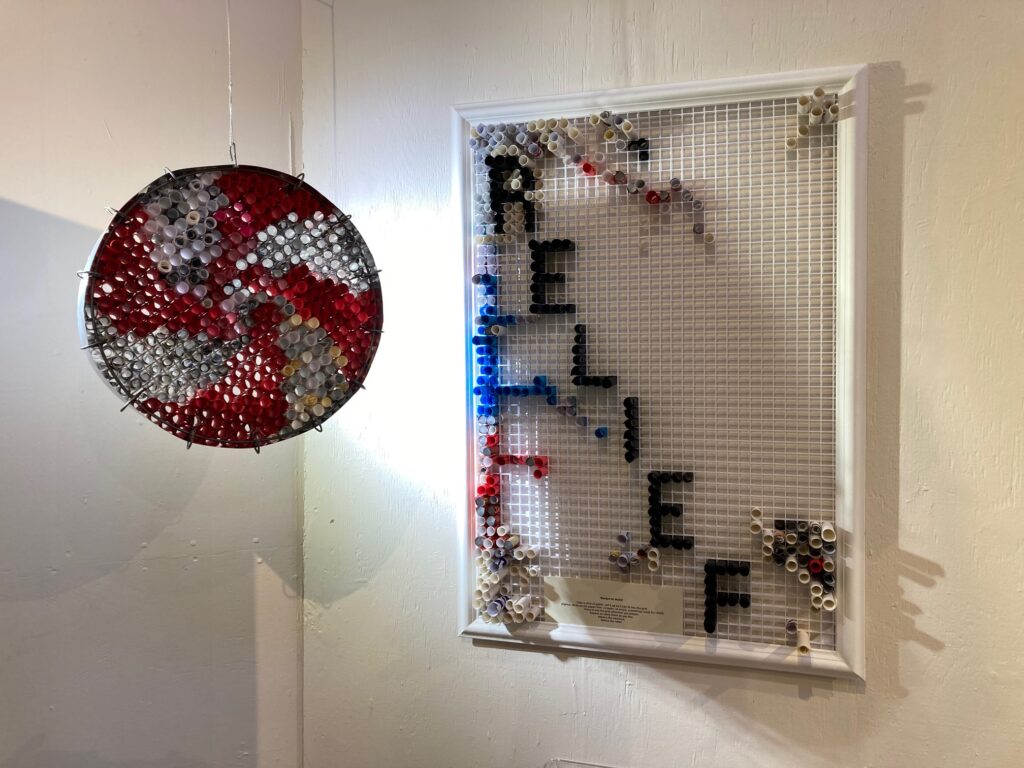
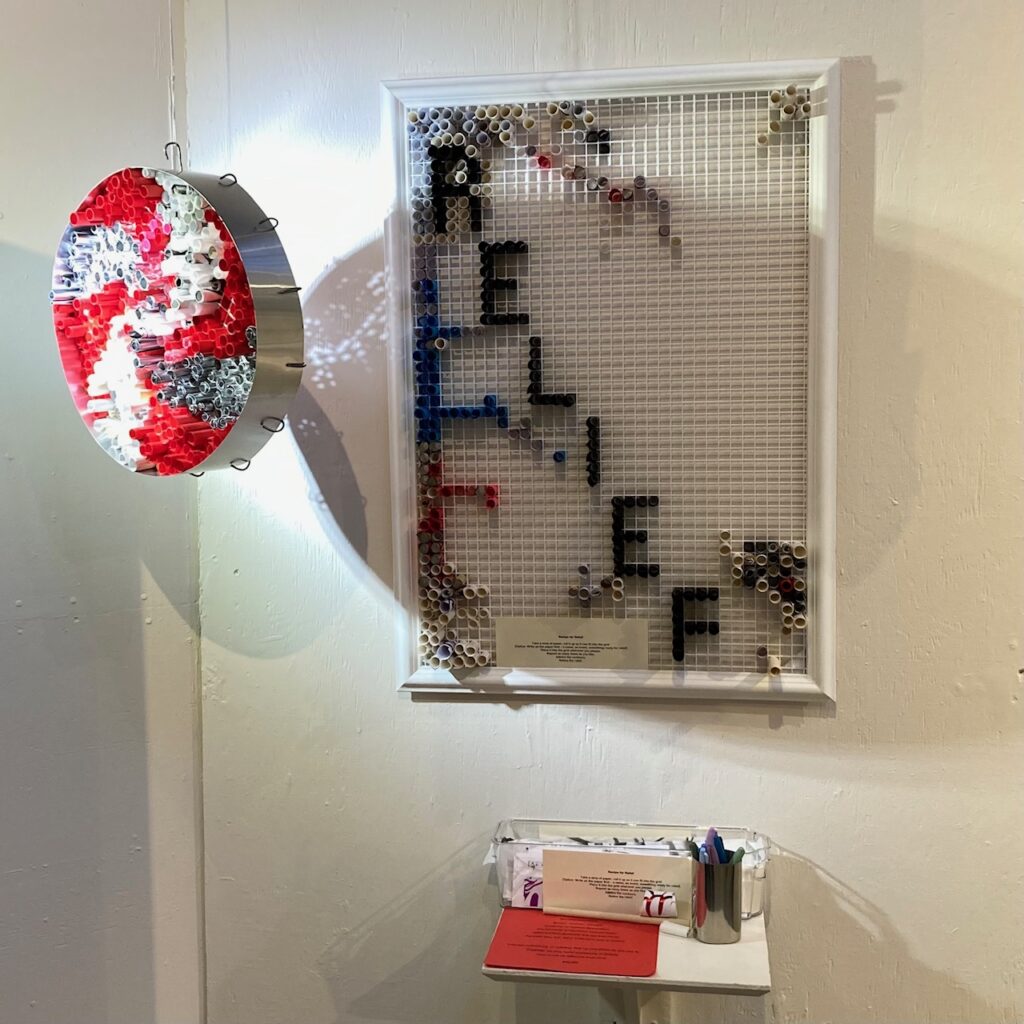
April 24 – installing Studio for art show opening in a couple of days. Once I could see the piece mounted and lit, needed to rework the rectangular frame section. Realized the letters needed to change – switched from white to black paper tubes, and shifted the letters across the piece, to increase visibility and relief. First three photos below give the progression in colour and position, final two photos give the appearance ahead of the art show. Will repeat the photos a few times during the show, to show the outcomes as viewers interact with / add to the piece.


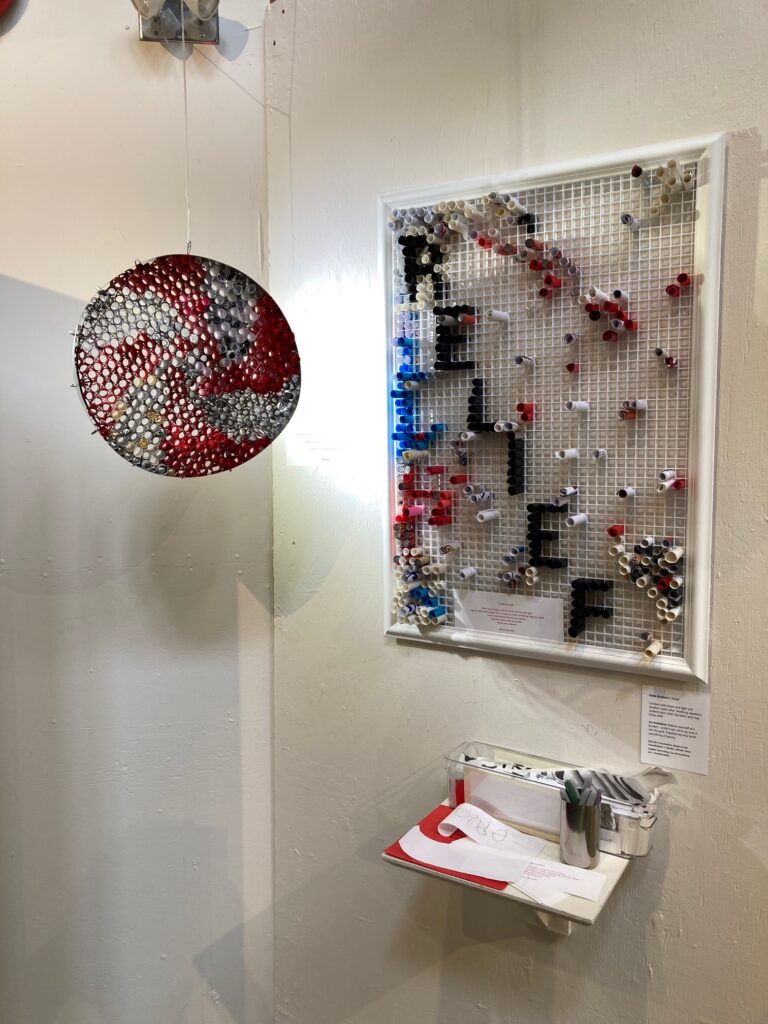
Over the week of the art show, viewers added pieces to the grid — Here are a couple of shots in process… not huge changes. A couple of thoughts in retrospect — 1) I could have made a more purposeful collection of coloured slips of paper, for perhaps a more cohesive “group composition”. — given that I was trying use scrap paper or items sourced from thrift stores, this would have needed a longer time span to assemble the raw materials. 2) Also, I could have scaled the available space on the grid to the likely size of the crowds, to give better odds that the space might have filled up.
FIN 131 Unit 1
Exercise 1: Objects as Storytellers
early brainstorming; objects, tableau, sketches

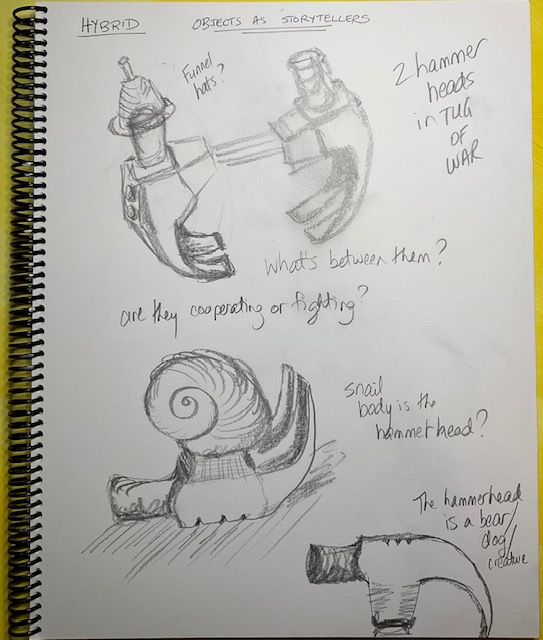

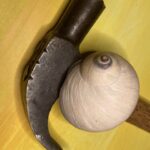


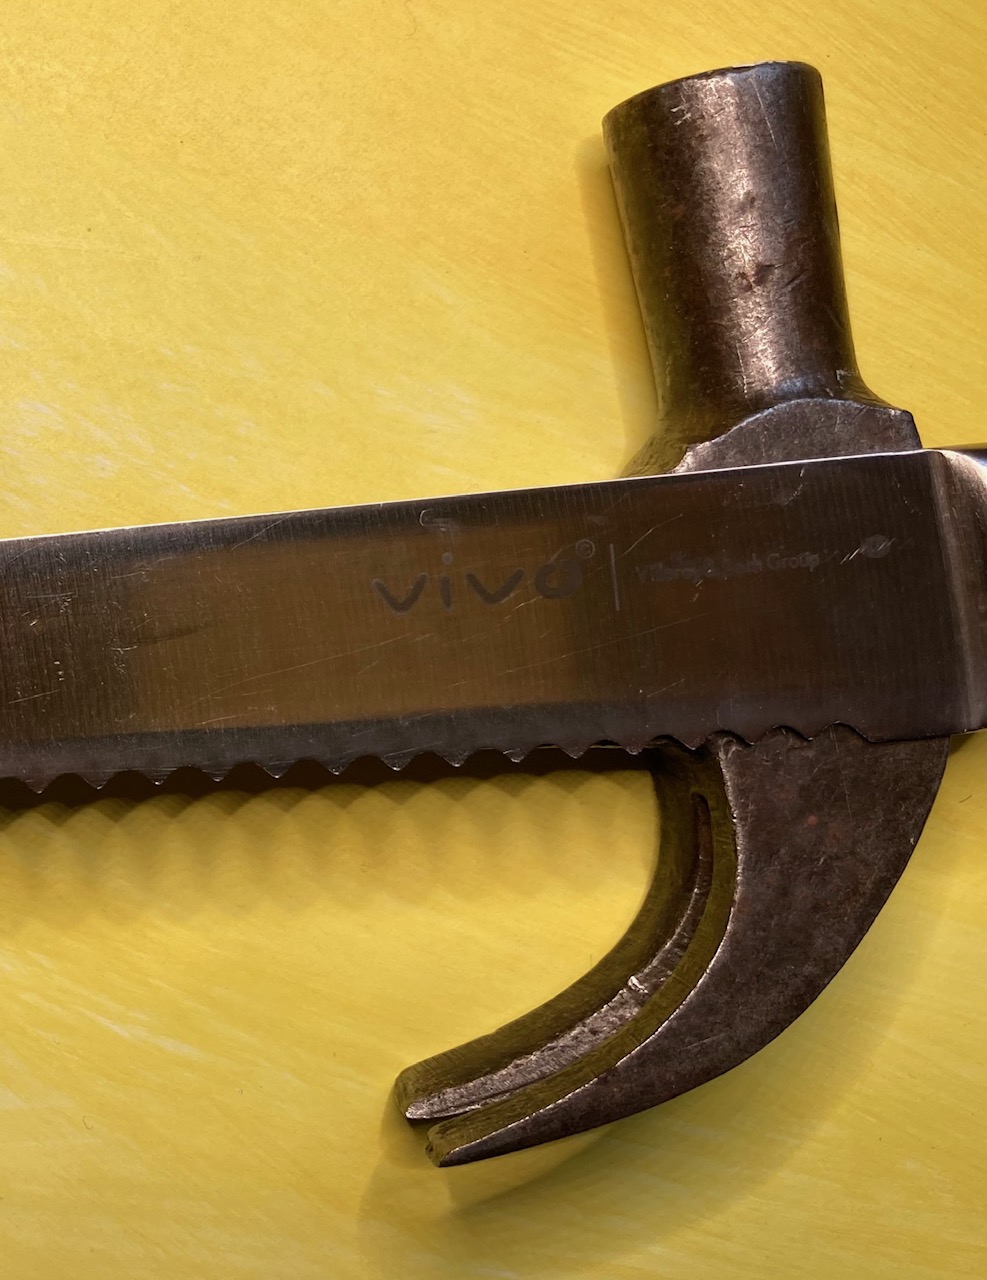
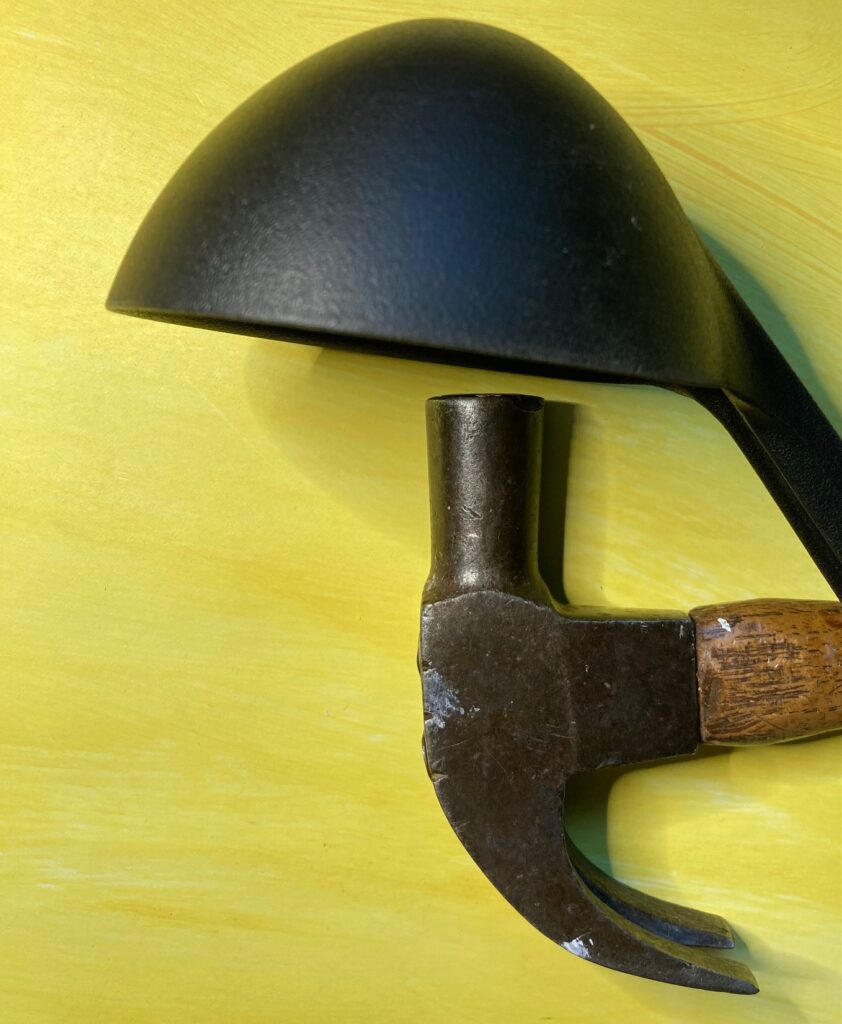
… so far I like the tension of the leaning figures — plus or minus hat. Early thoughts: 1) cast to include partial length of the hammer handle, and vary how I treat that handle on each multiple. 2) set them up in pairs, could they vary their relationship from “tug-of-war” to cooperation? What object are they tug-of-warring over? 3) give the figure a big fat nail in place of the hammer handle, and have each casting lean further forward as if the nail is disappearing into the body (is it seppuku? is that just too weird?)
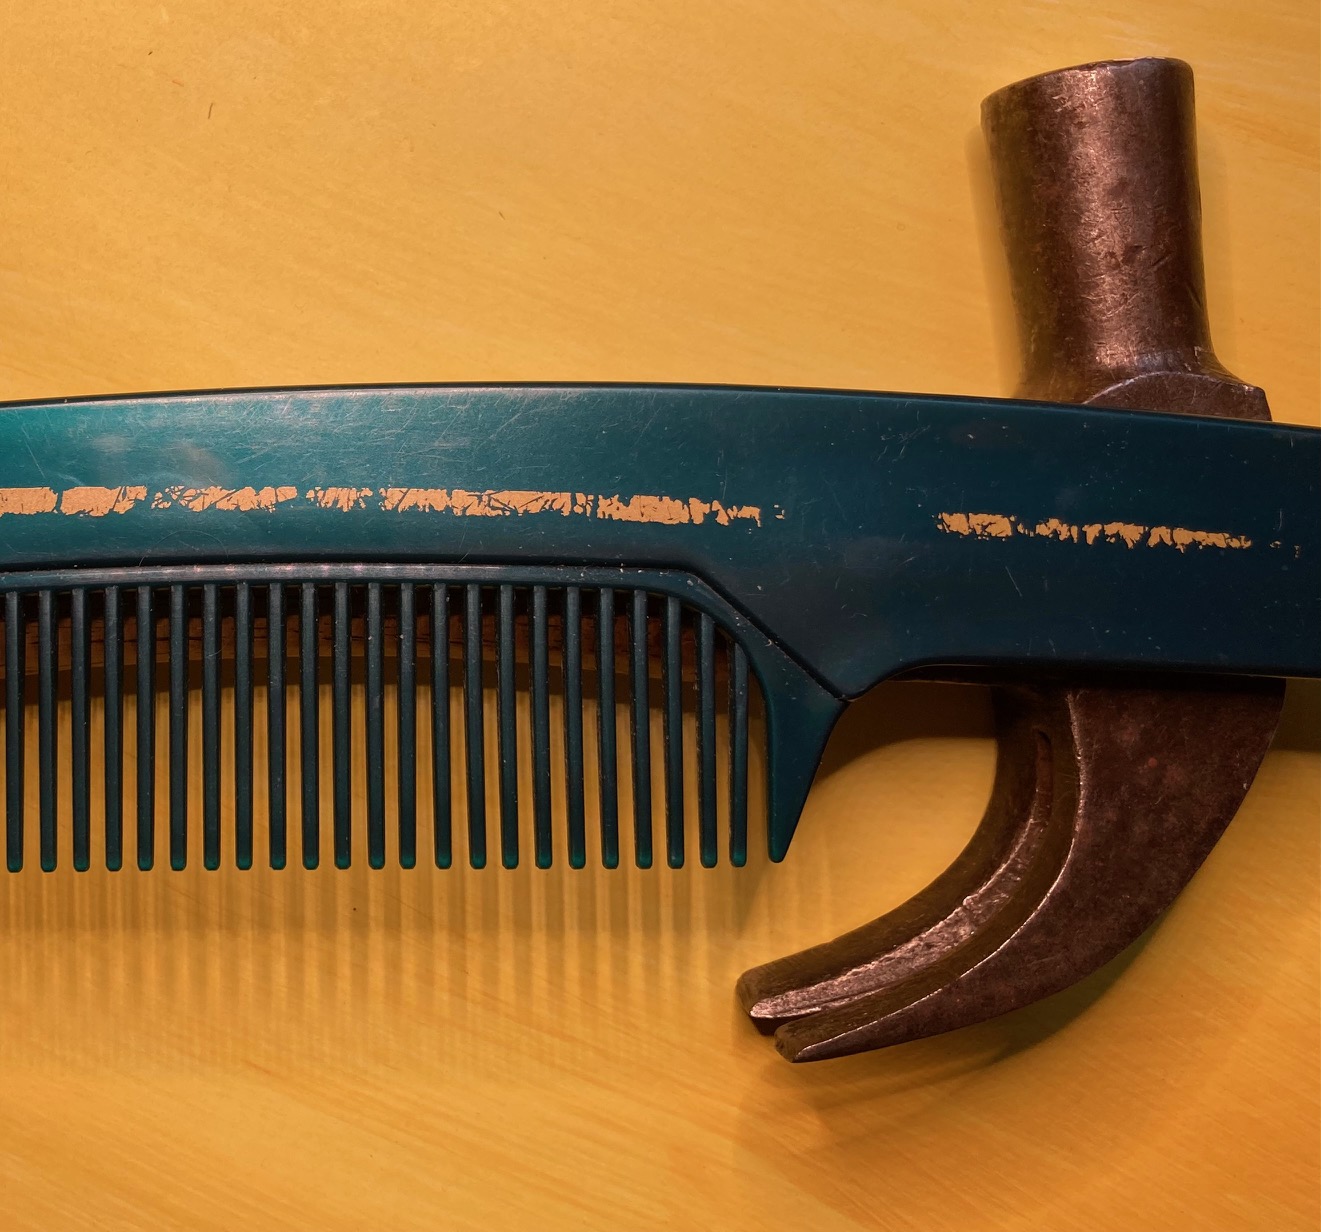
A FEW DAYS LATER… sketching out possible “situations” for pairs of hammerhead people, see below, along with photos of other “objects” that could be cast for them to act on… The sketches convey the main idea, the photos try out possible reimagined objects.
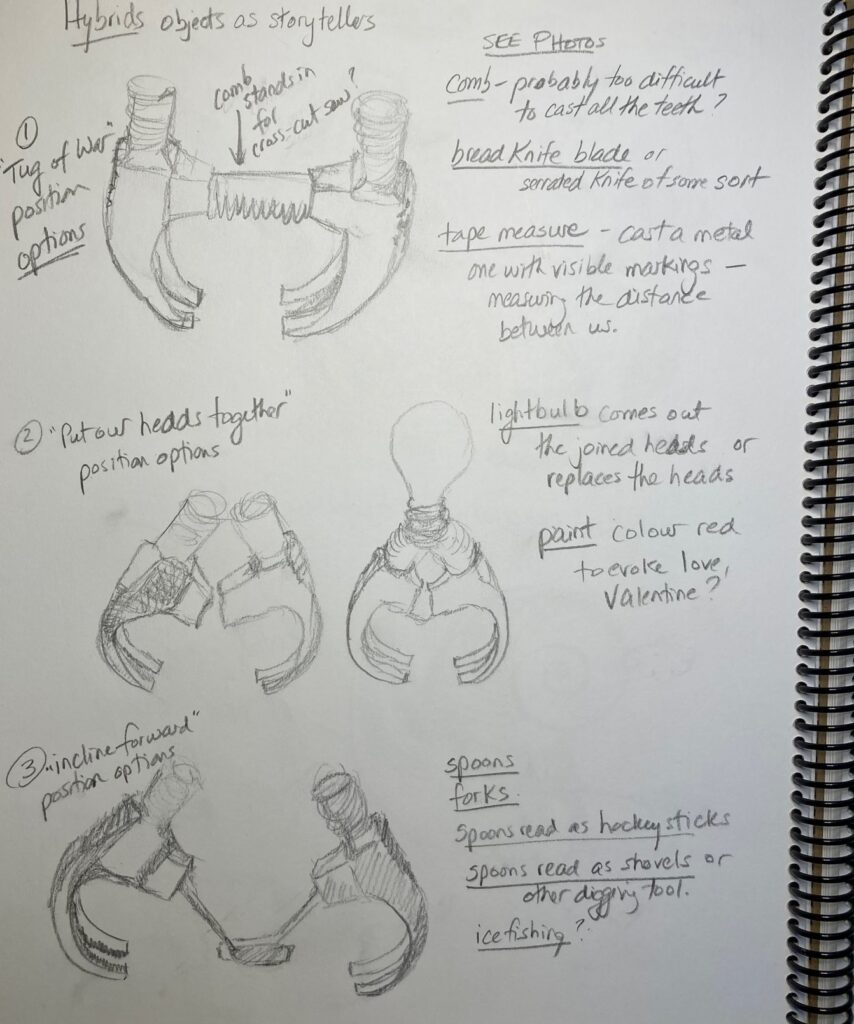
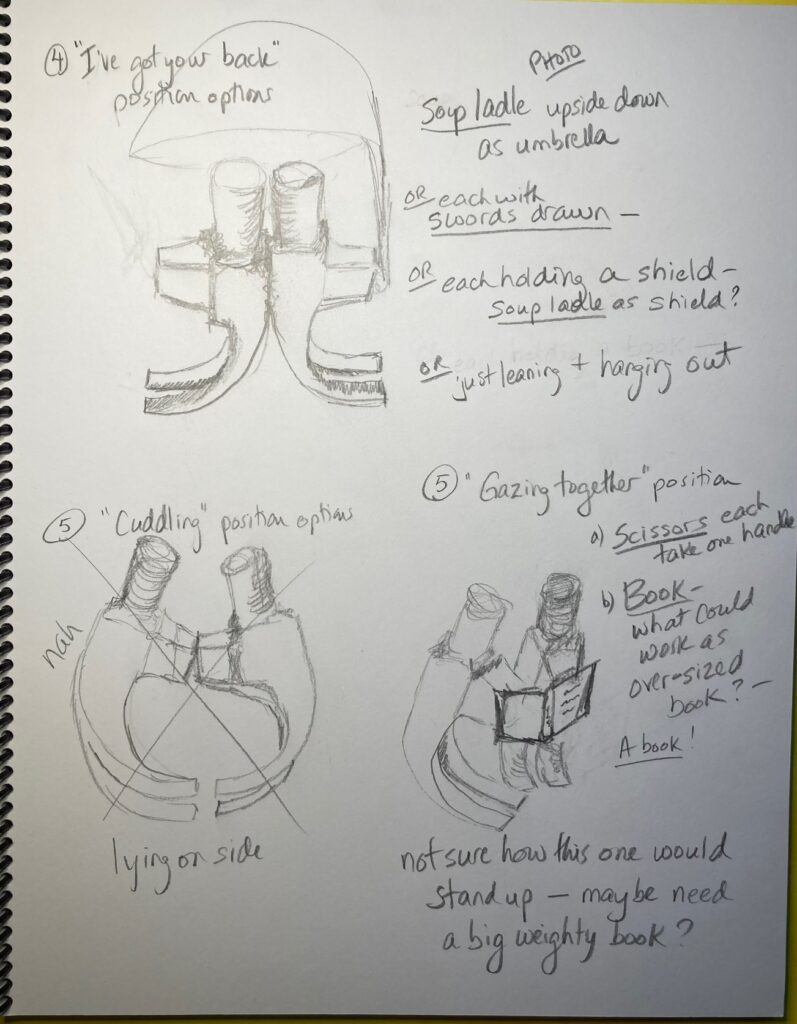
I am imagining making 3 to 5 pairs of hammerheads, picking best scenarios. I am imagining casting the entire metal part plus a portion of the wooden handle, with the “open” end of the cast being partway down the wooden handle. Then I treat the “meeting point” of the two hammerhead creatures differently in each case — either by carving out the plaster to the shape of the thing that is between them, or by inserting another cast thing (sawblade, spoon or fork, ladle) into that space. No idea if any of this is practically achievable. Have missed first two classes (one for medical reasons, one for snow) so have arranged to meet Angela in virtual meet-up before the next class, see if I need to swerve…
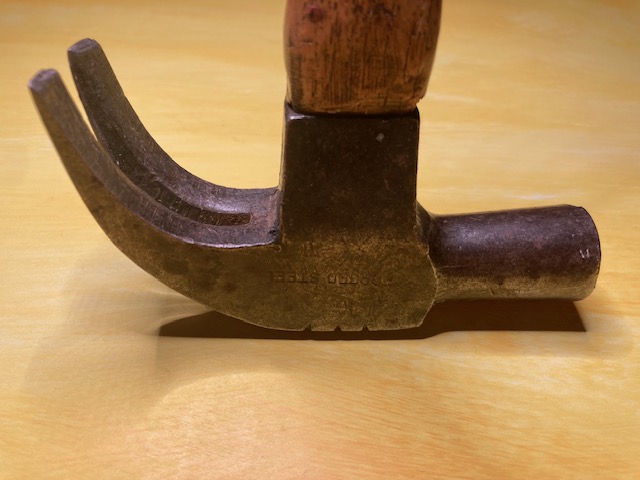
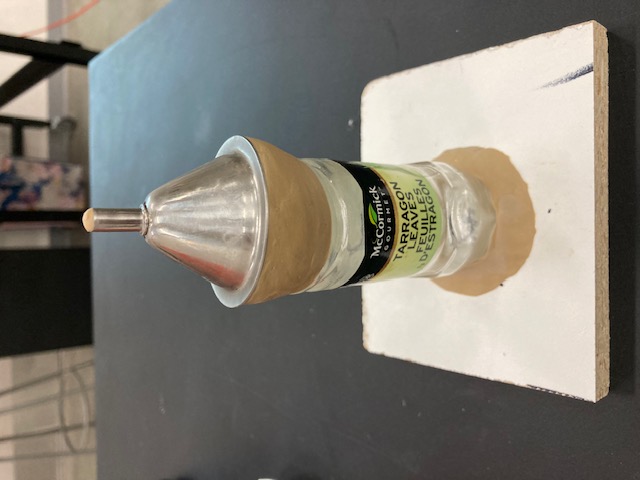
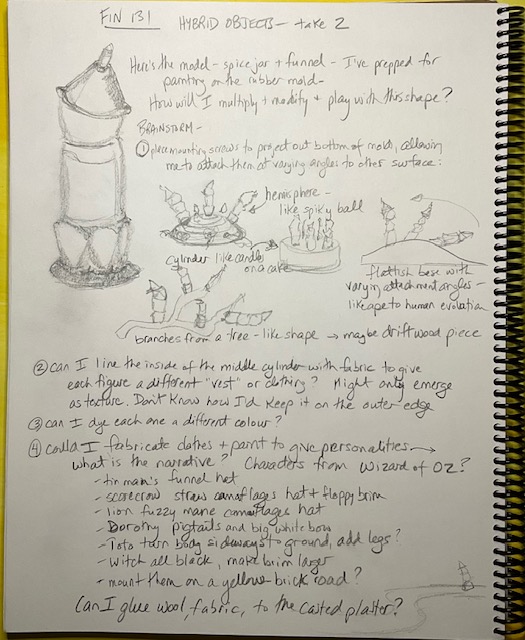
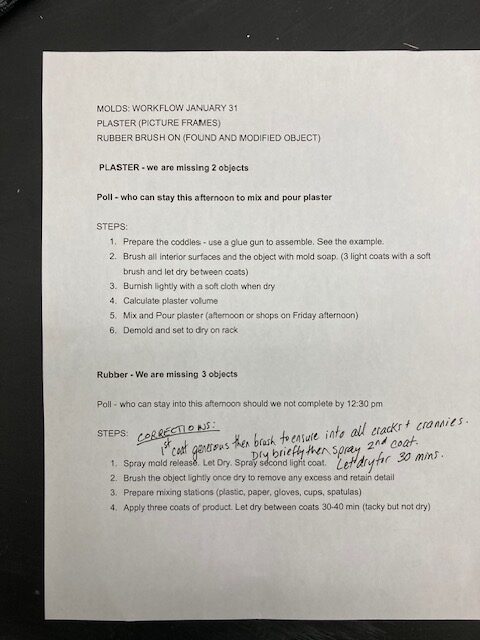
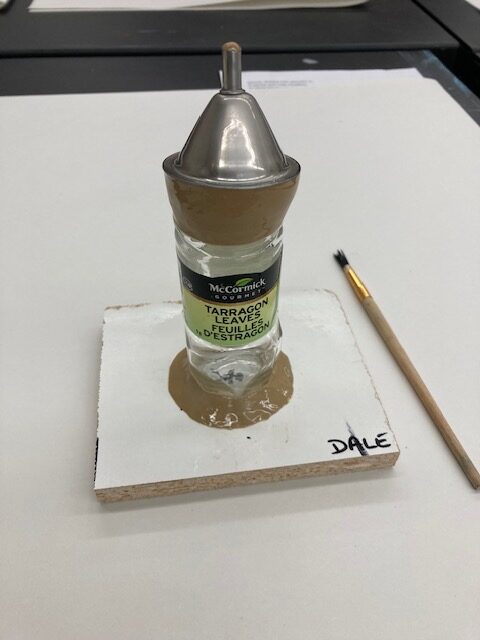
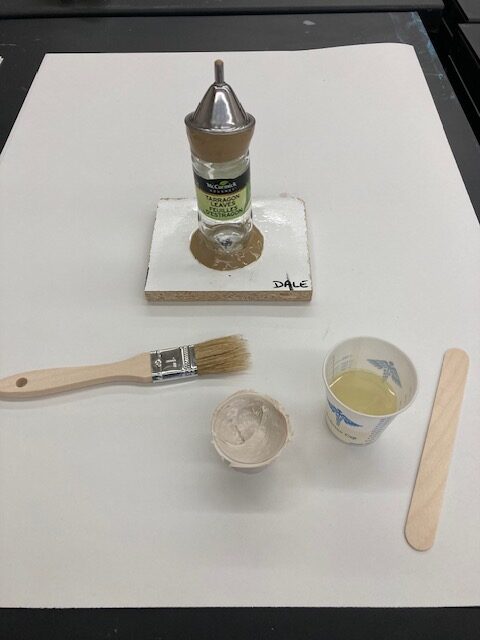
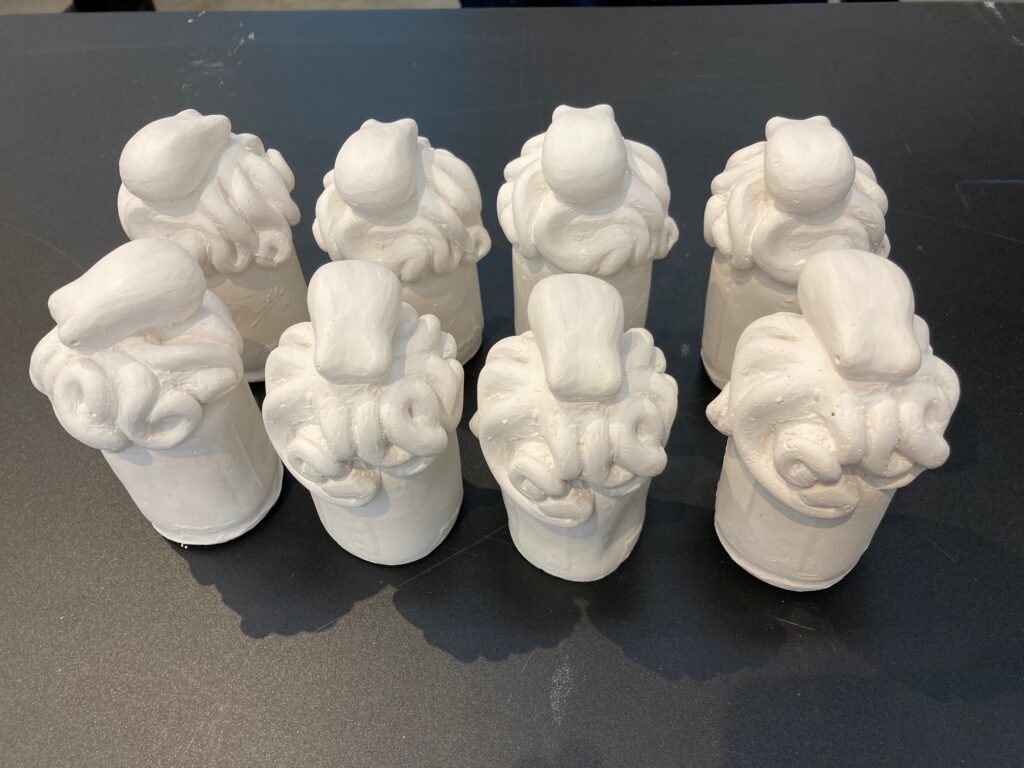
SWERVING… Yes it is time to swerve… The hammerhead wasn’t practical for the rubber mold as there would be no way to un-mold without cutting the rubber casing, which then requires a mother mold to prevent those cut edges from leaking plaster… too complex for the time available in this class… Therefore — see below my hybrid object, ready for four coats of paint-on rubber material next week in class:

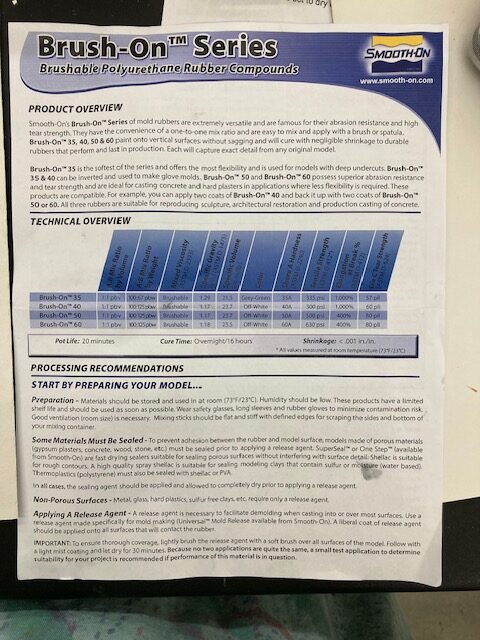
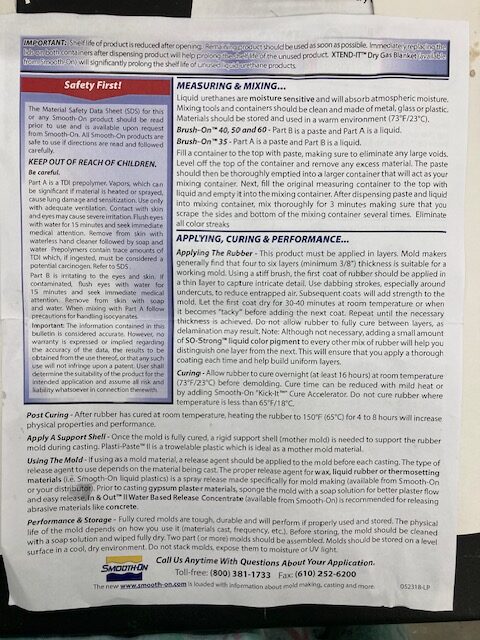
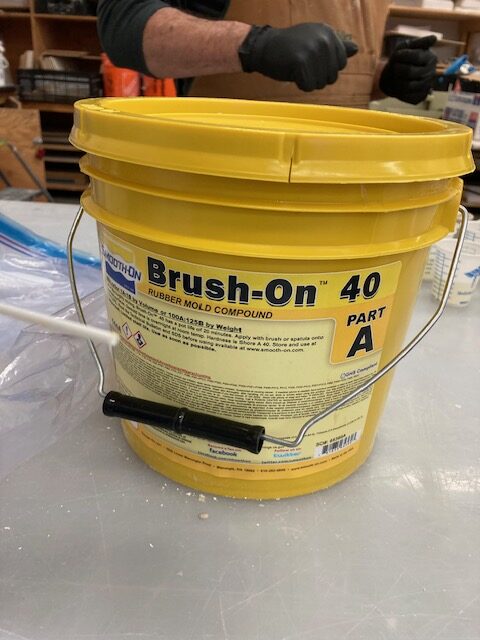
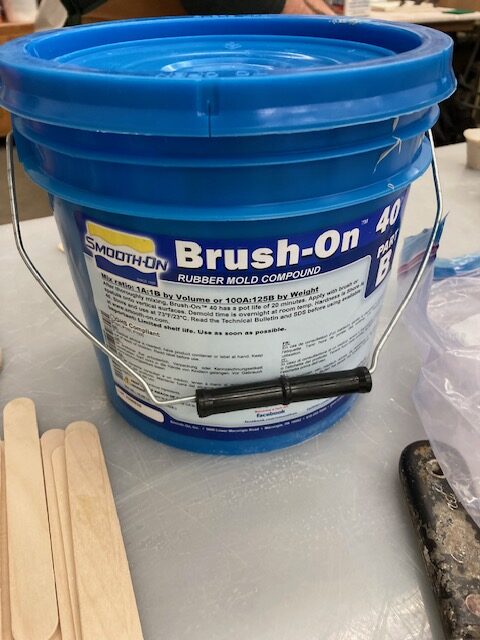
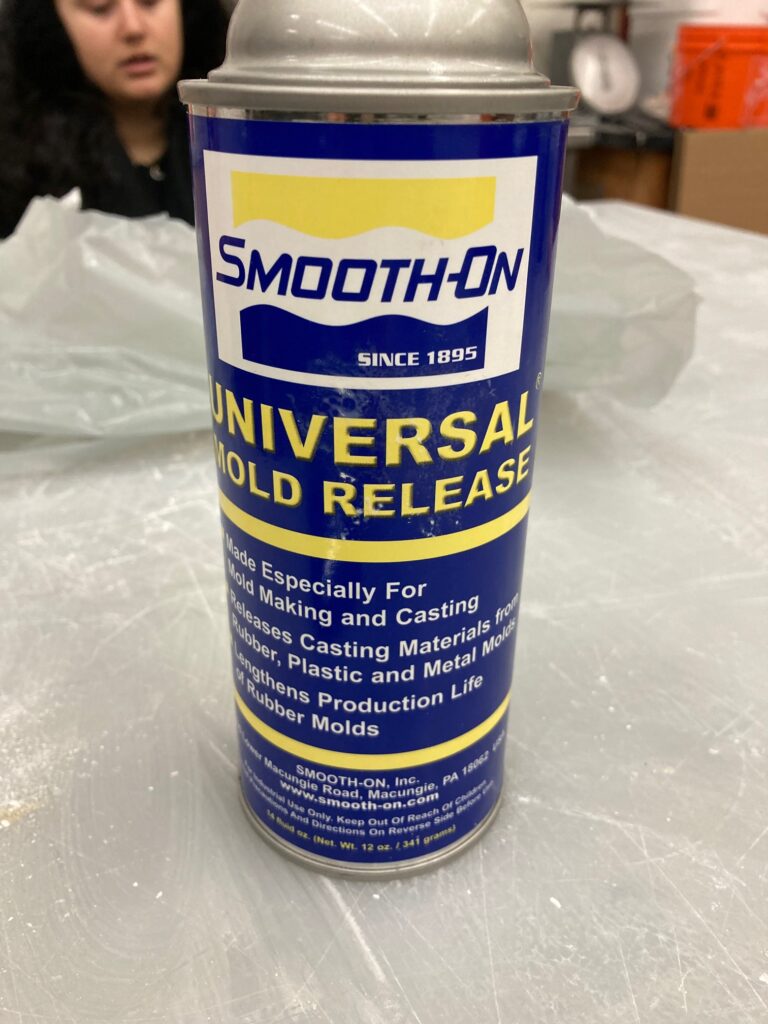
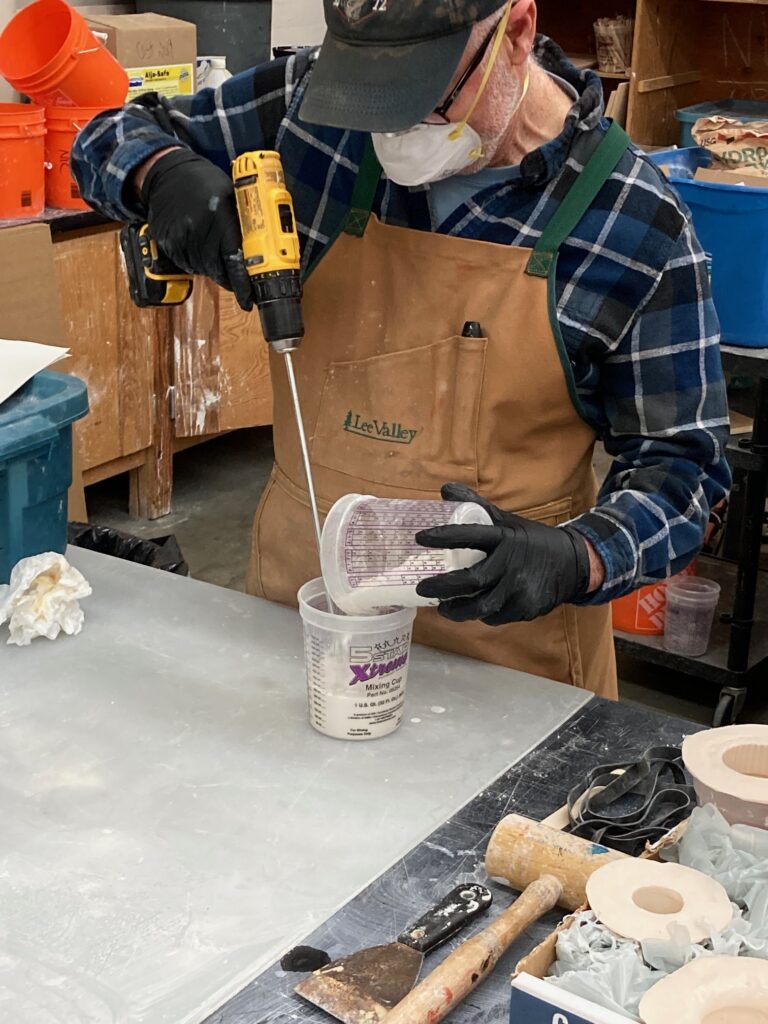
January 31: Rubber mold day We first sprayed on mold release (non-toxic but filled the room like hairspray!) with generous first layer, worked into all nooks and crannies, then light second coat, let dry for 30 mins. Went on to apply 3 layers of Brush-On 40 rubber. For each layer mixed equal amounts Parts A and B for 2 minutes continuously, then had about 6 minutes working time to apply to object. The first layer used brush to get fully into every crevice. Next 2 layers used popsicle stick trowel. Let dry 20 to 30 mins between layers, until still tacky but no rubber comes off when lightly touched with finger. Needs to set up for minimum 16 hours before unmolding – I returned 2 days later. When I unmolded the metal cap stayed inside the figure (crisis!) but was able to gently squeeze it out with no damage to the mold.
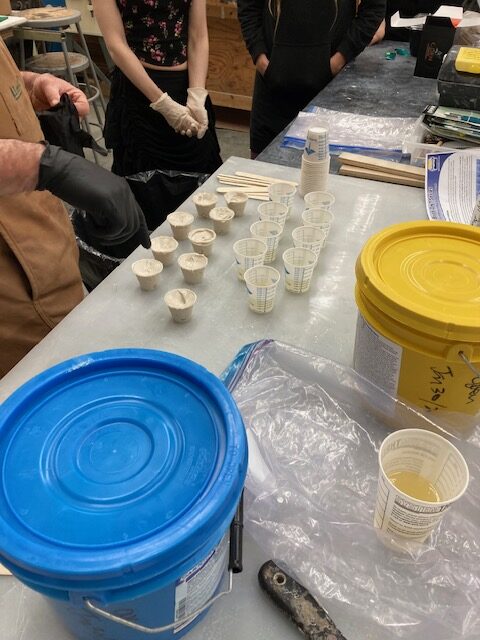
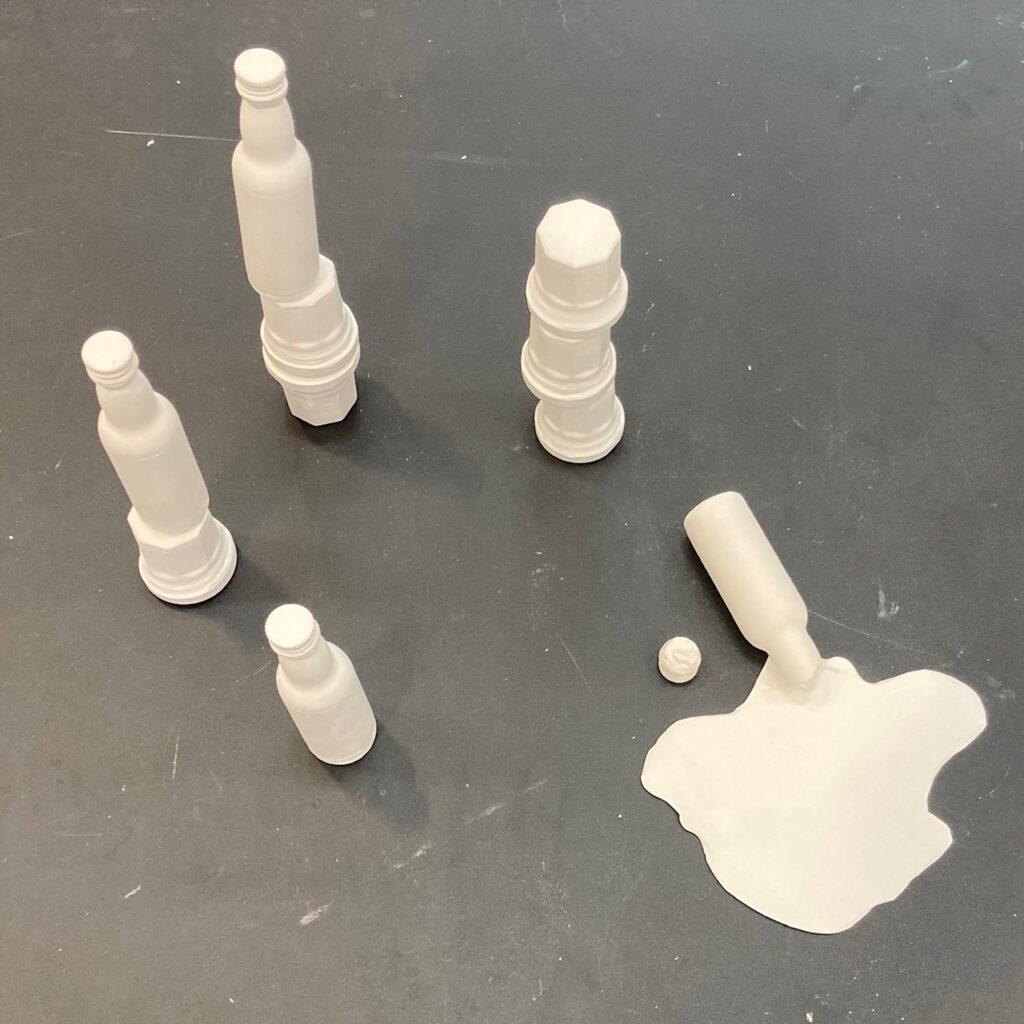
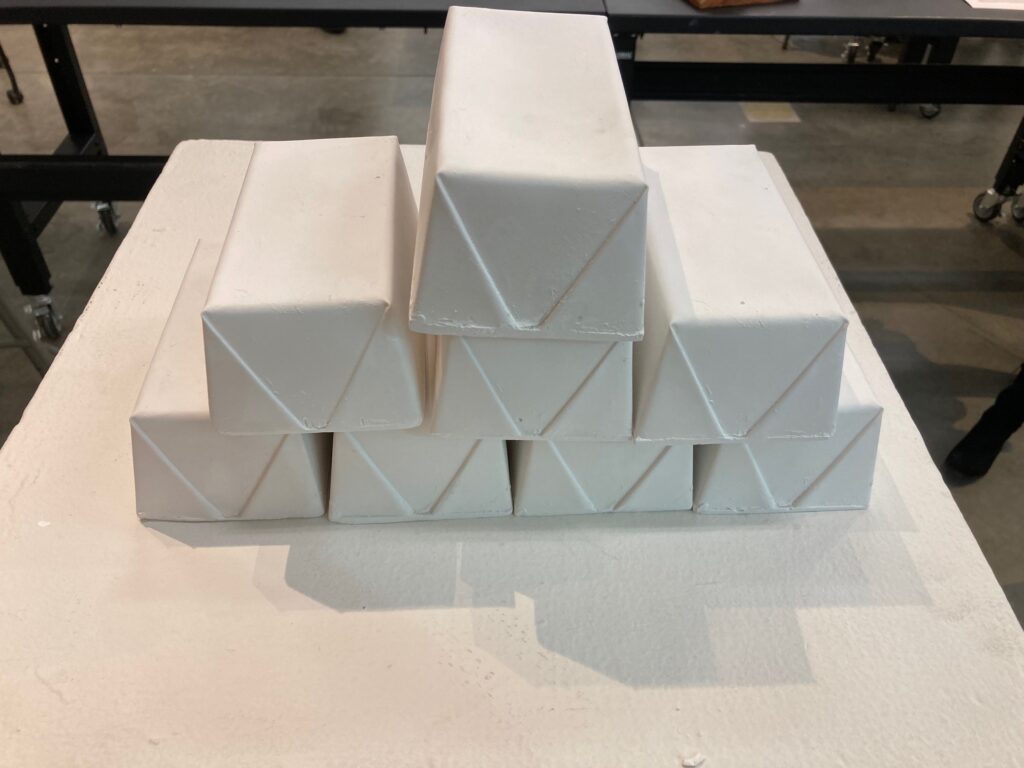
Feb 7 class — first trials to pour hydrocal in silicone mold.

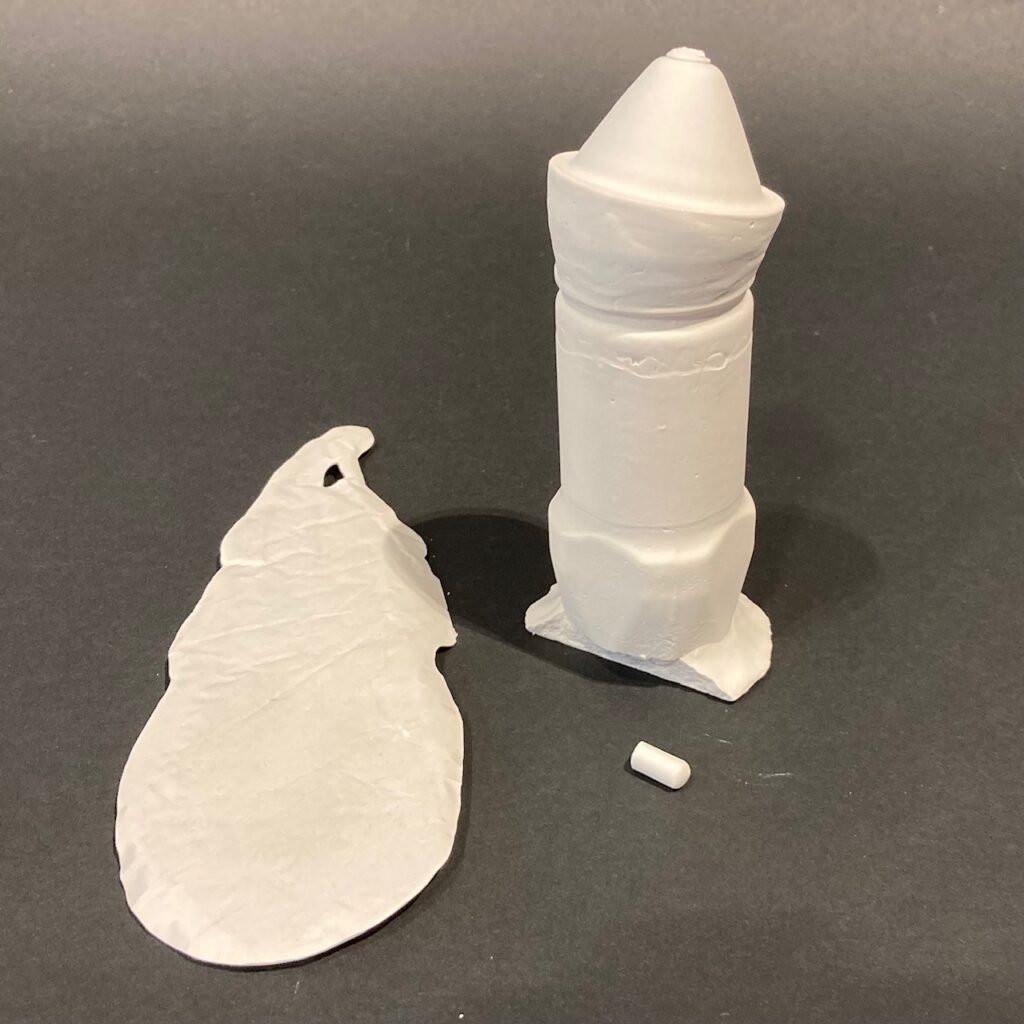
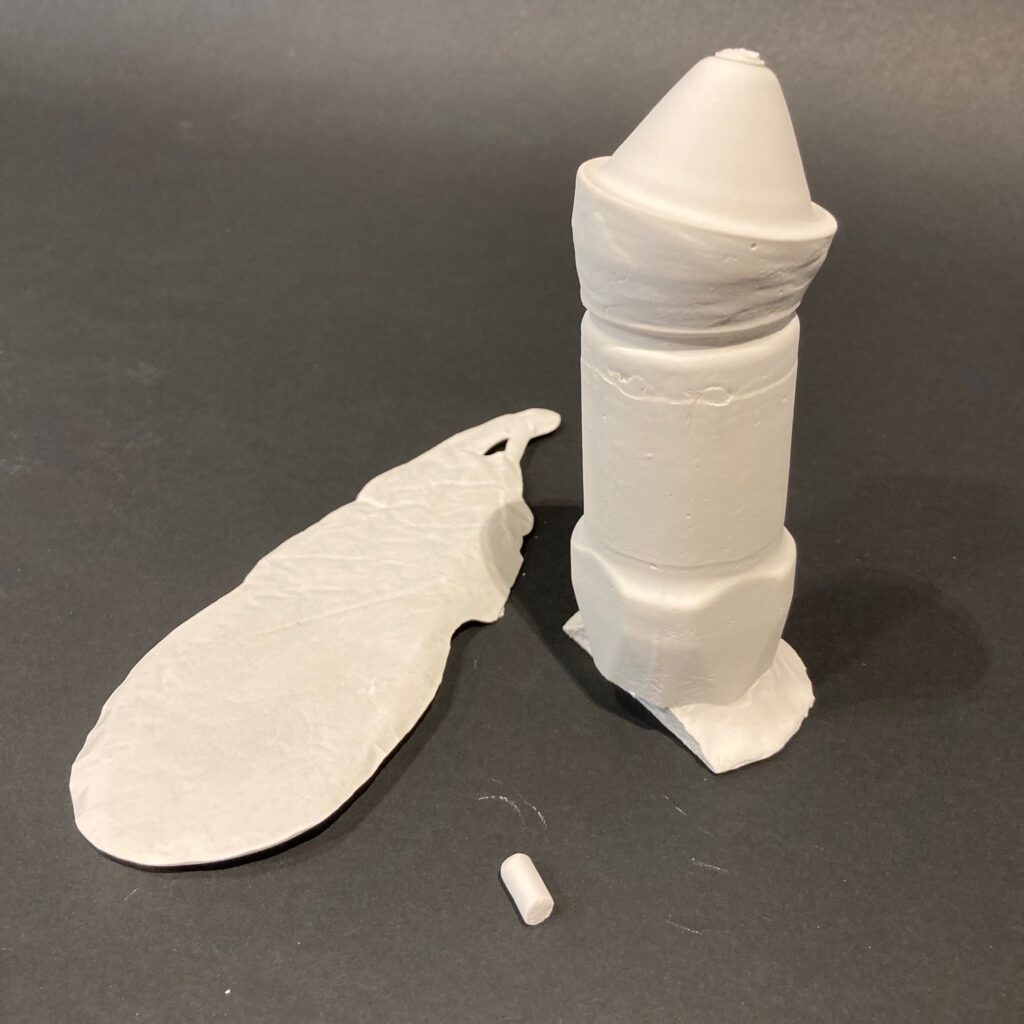
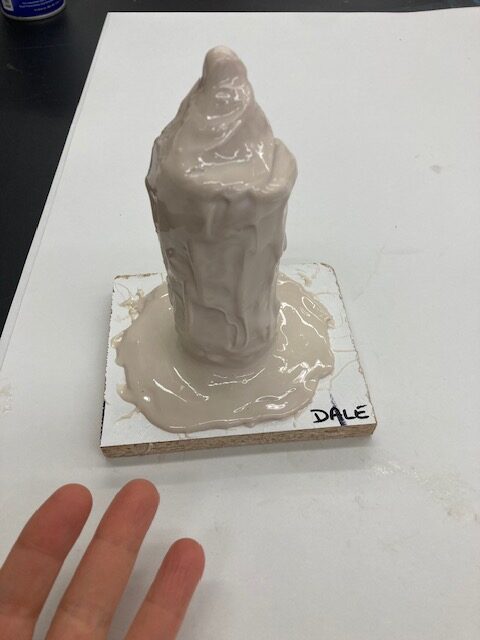
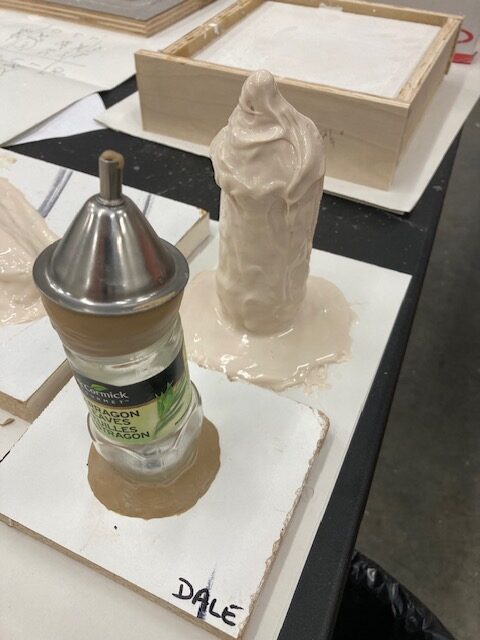
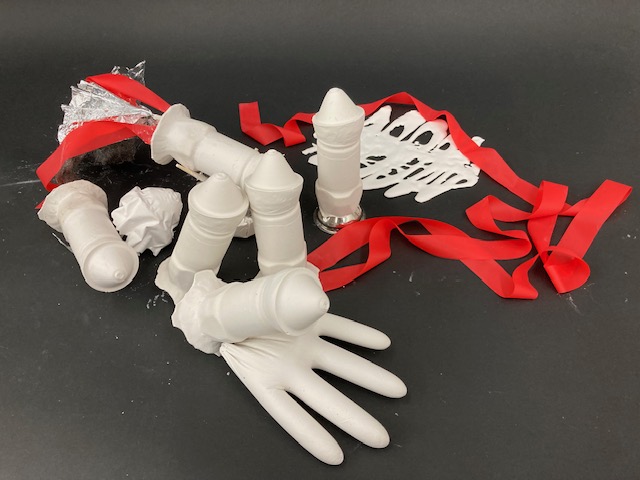
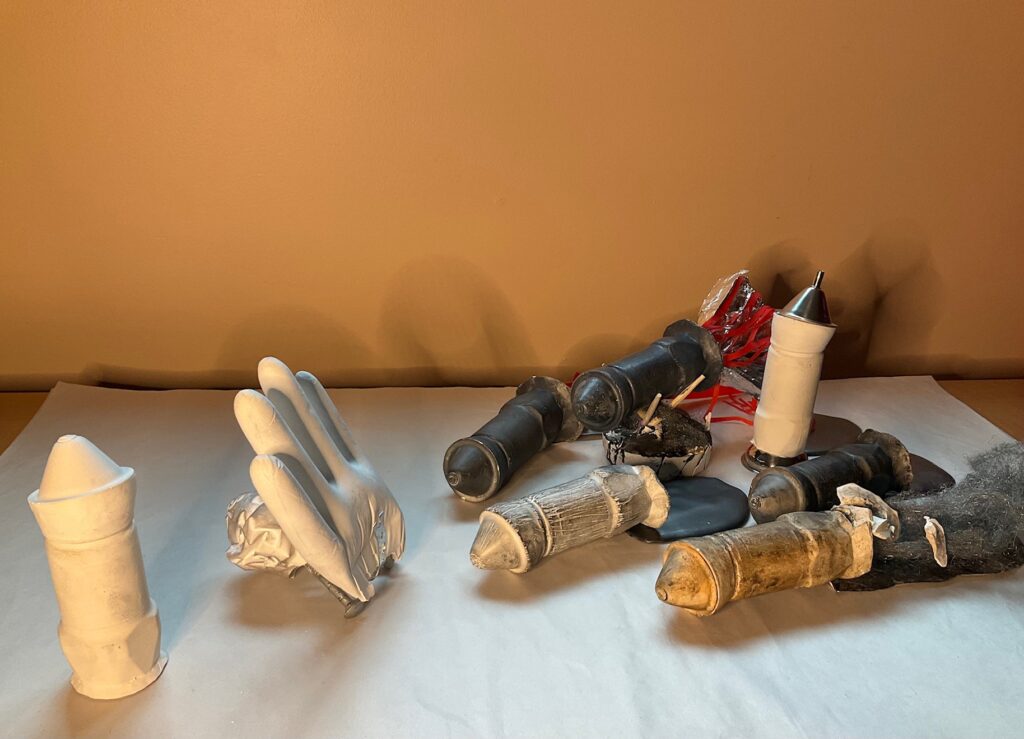
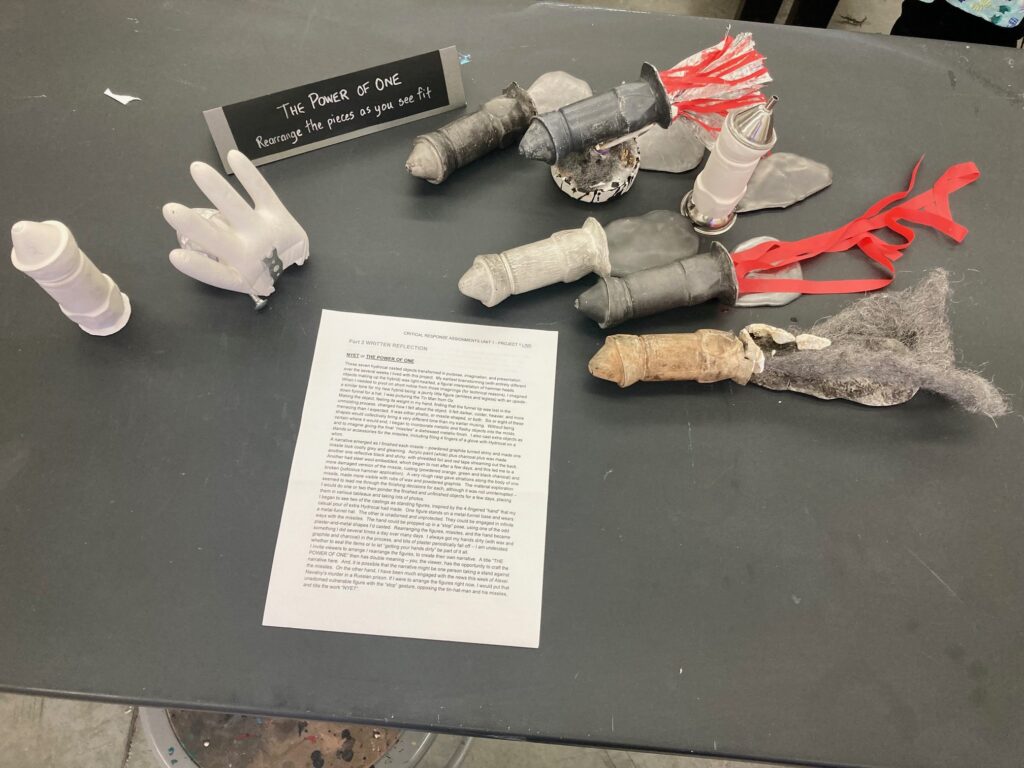
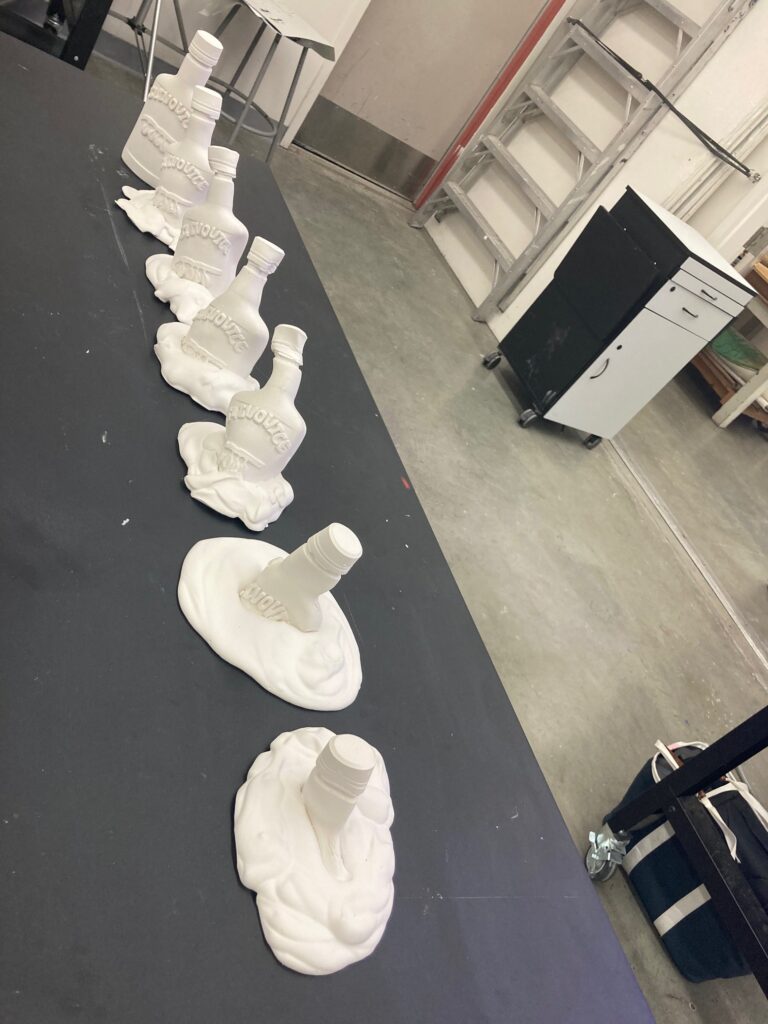
Feb 7/8: cast 5 more for a total of 6 items – see below. Every tip has broken off — not possible to be gentle enough while removing the very snug-fitting rubber mold. Incorporated various items, most of them with a metallic vibe — pieces of metal stripping, screws, steel wool, a small stainless-steel funnel, aluminum foil. But also included flagging tape that streams out the bottom of the object. I seem to be heading towards a rocket / missile vibe, while also pondering the phallic / dildo-like shapes. Perhaps finish them with a polished grey quality (graphite, charcoal, wax) with greater and lesser degrees of broken-ness, wear. A bit of a parody of Russian (or North Korean) missile parades, with a nod to the macho posturing involved? Some photos…

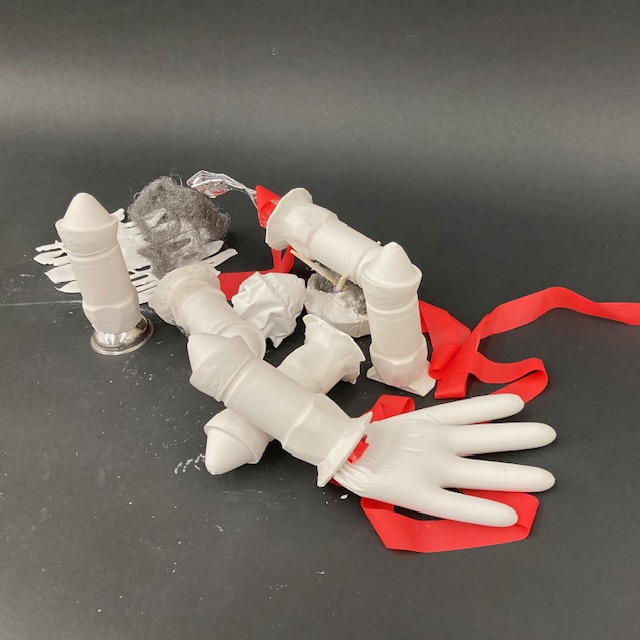
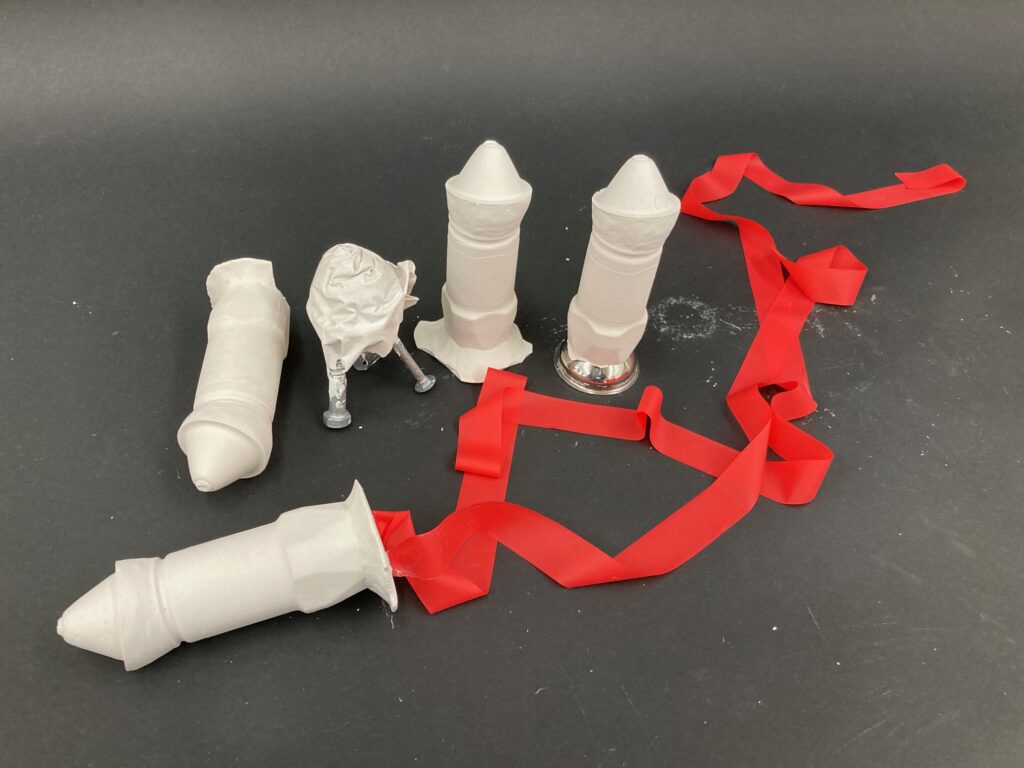
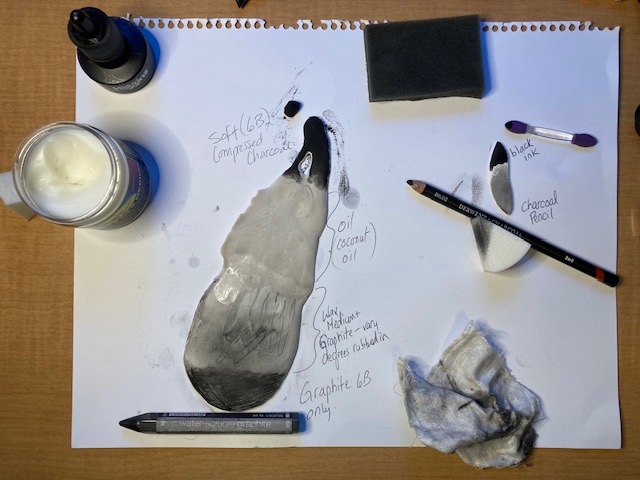
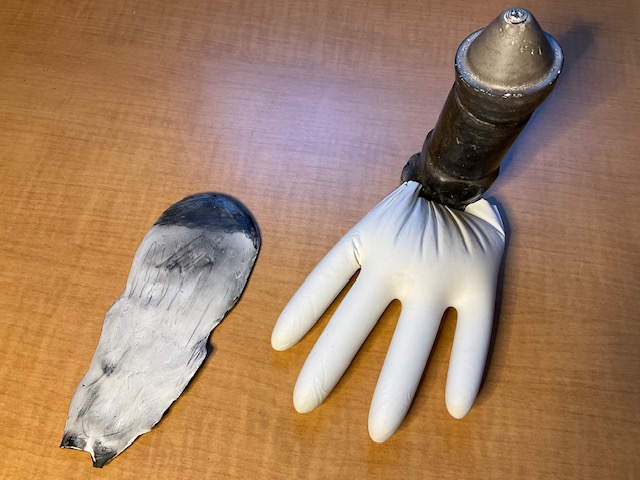
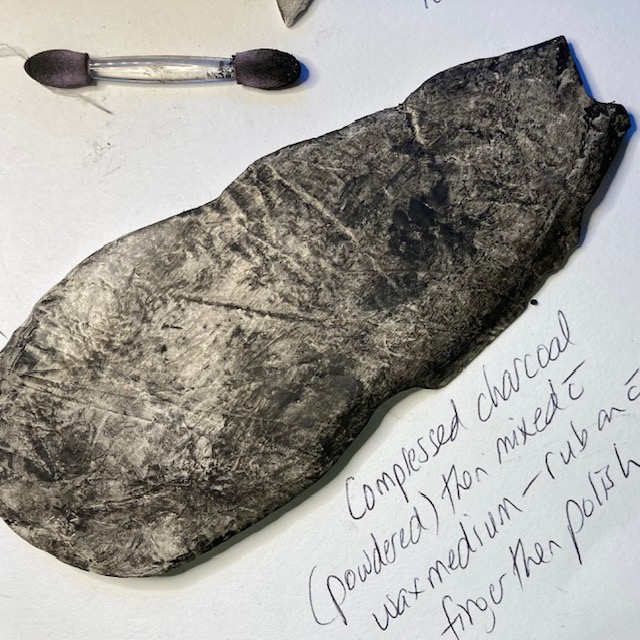
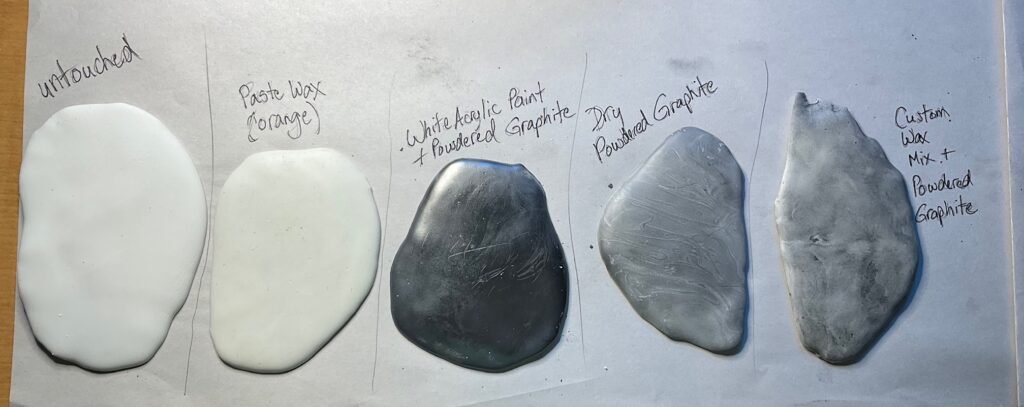
Initial experiments with surface treatment: see below. Ideas and Questions for class Wed Feb 14: vary mixtures of wax and/or oil with powdered graphite / charcoal. Is it okay to use coconut oil (too organic? will it mold?). Can I use dilute ink or too wet? How incorporate red streamers / foil / steel wool accents? Keep all rough edges?
SELF ASSESSMENT and WRITTEN REFLECTION for Hydrocal Multiples project: see attached pdf below.
CRITICAL-RESPONSE-UNIT-1.-DalePEER ASSESSMENT for Hydrocal Multiples project: see attached pdf below
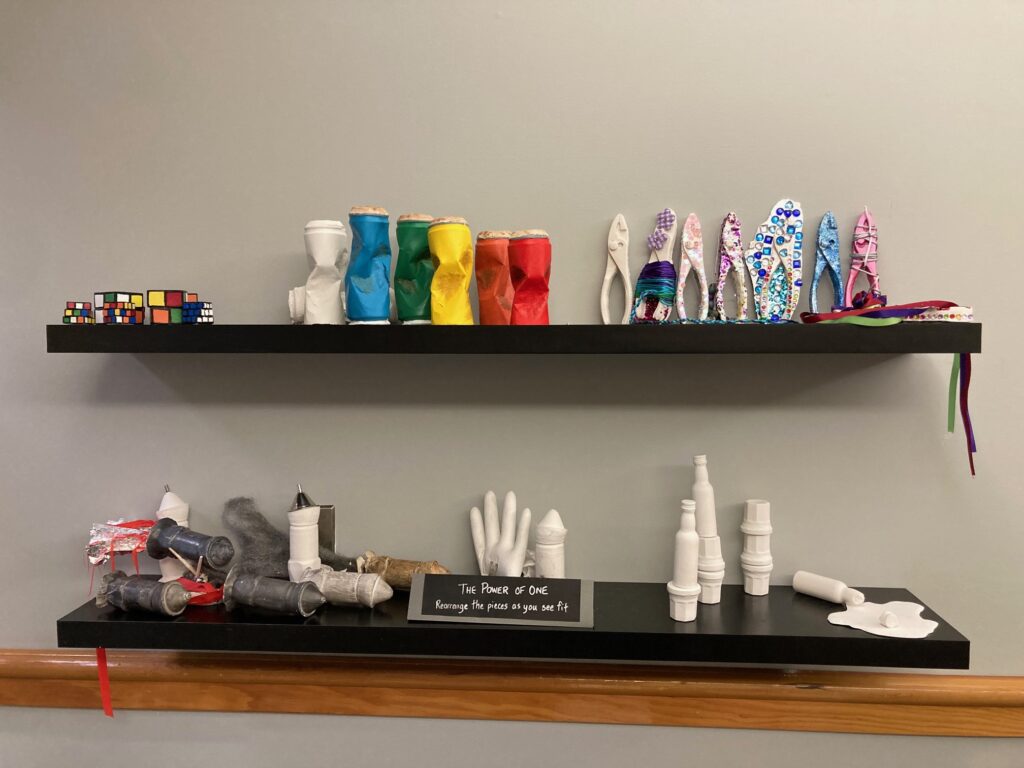
CRITICAL-RESPONSE-with-peer-interview-UNIT-1.-DaleClass critique / sharing of the projects:
FIN 130 Unit 3
Unit 3 Research Project:
Made + Altered: Intersection of Art and Design Creation with Manufacturing
U3_Research-Assign_DGrahamFIN 130 Unit 2
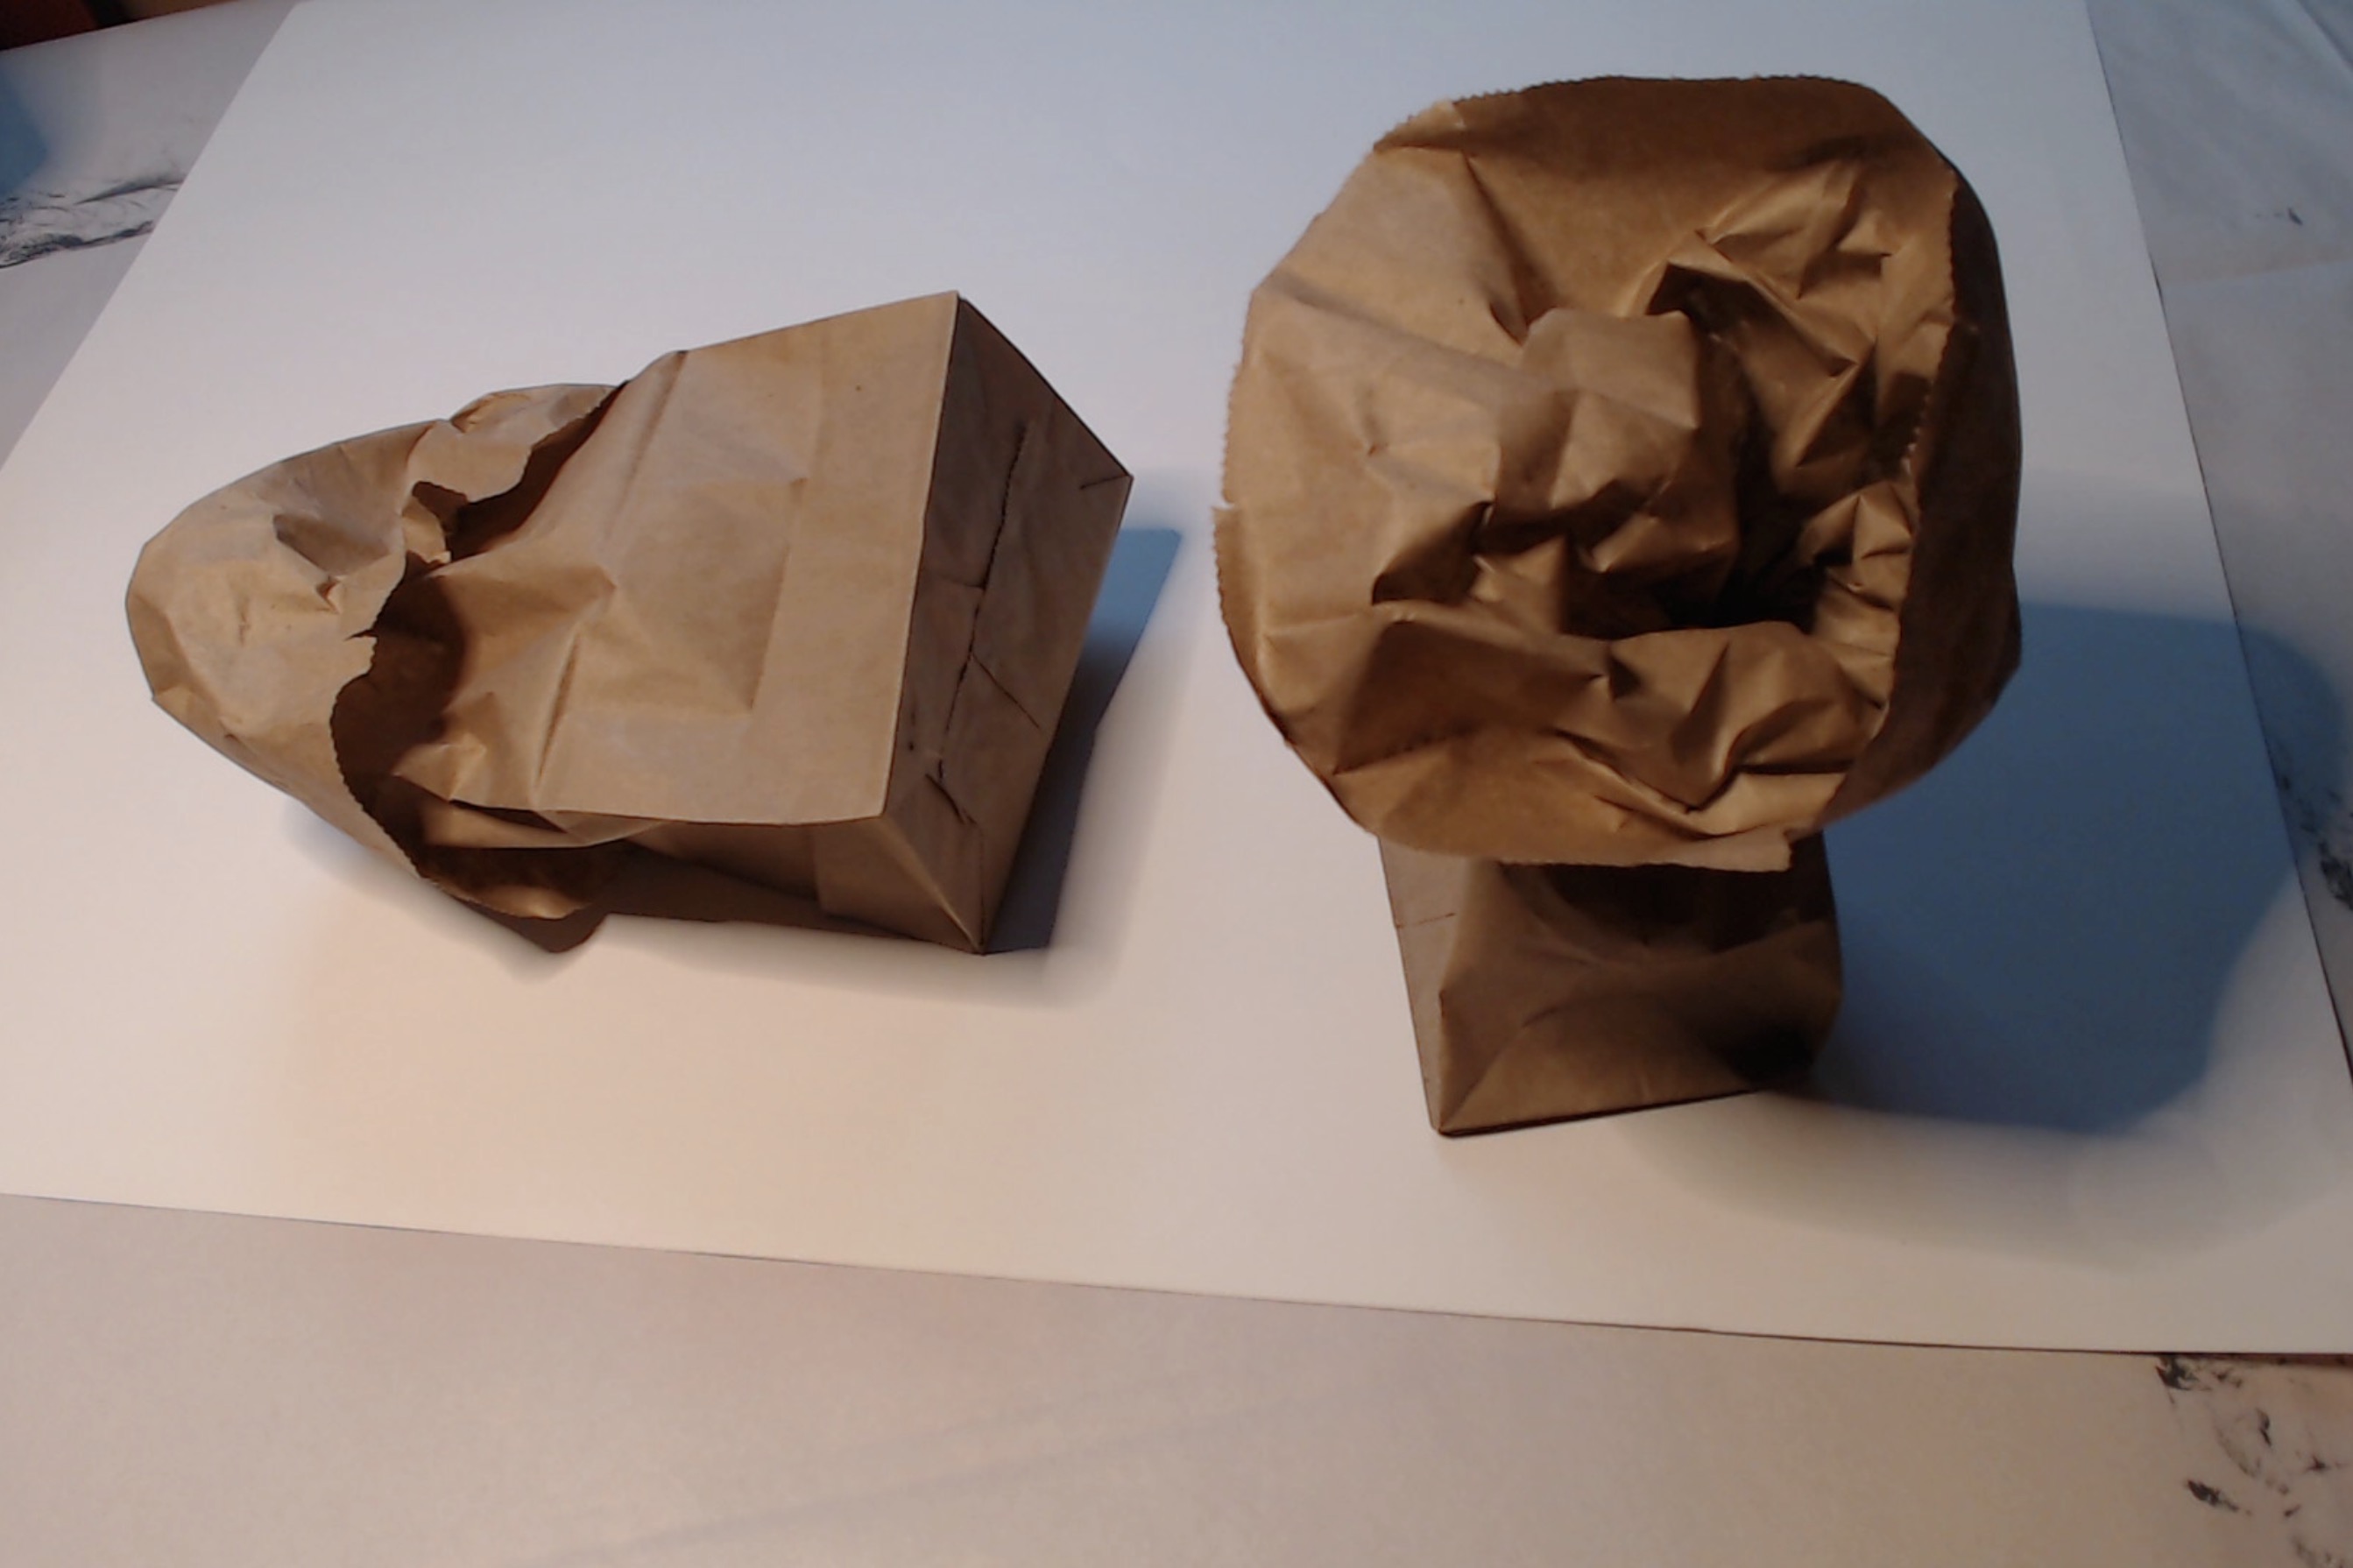
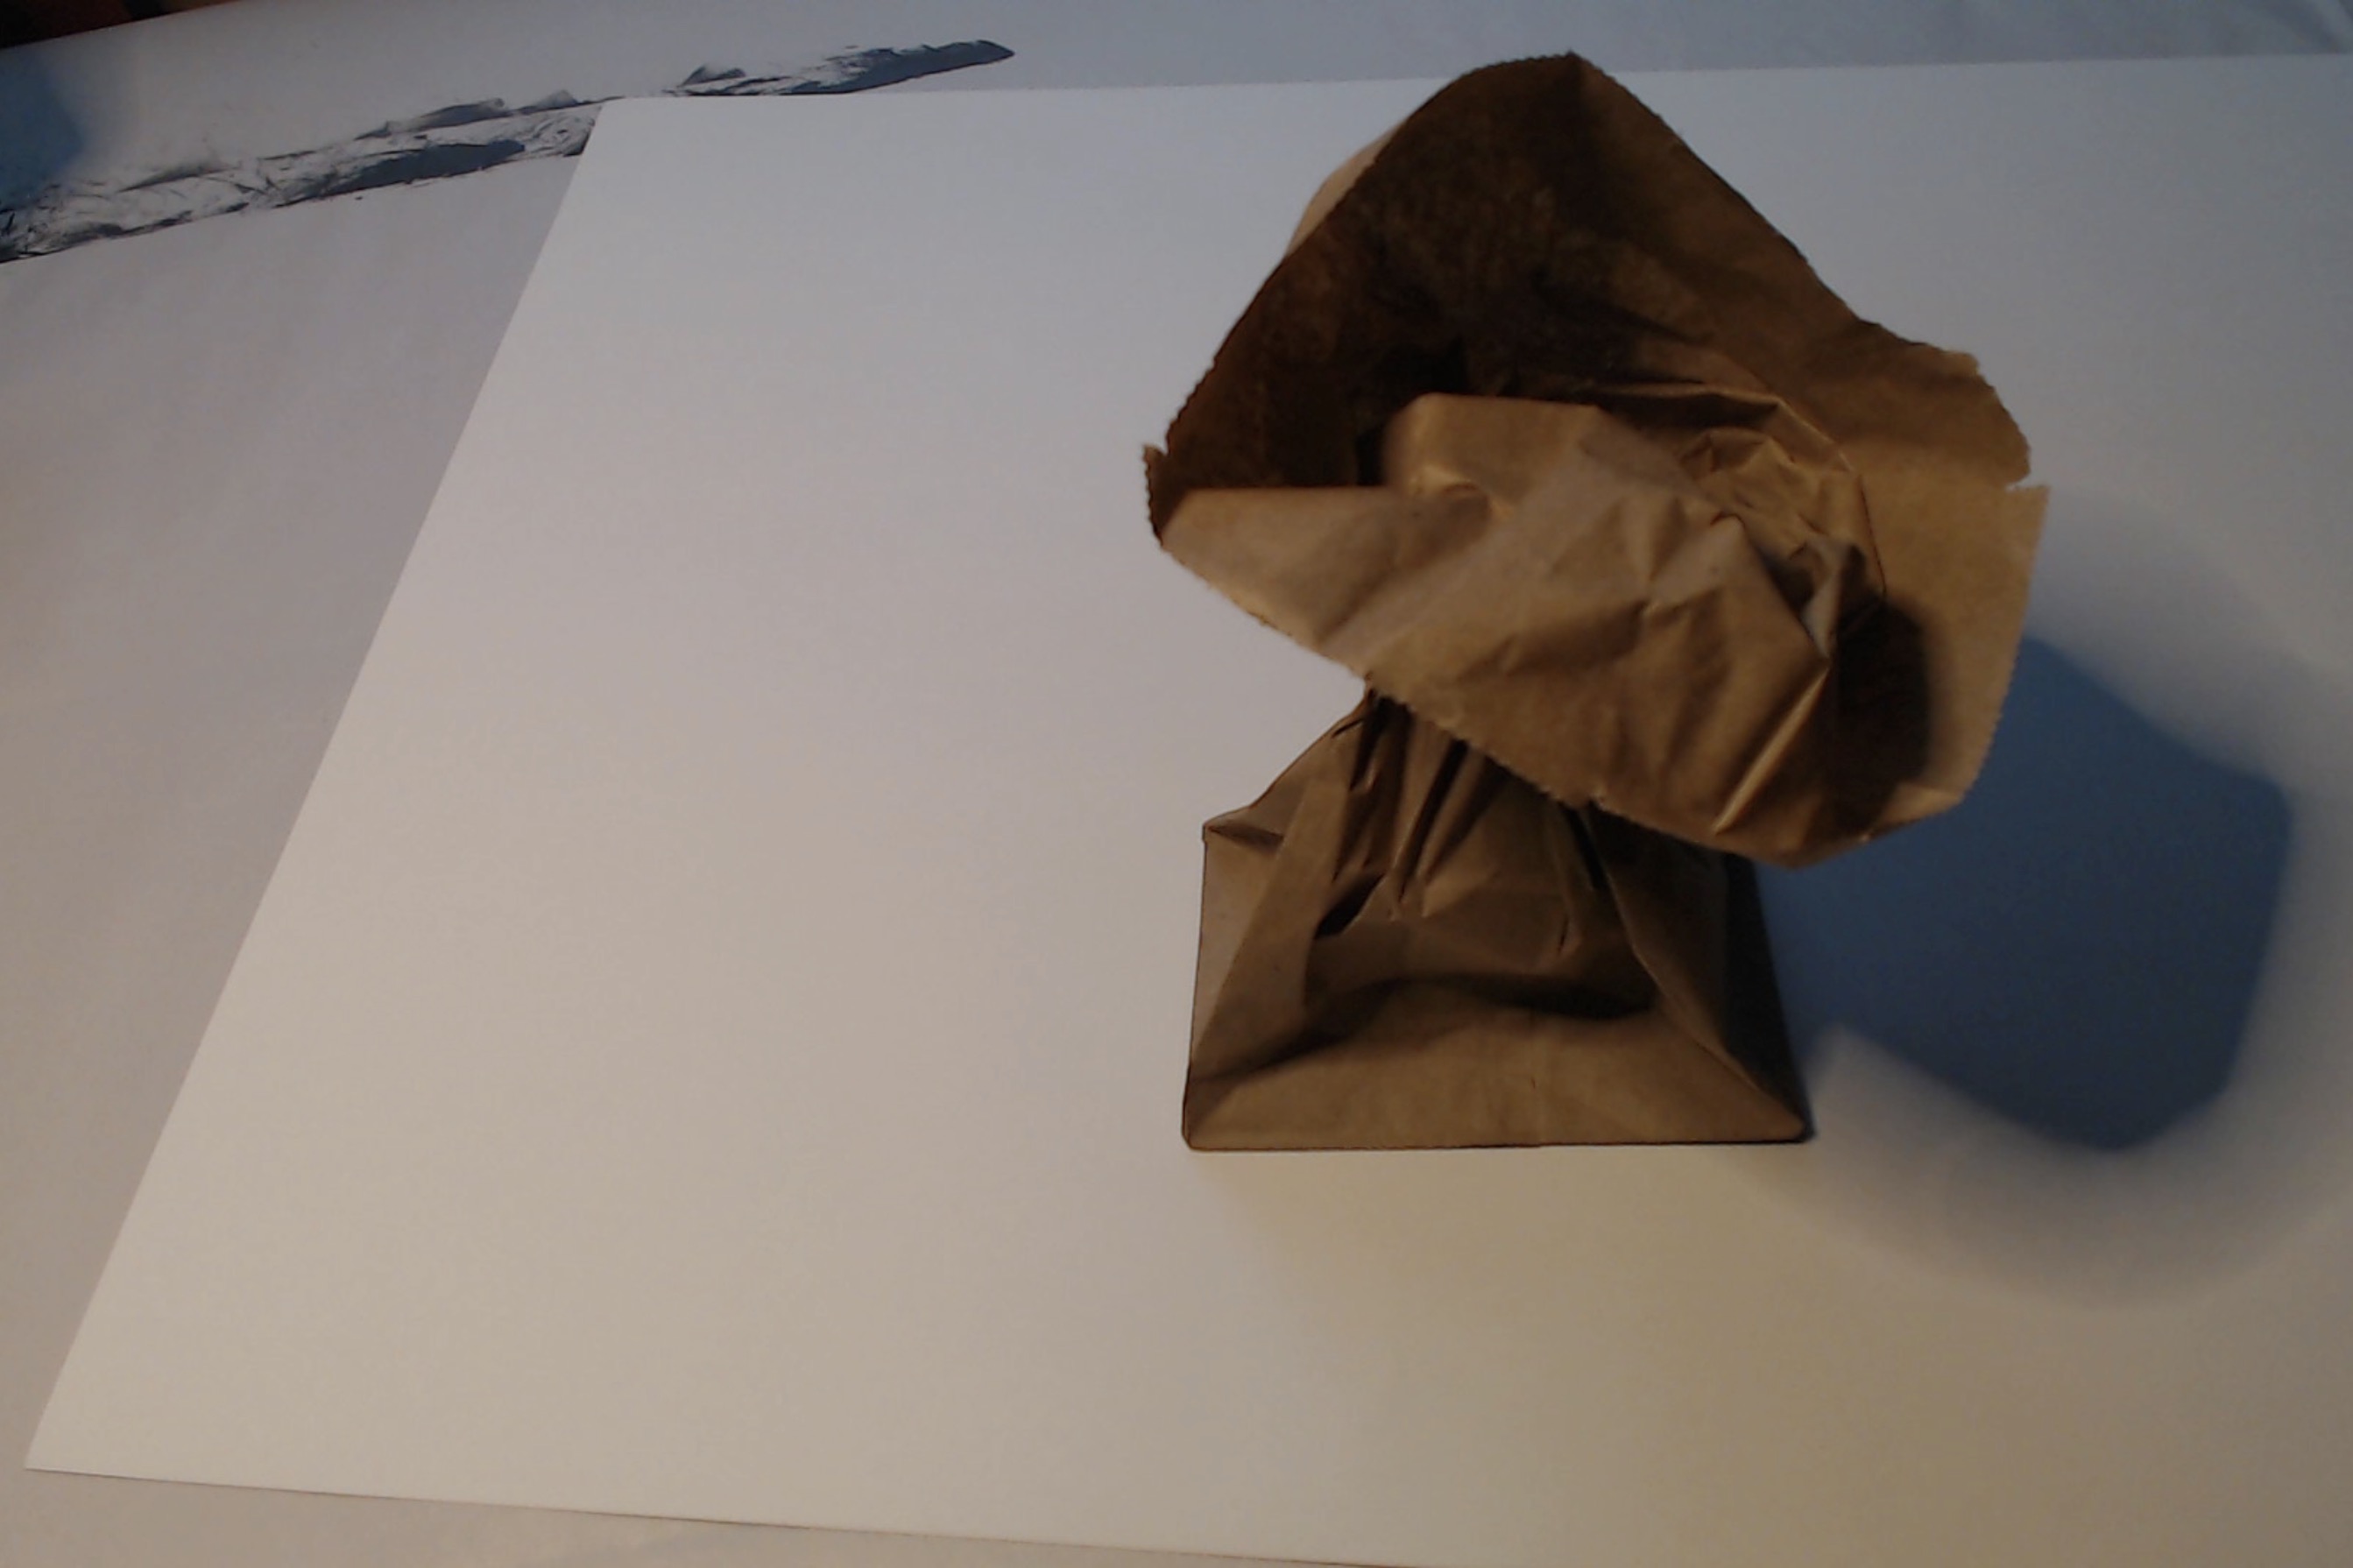
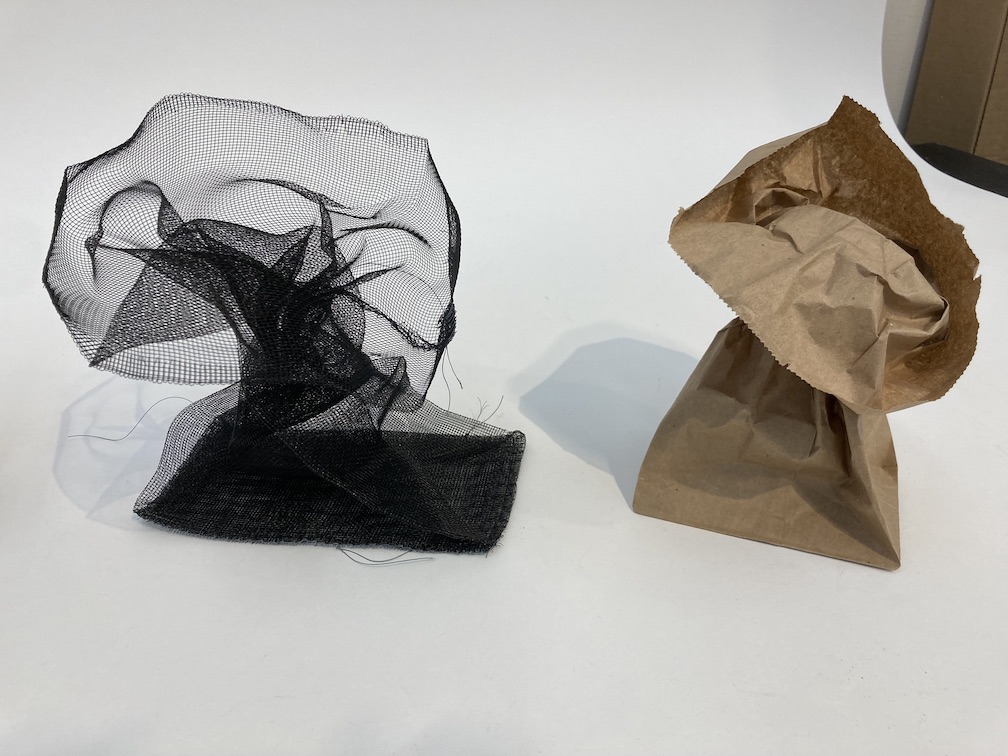
Paper Bag Play:


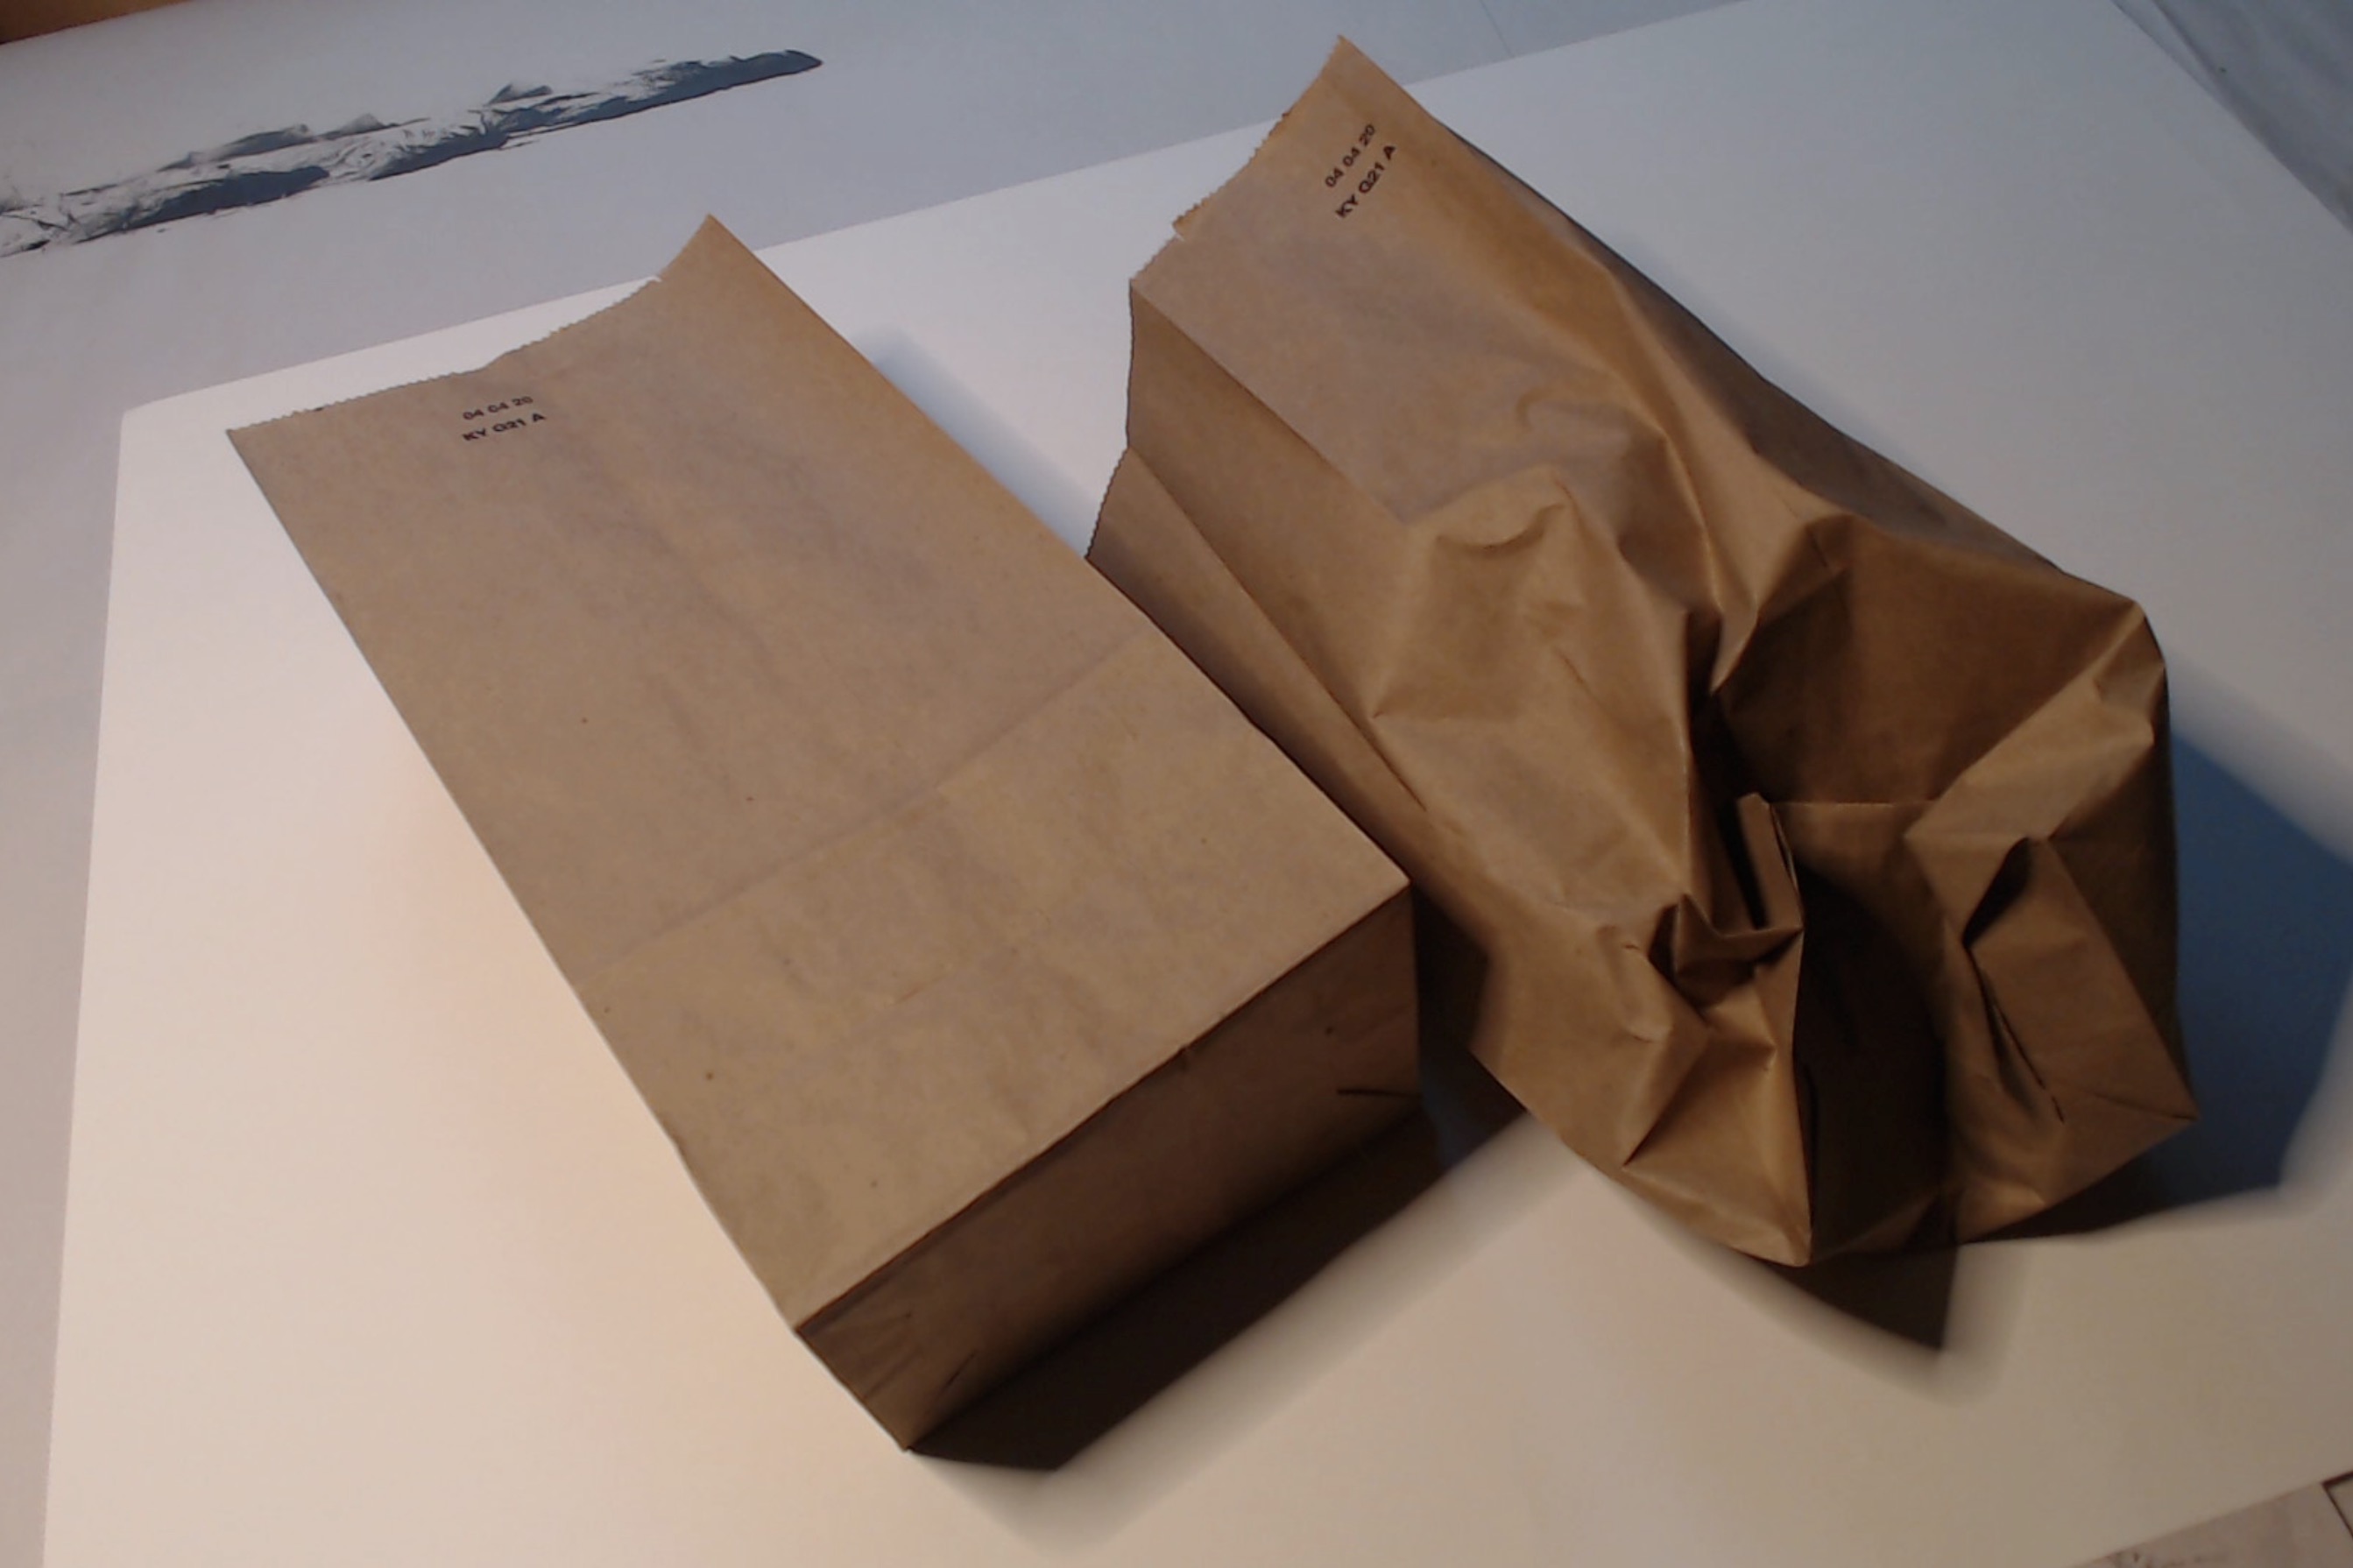
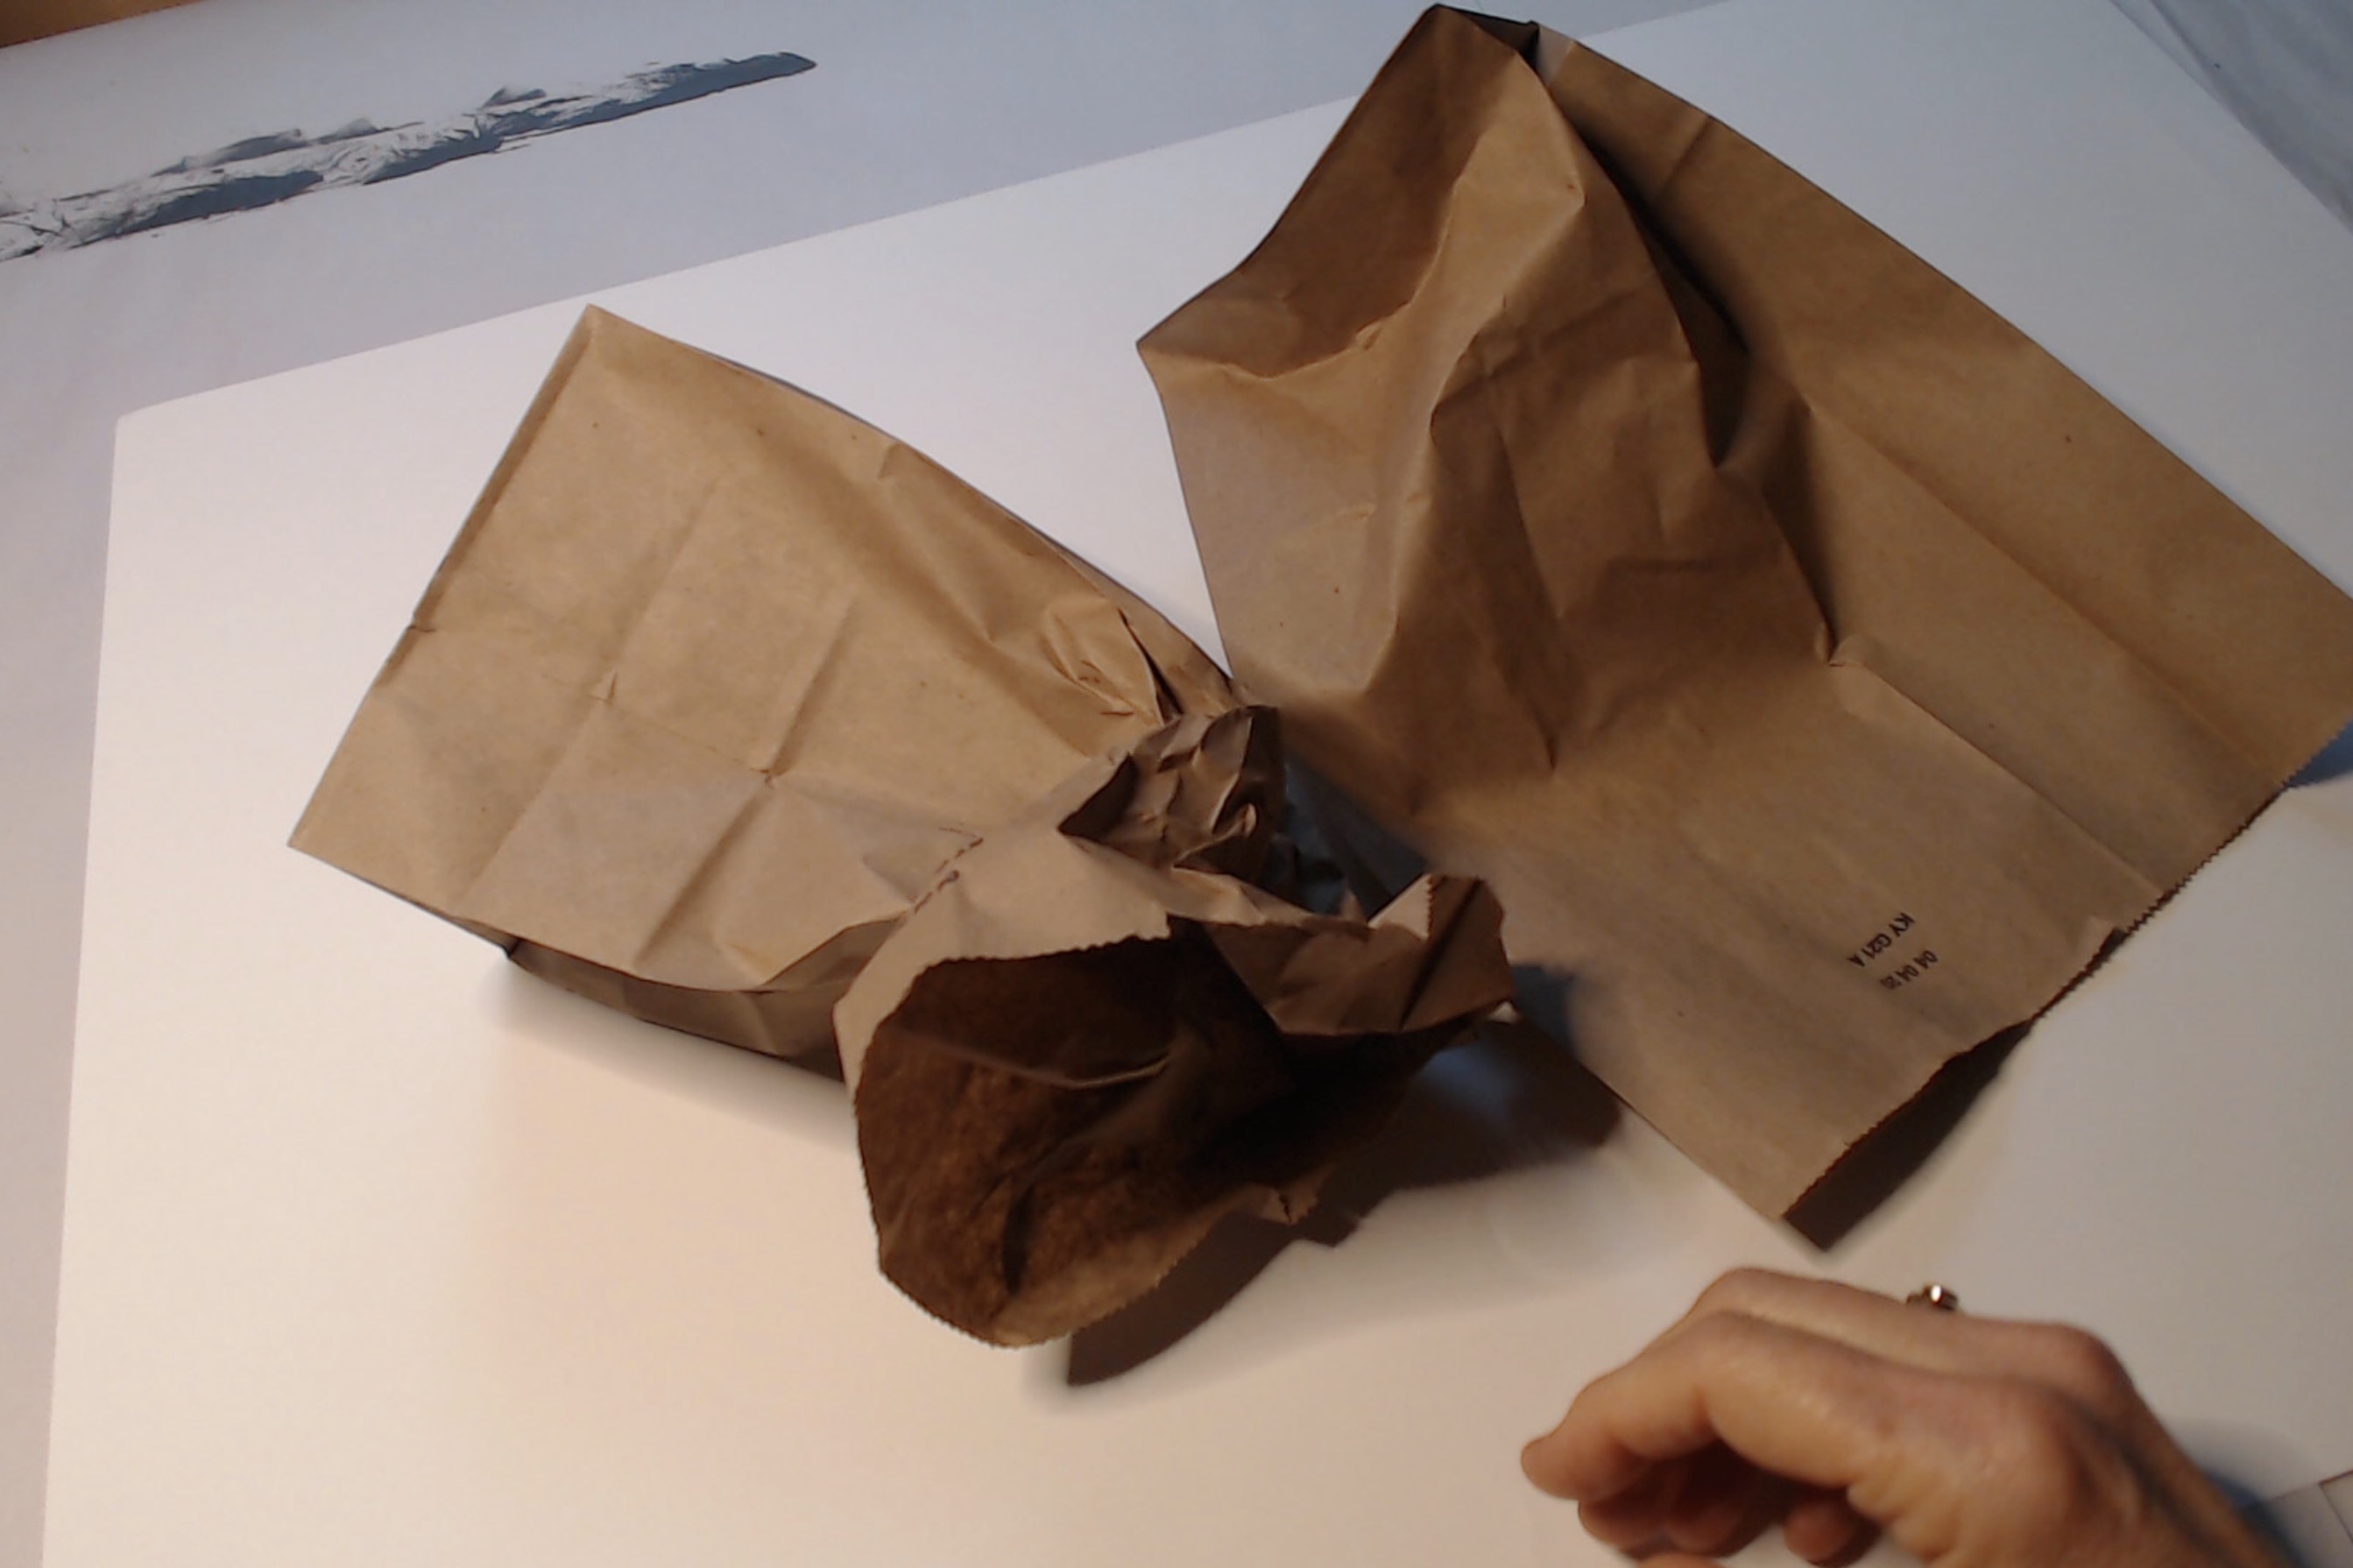
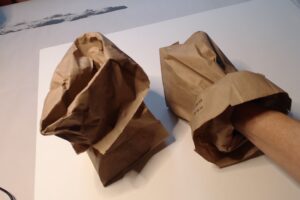
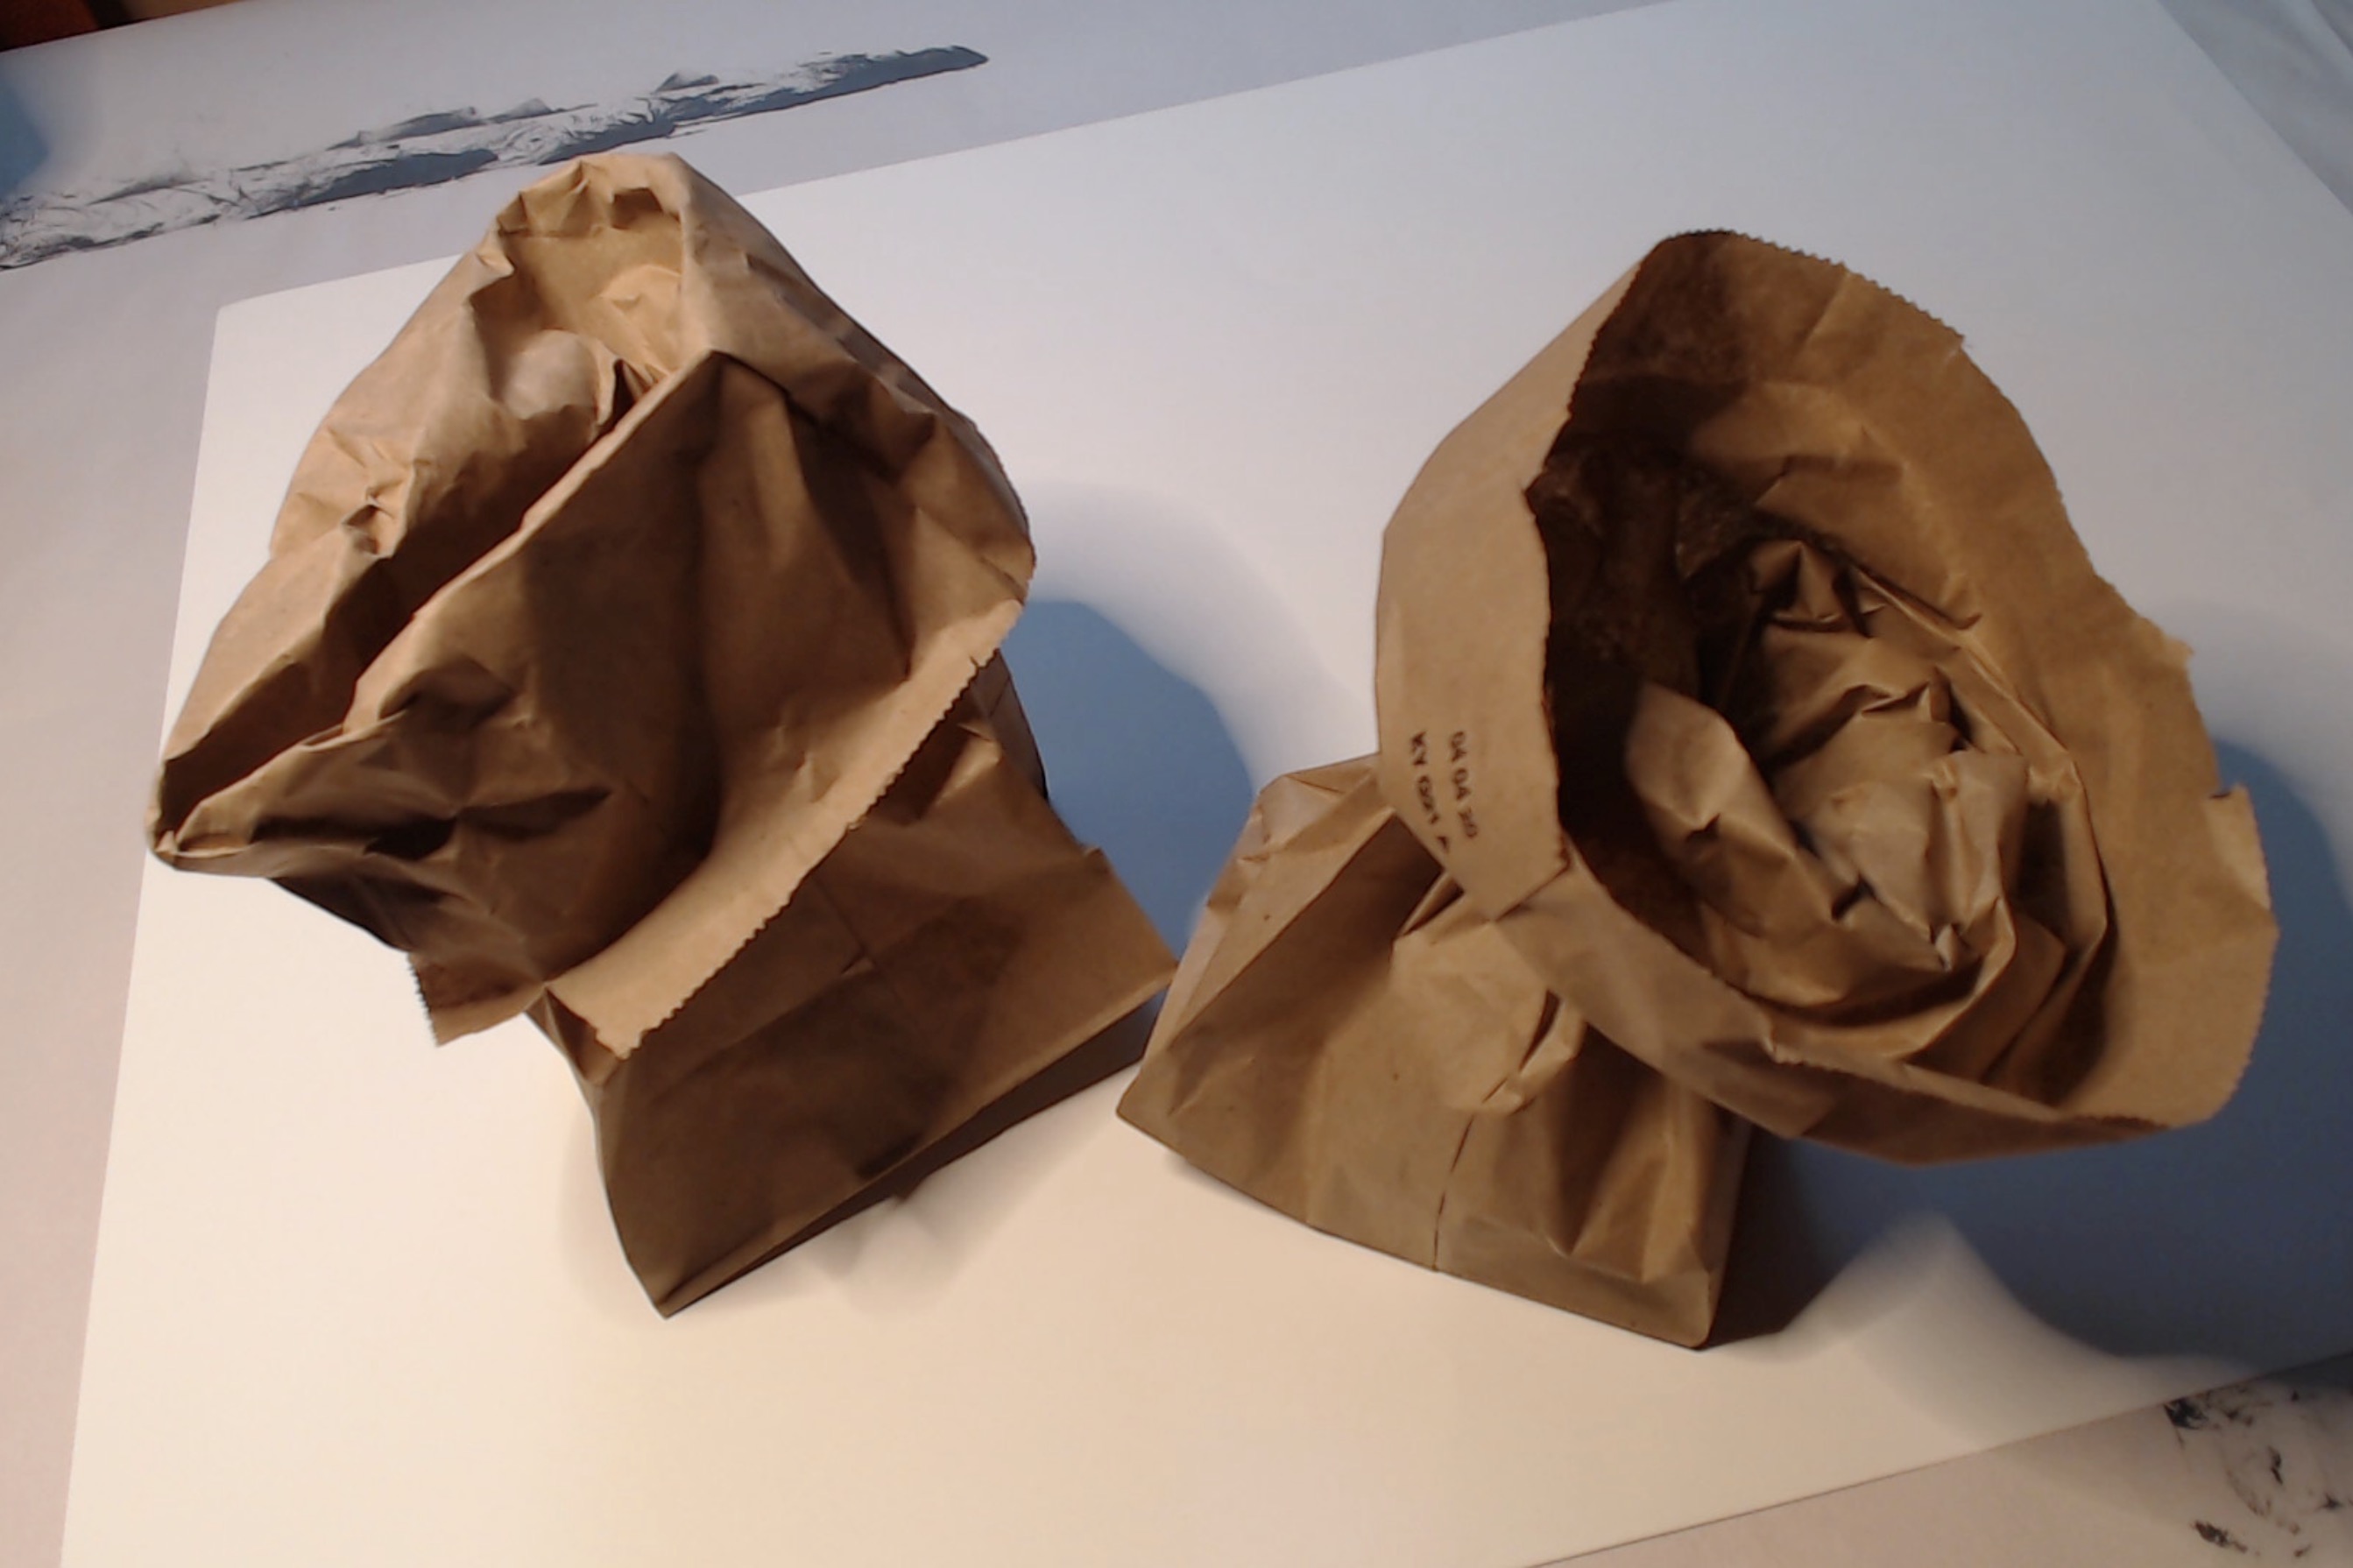
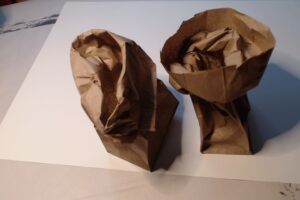

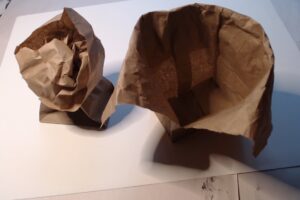
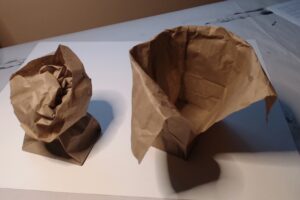
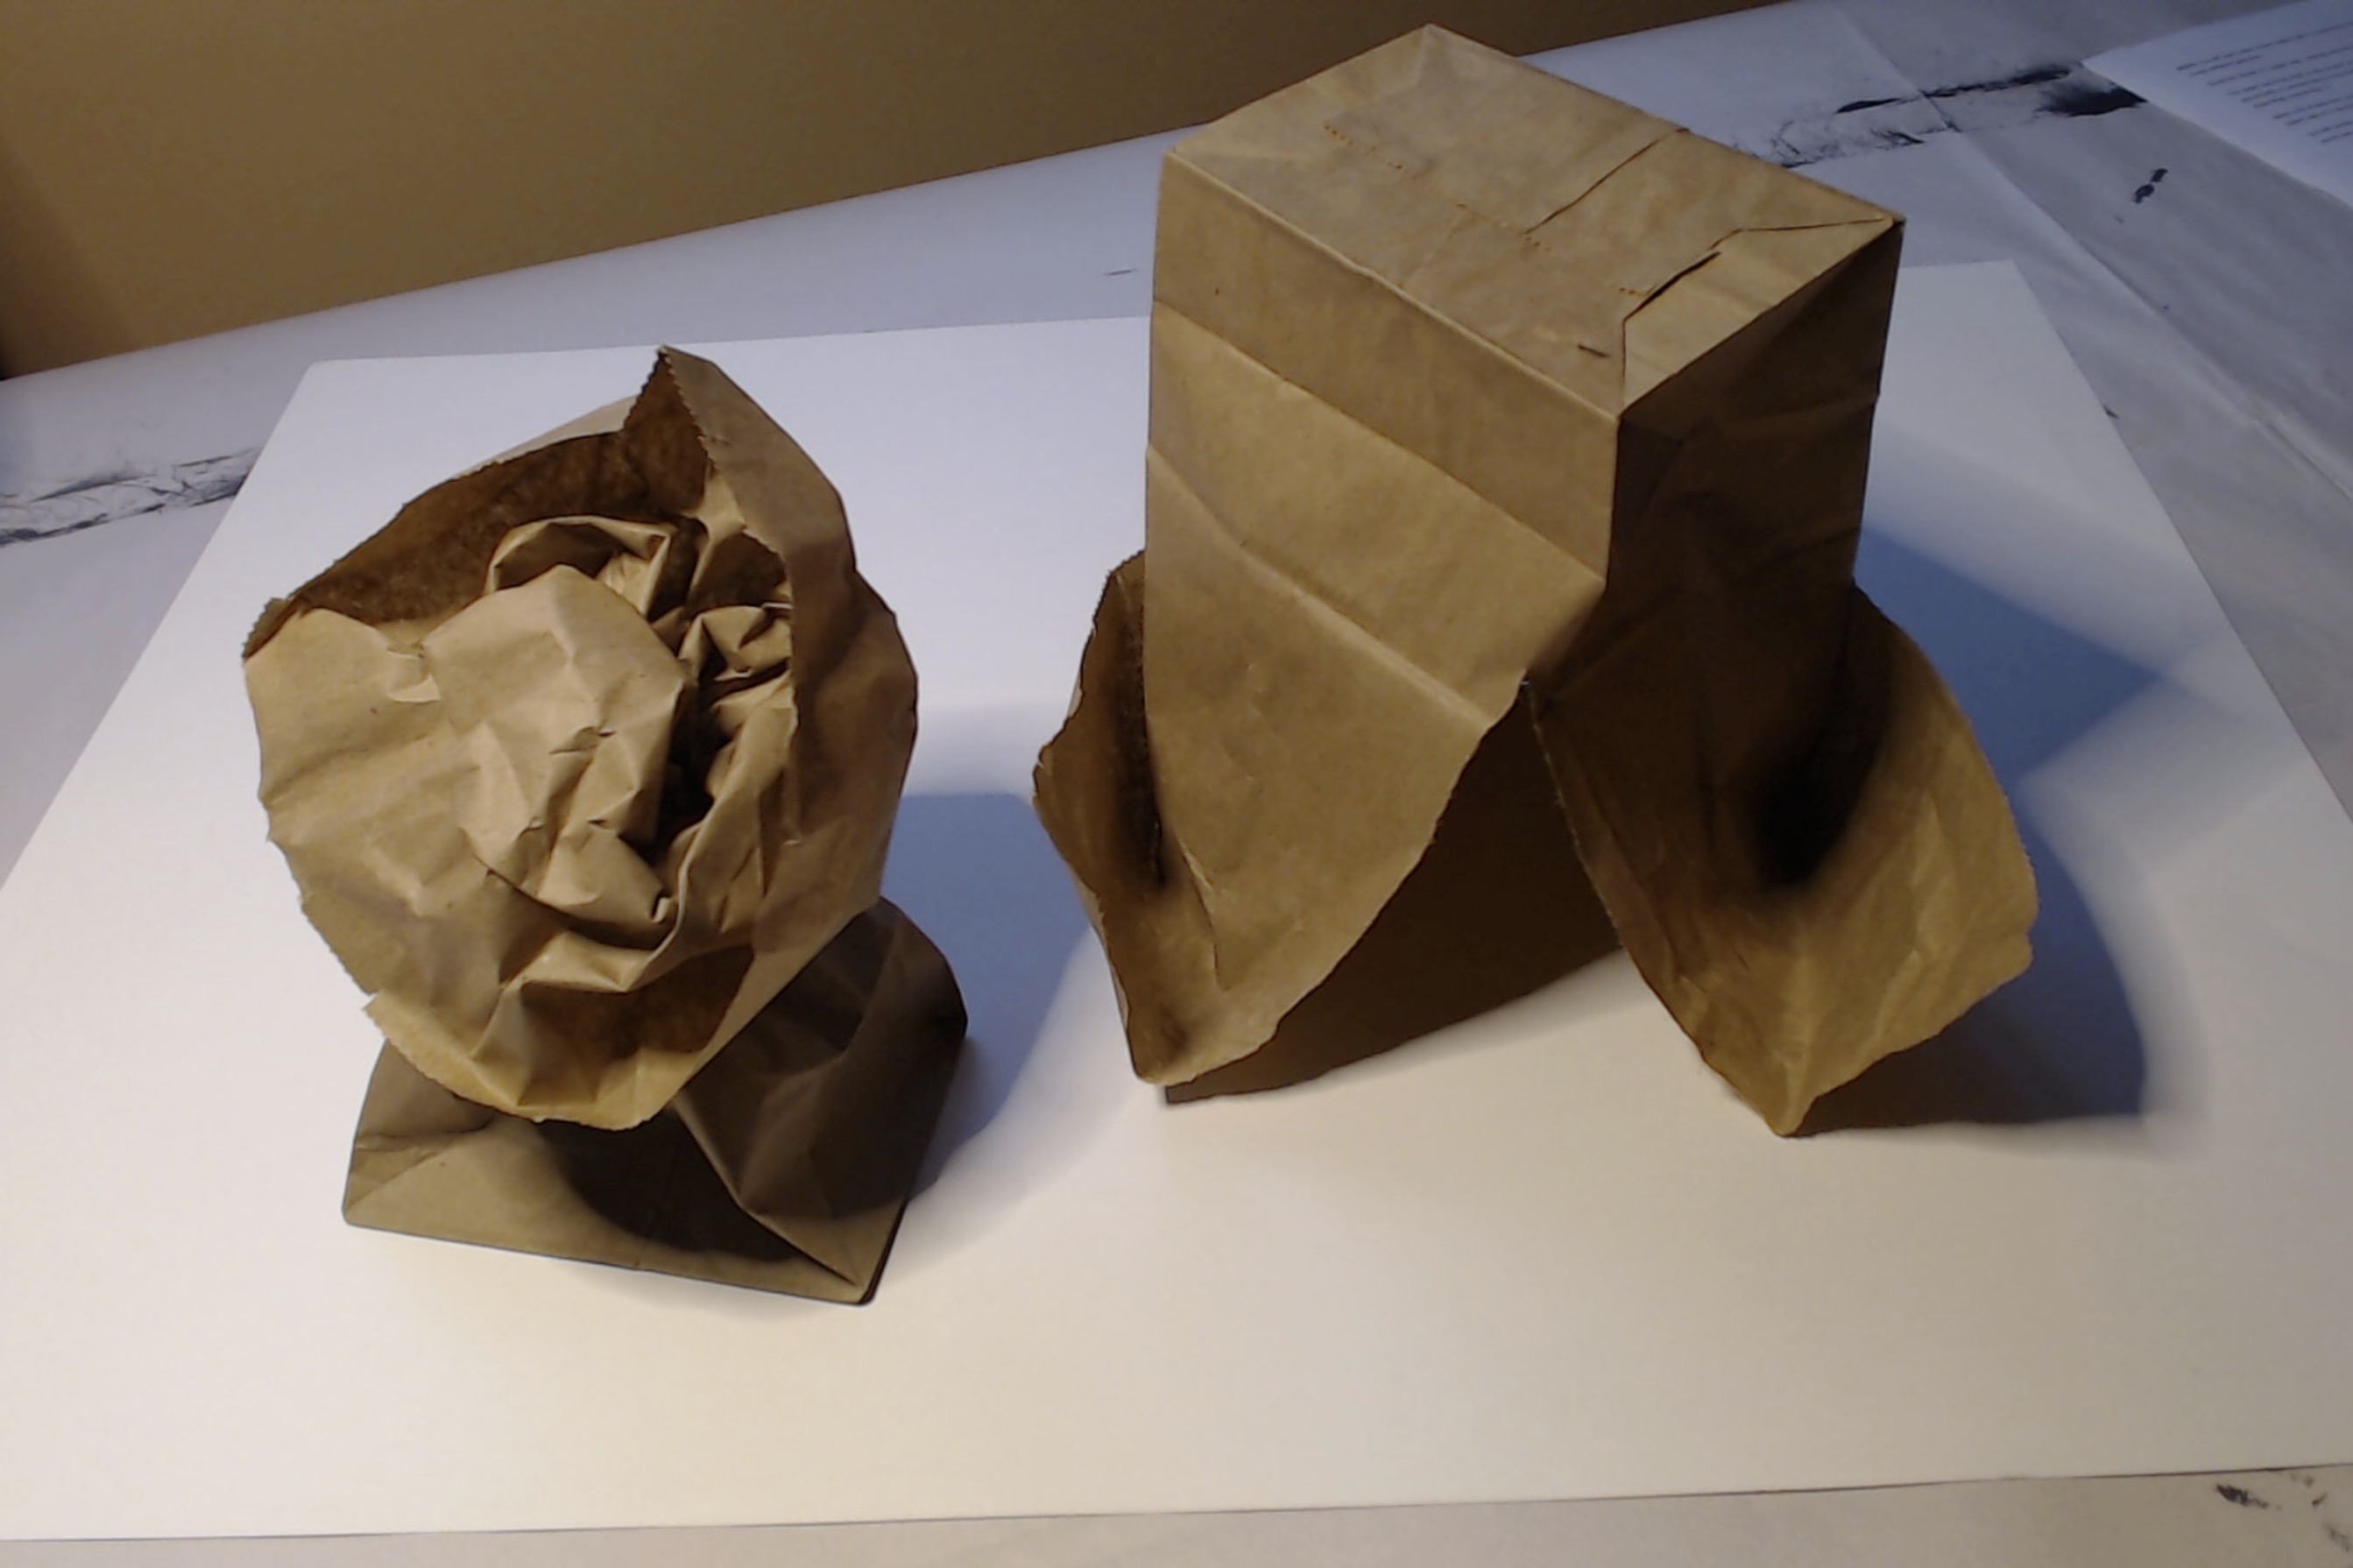

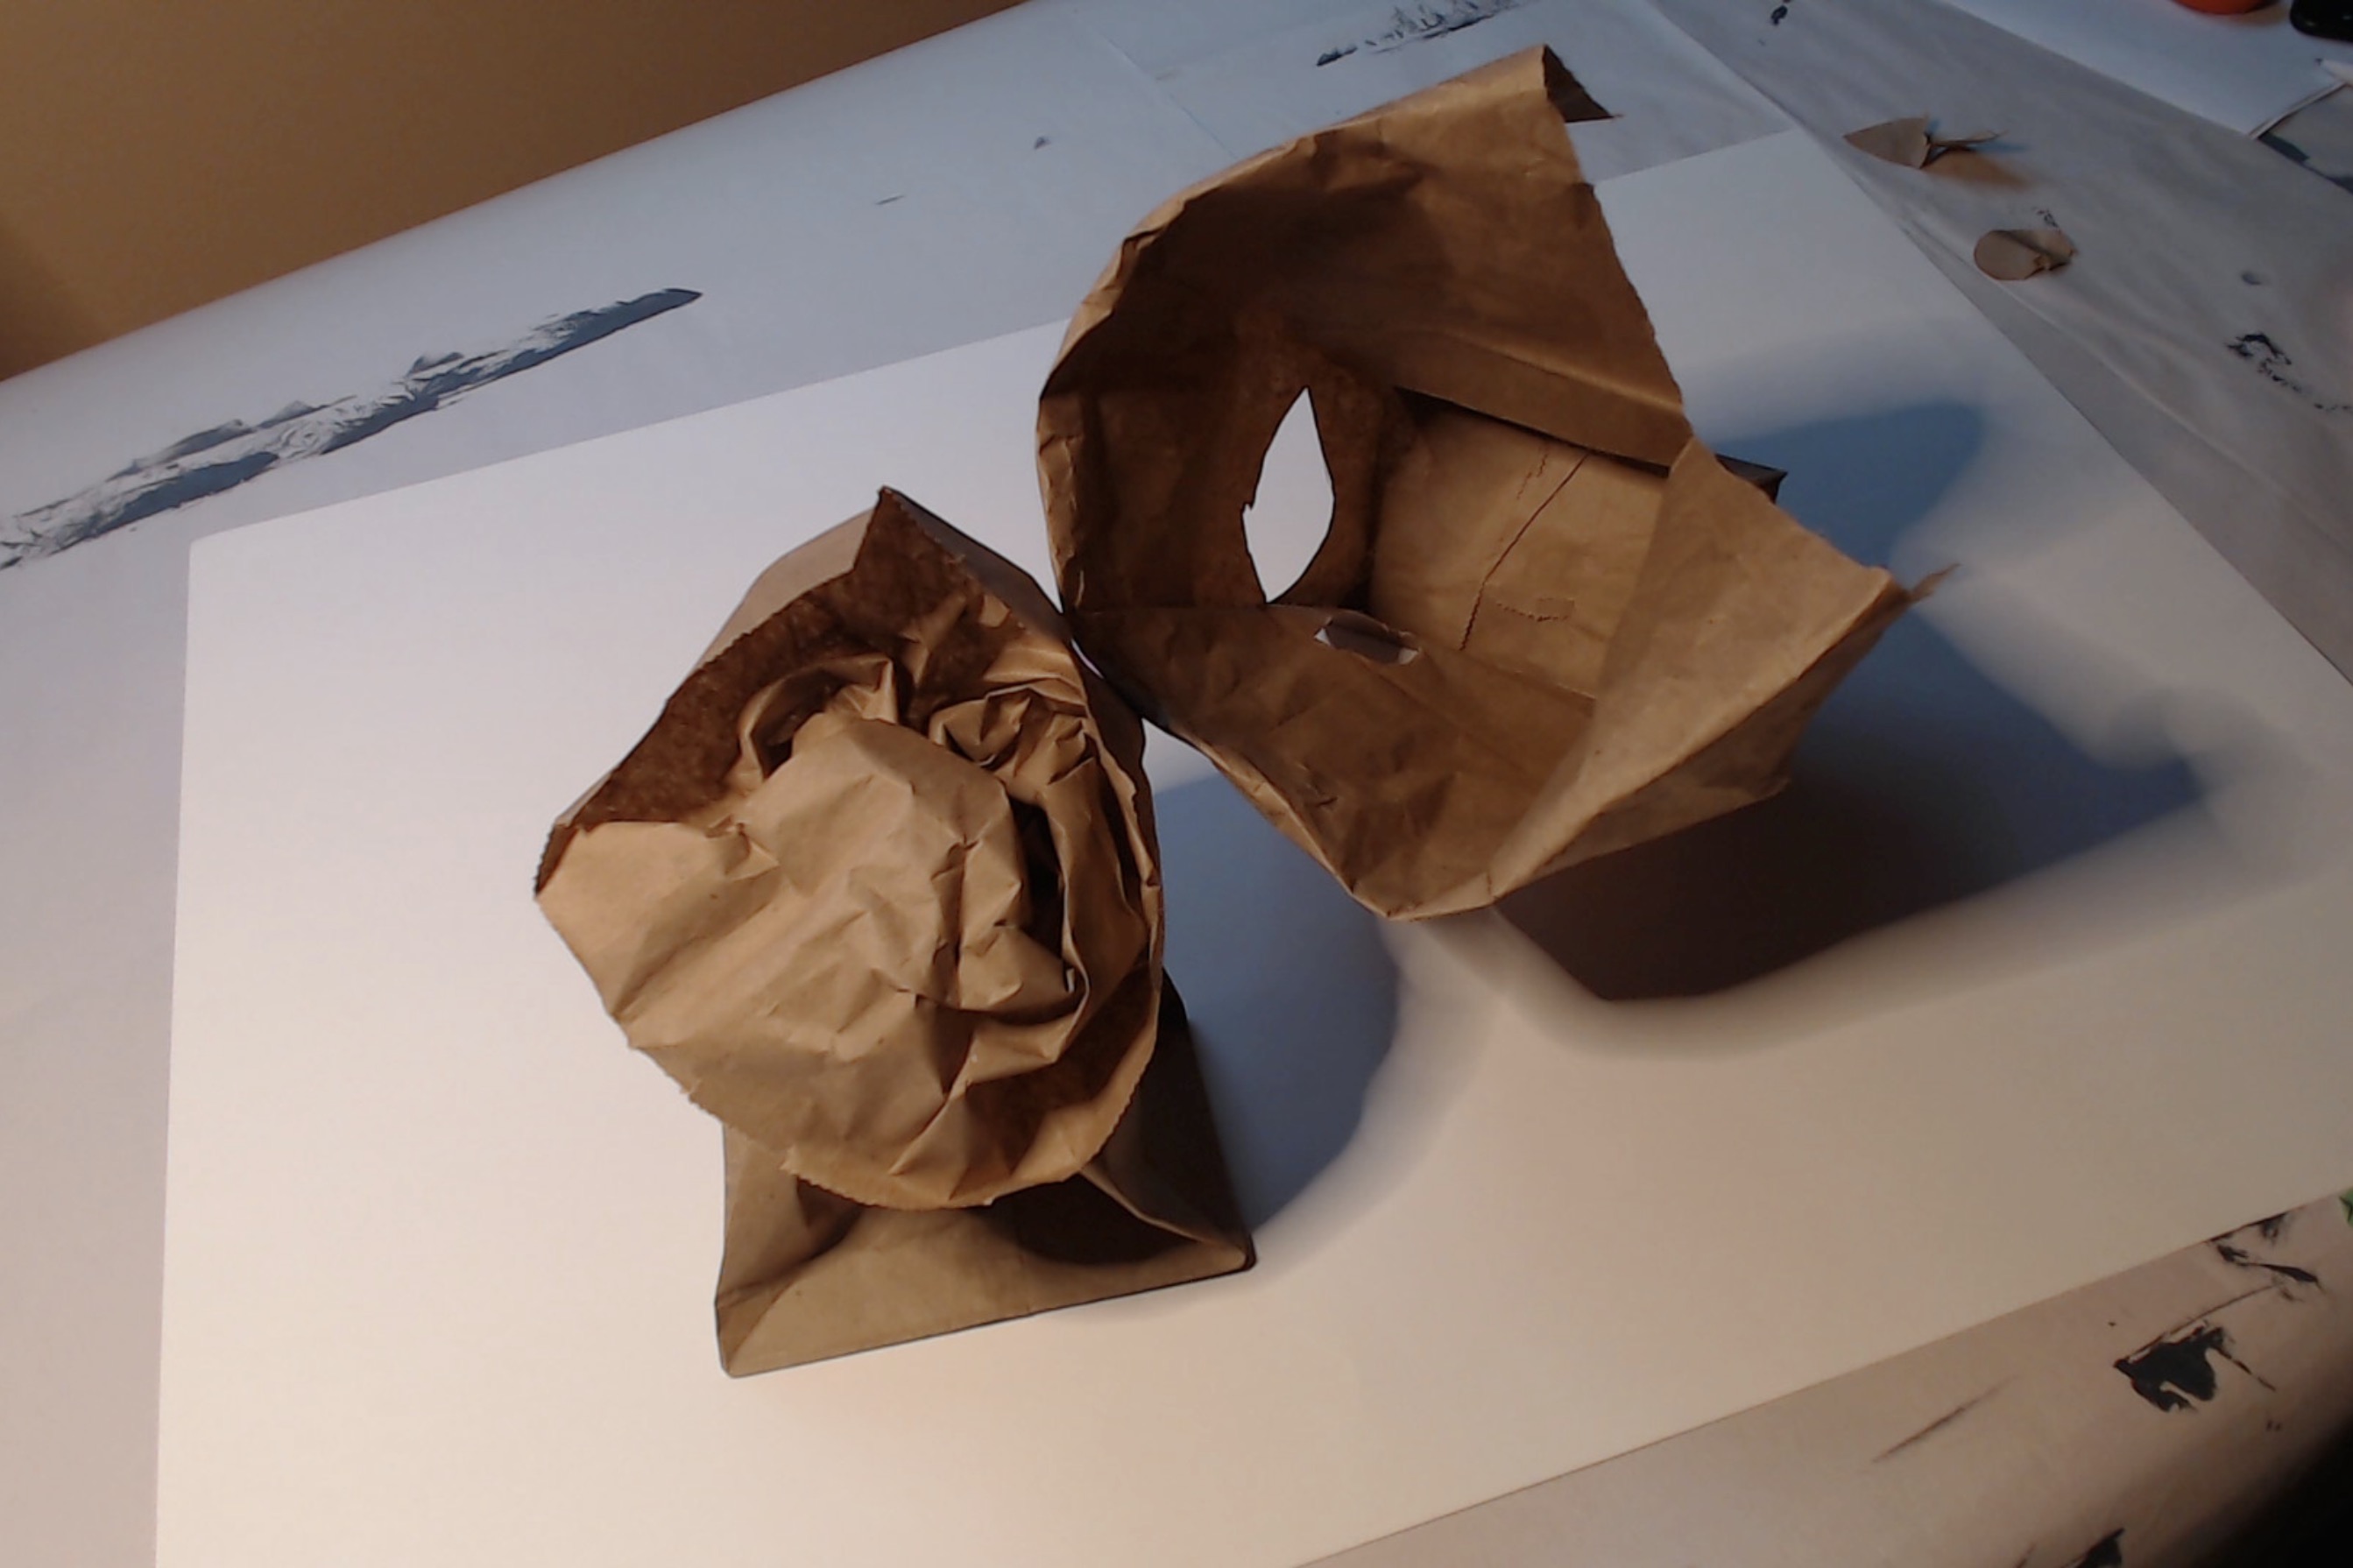

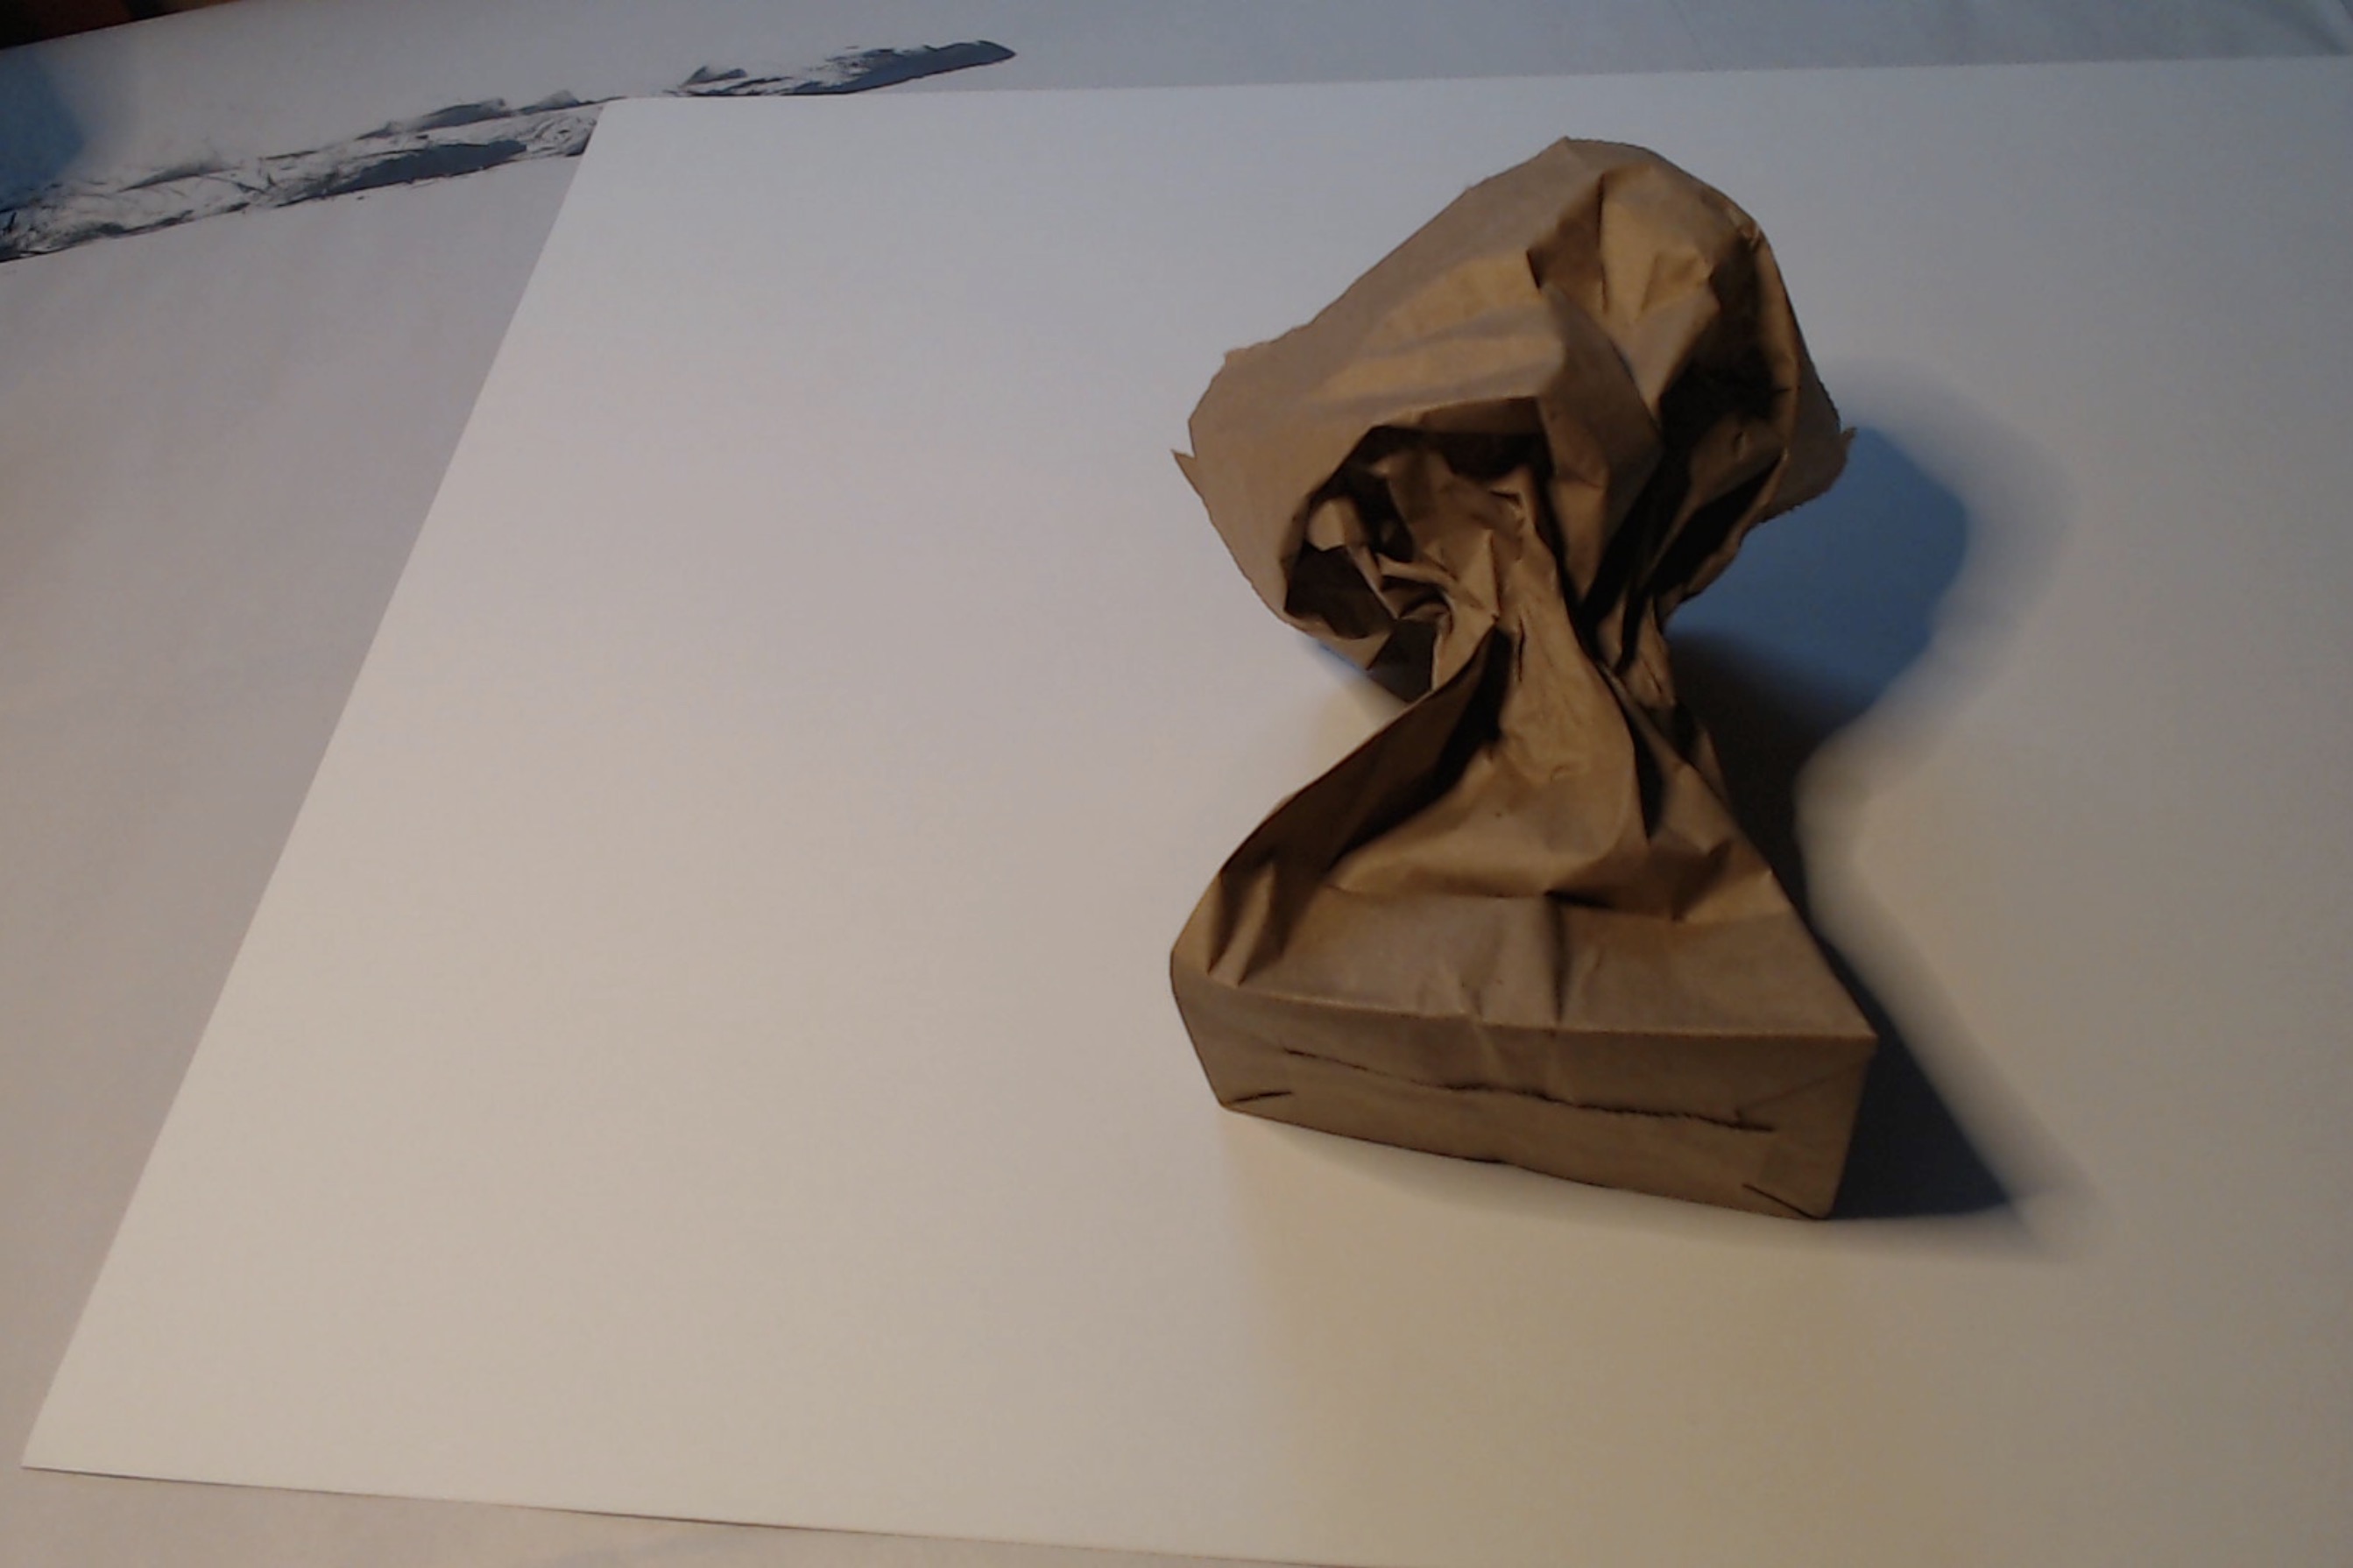
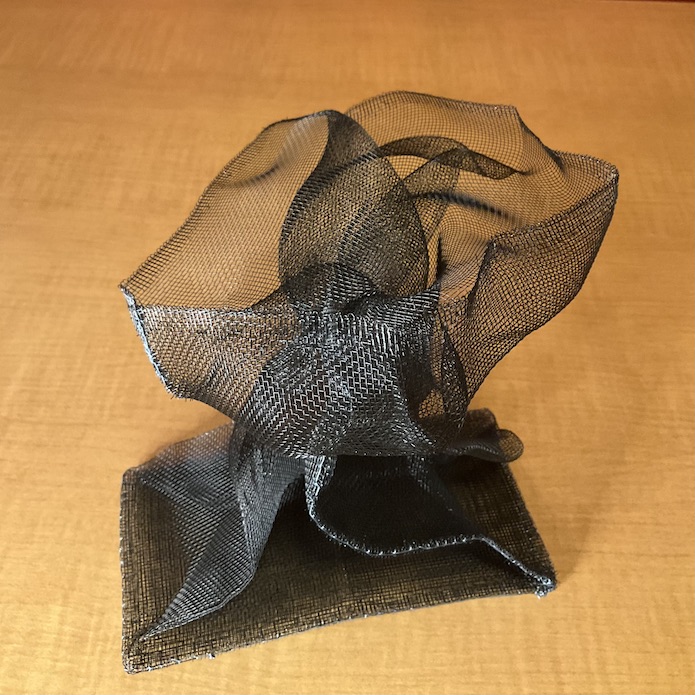
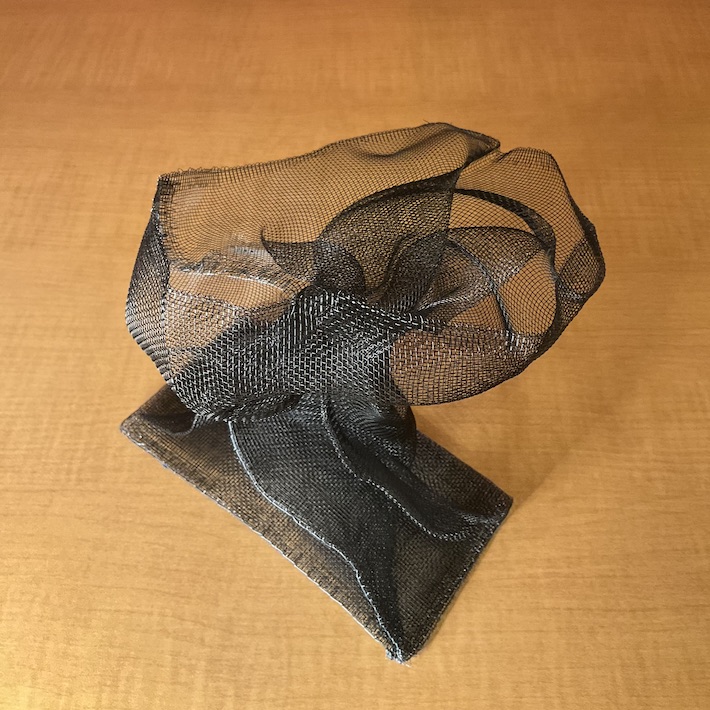
Oct 3 class — fabricate mesh bags. Skin one with plaster bandage.

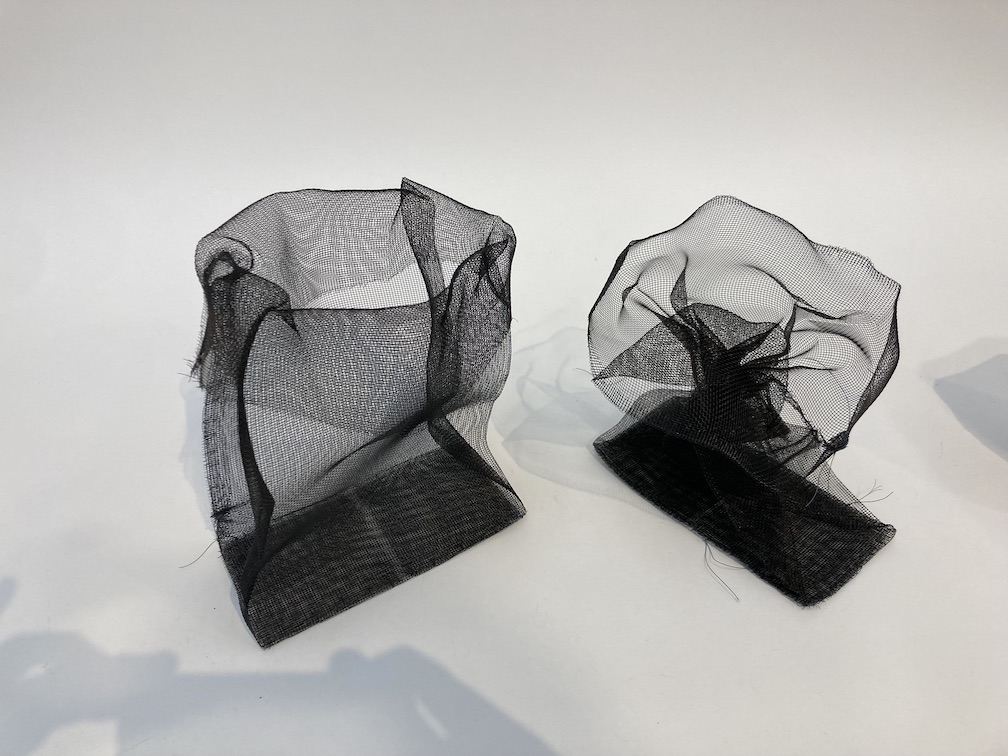
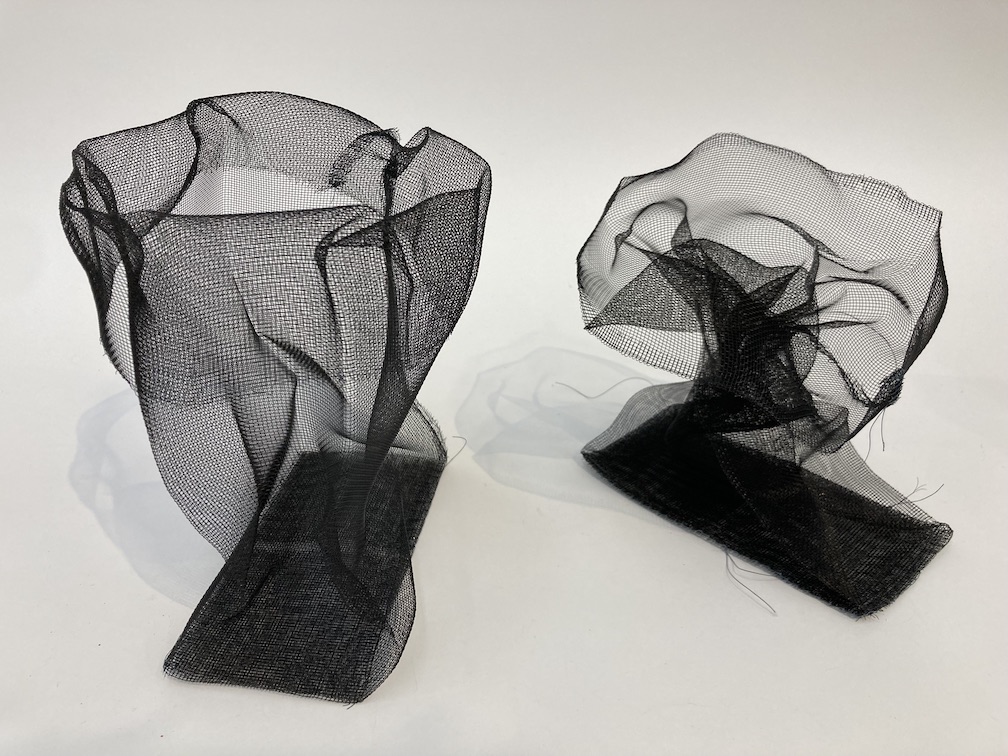
next steps… 1) mesh bag trim loose threads, play more with shape; and 2) plaster over skinned bag — hand shape exterior, try pouring into interior.
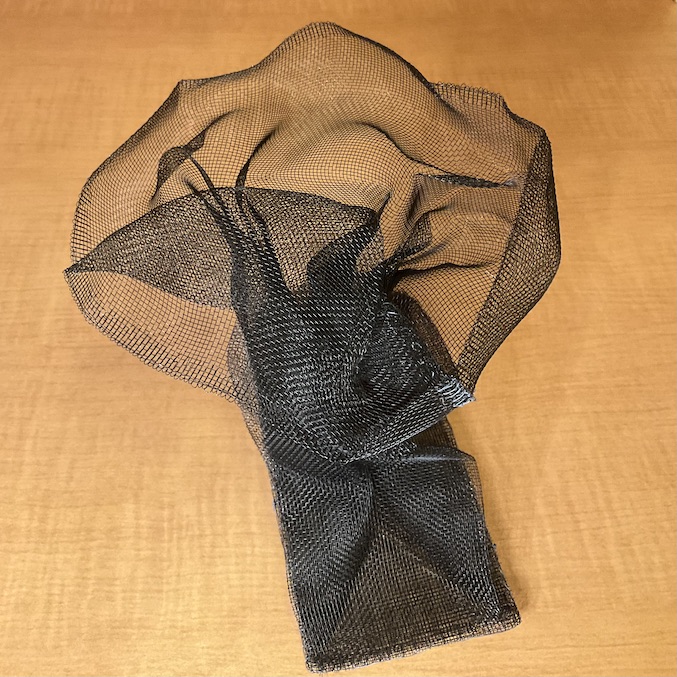
Oct 10 Mesh bag in process: threads trimmed, shape opened a bit wider:

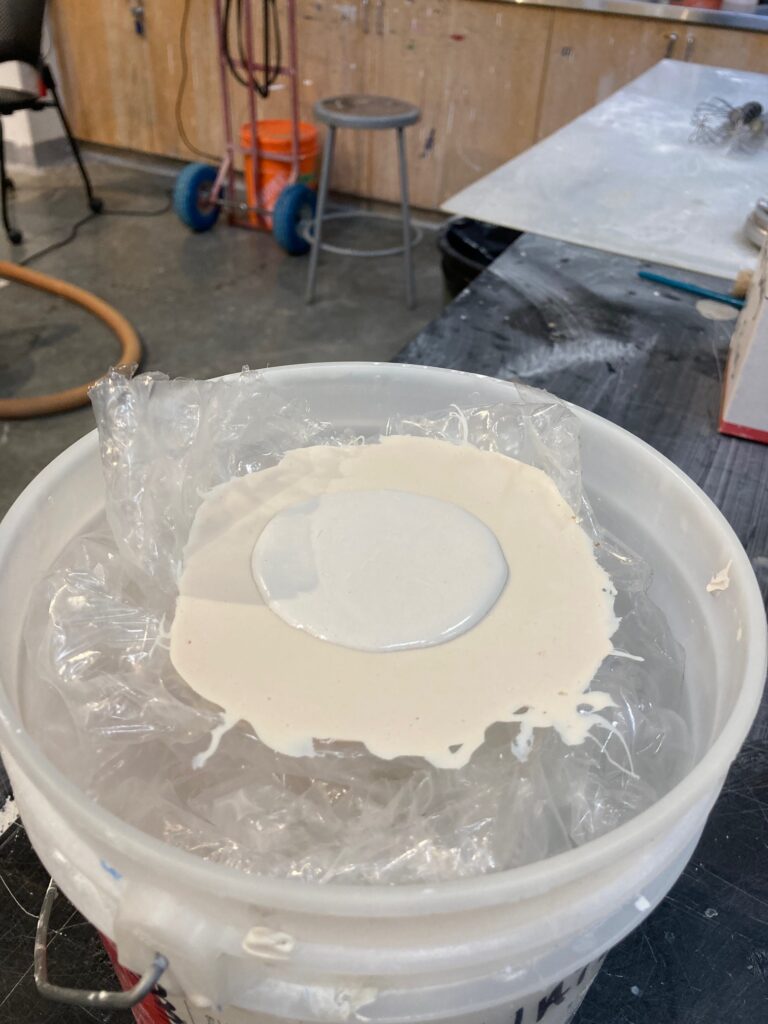
Oct 10th: Start plastering. Made two small batches in succession – poured inside of bag while still liquid, applied manually to outside. Not adept at making it smooth — more like swirls of frosting on a cake… will see how to work with that once dry and I start sanding…
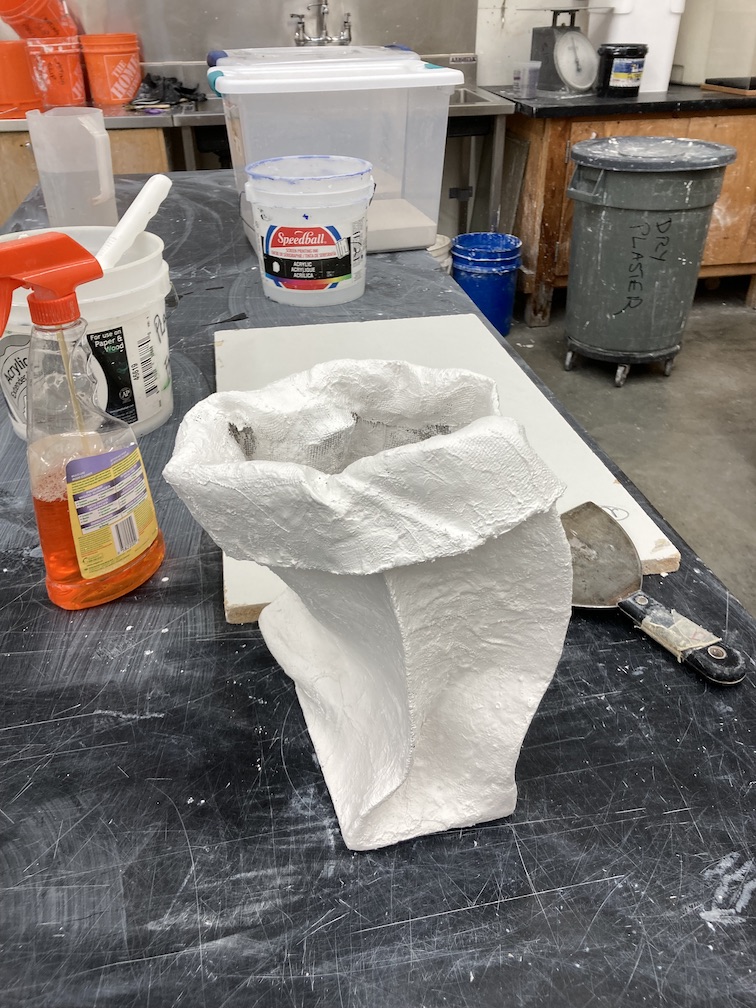
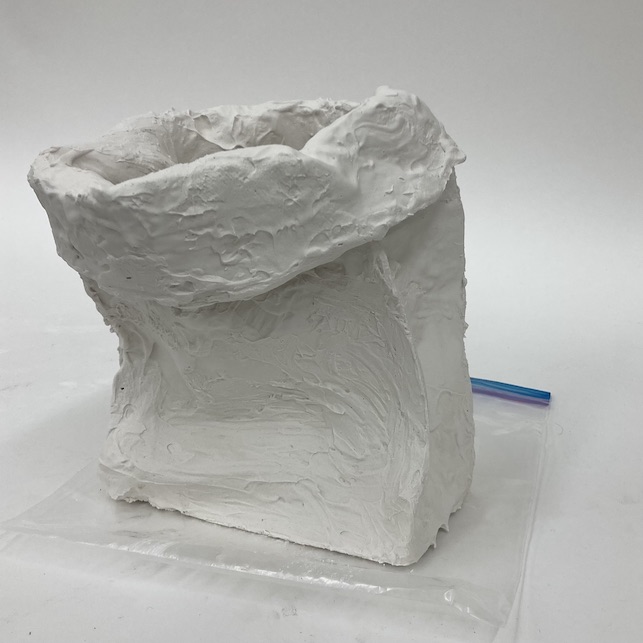
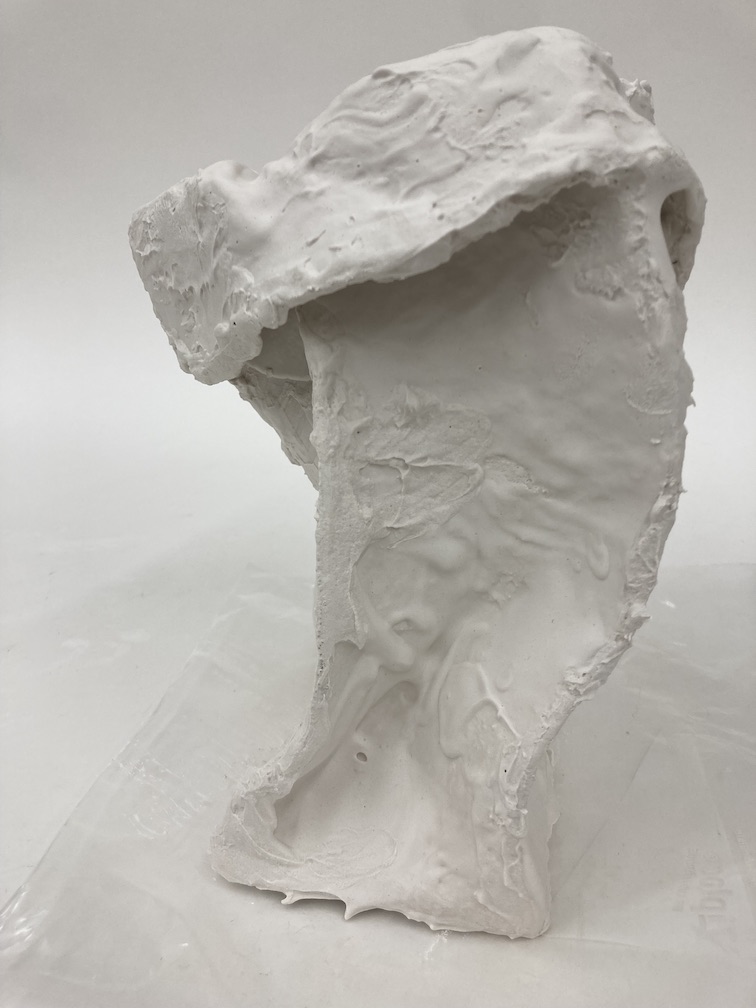
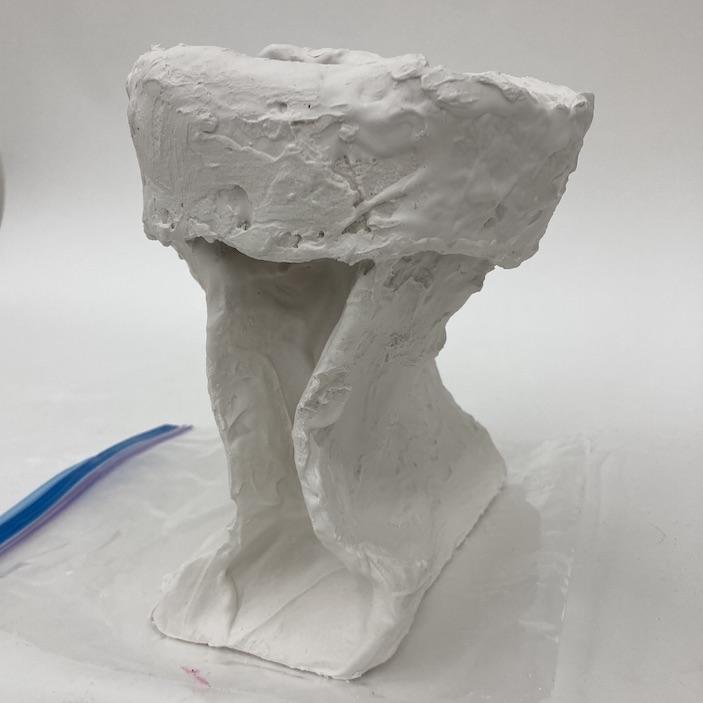
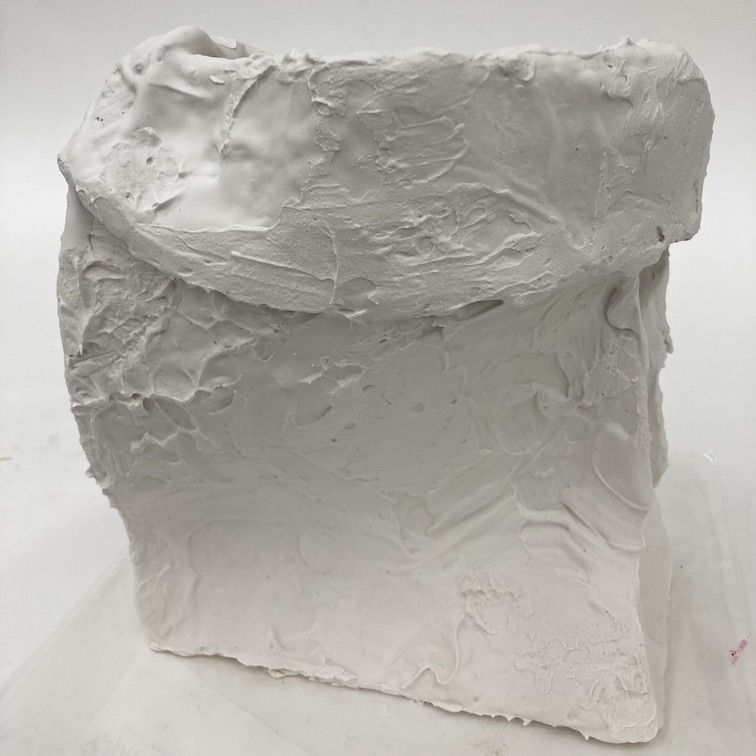
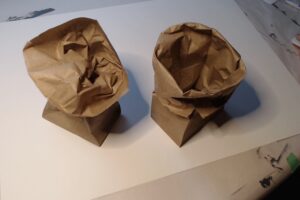
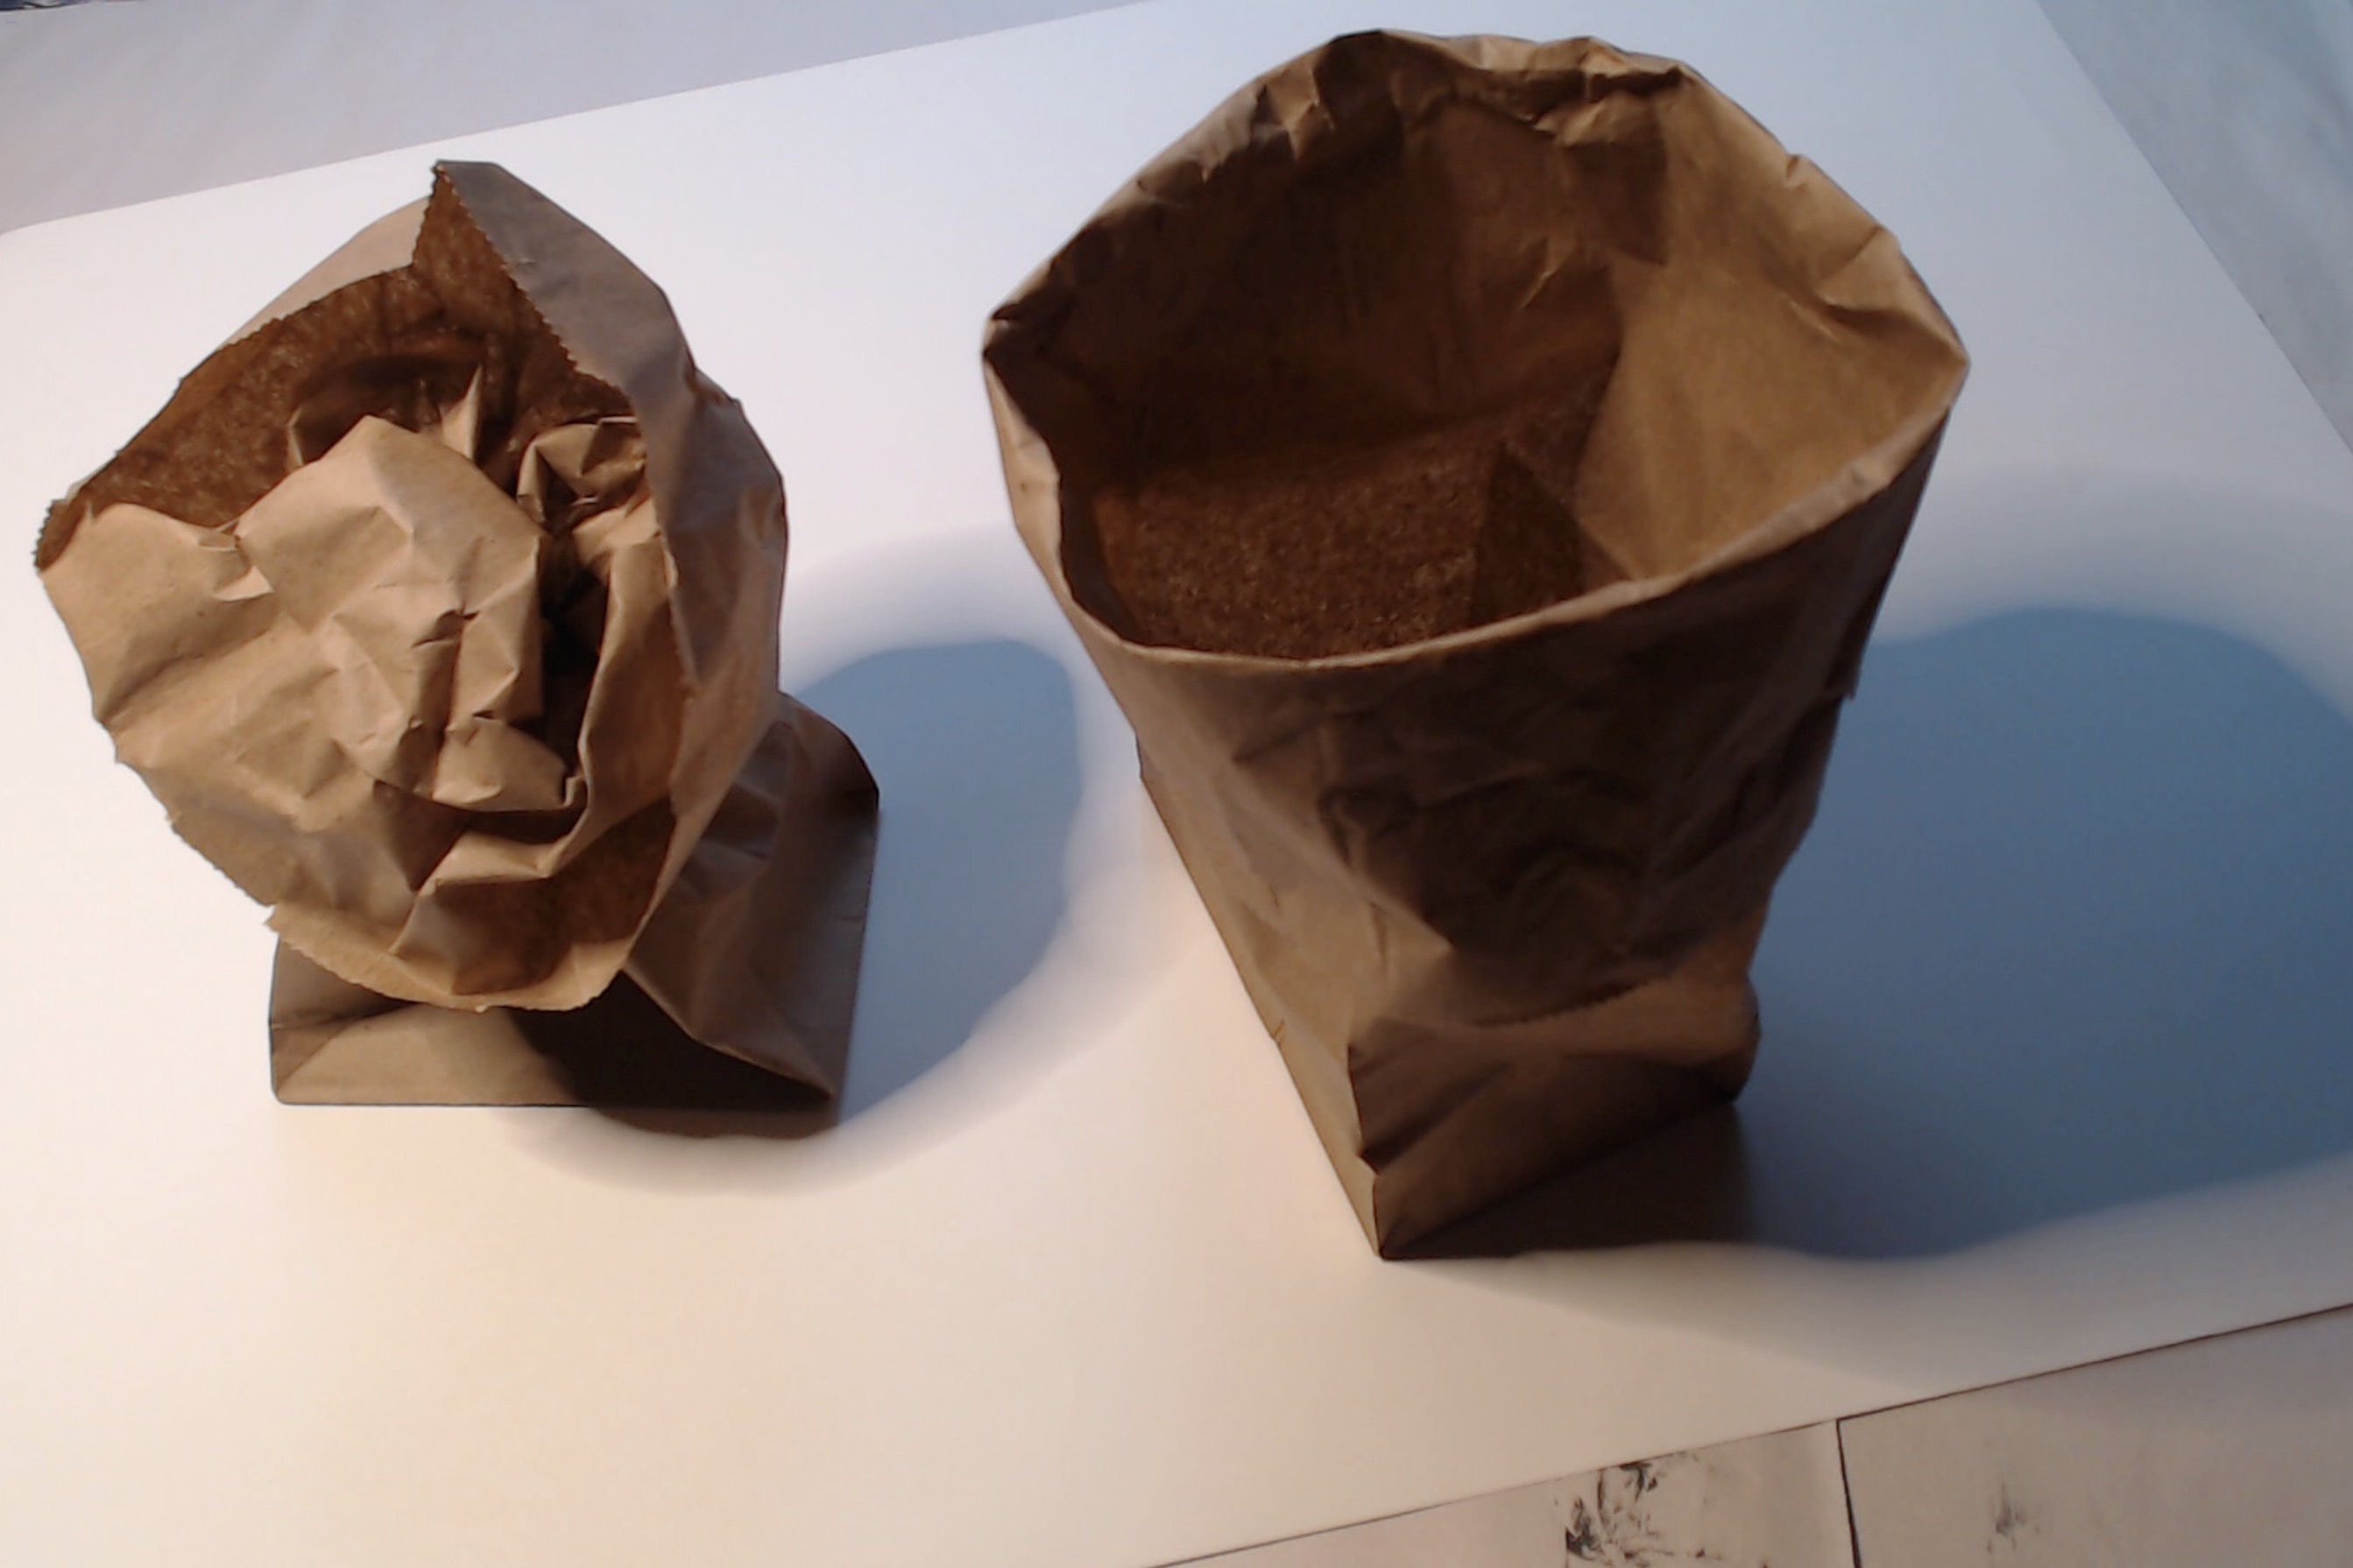
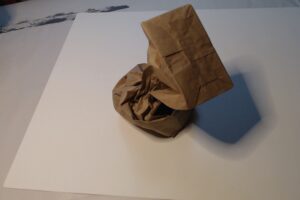
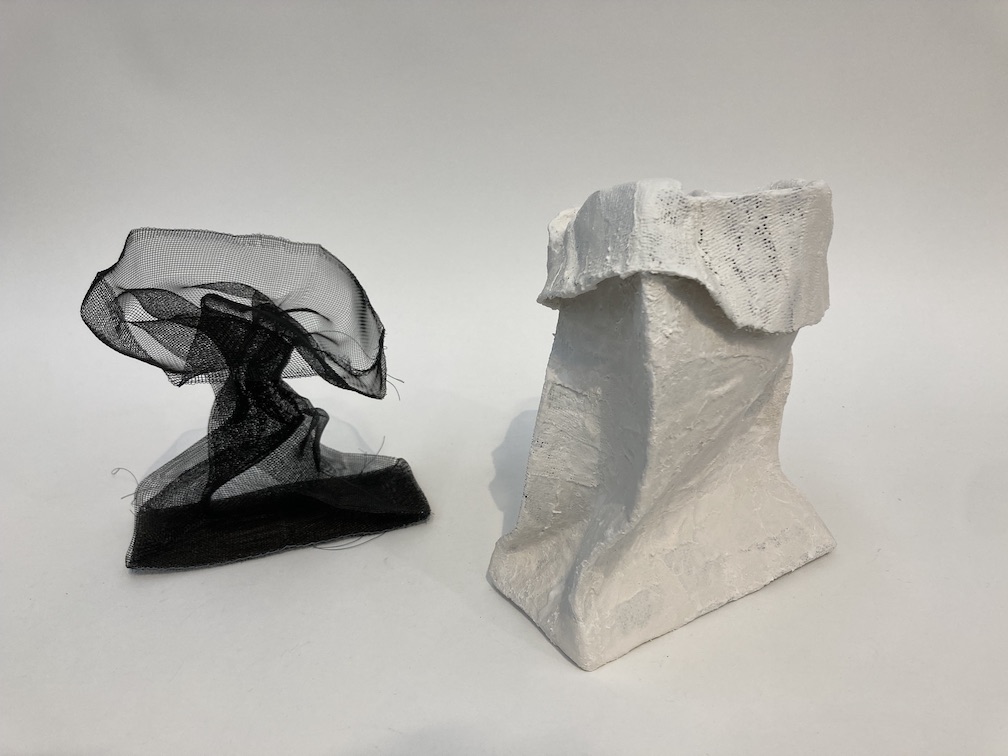
October 17th in studio: Dry sanding to start – some areas look like worn rock (Angela’s description) and others still like peaks of frosting. Also, one area on the rim was cracked during my wet-sand last week. One more plaster pour today would allow repair of the broken rim, fill some hollows and holes, and make more depth of plaster to allow further sanding for a smoother finish. See below — photos of the plaster patch, the (still damp) plastered shape positioned with the mesh bag to play with negative space… However, will still do one more sanding before I call it done…


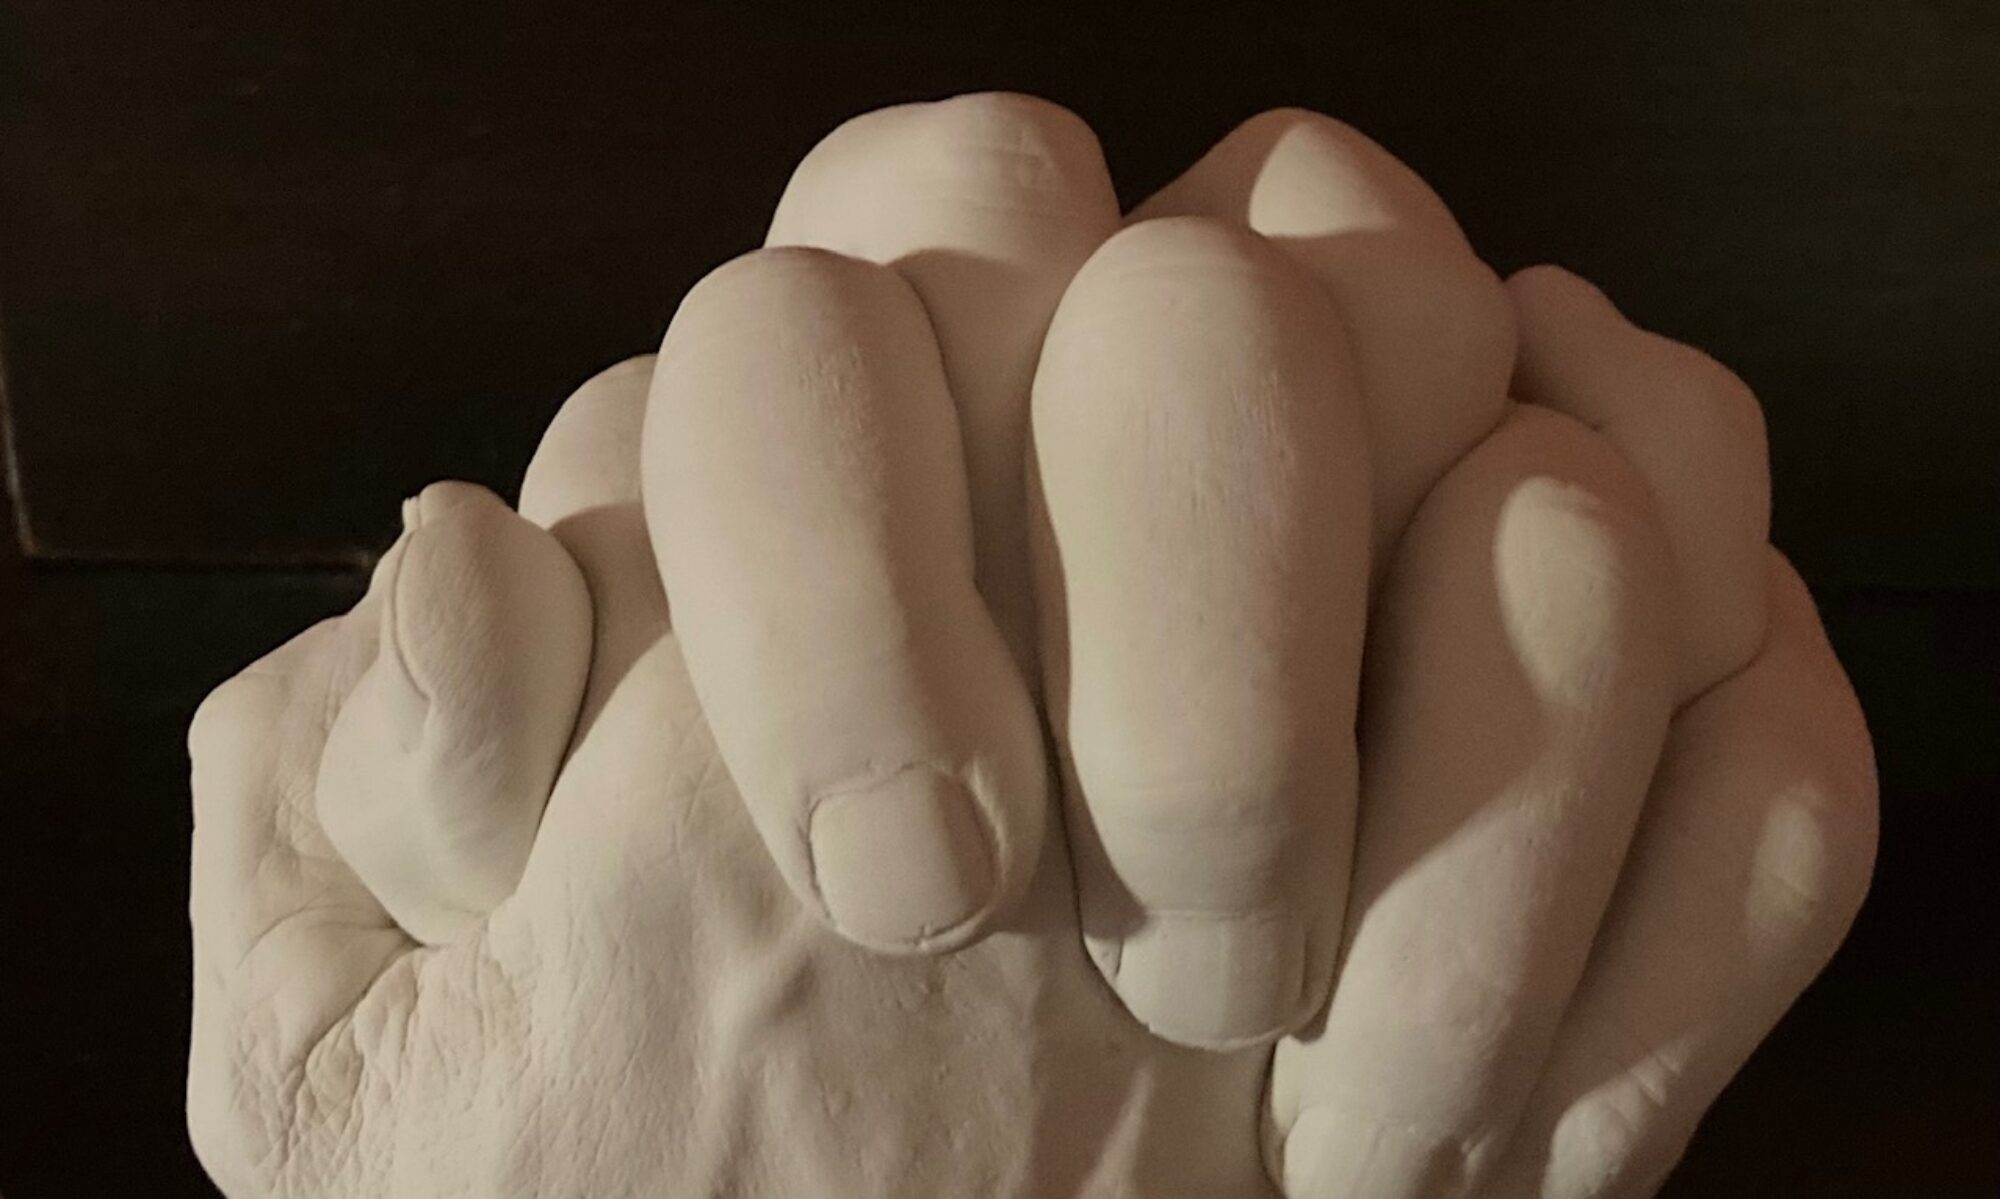
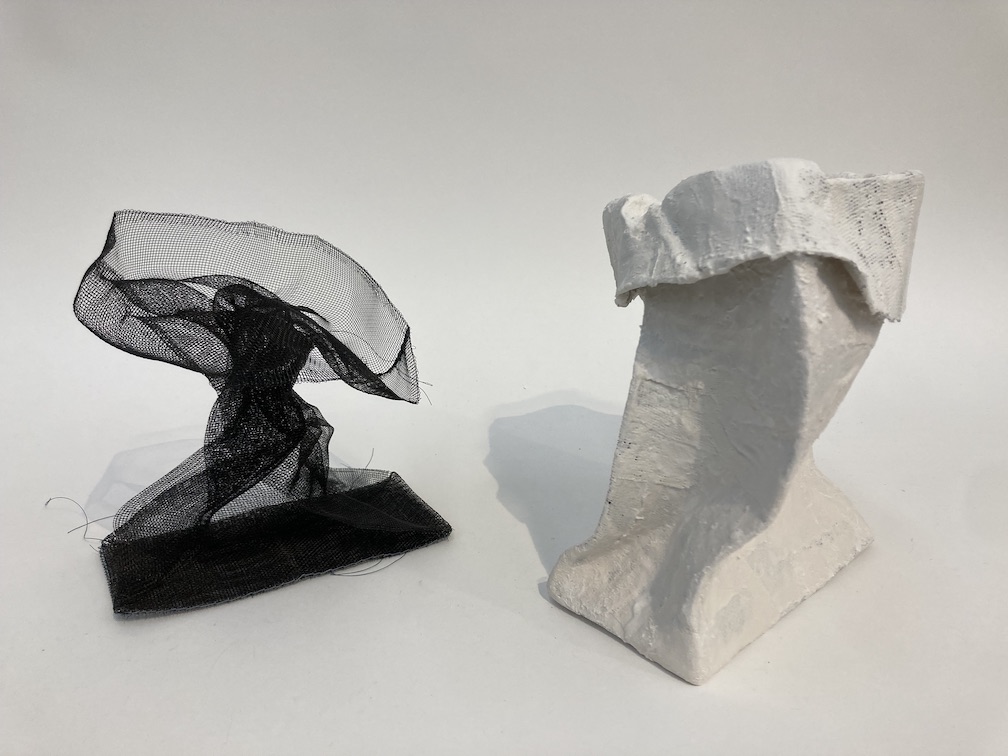
FINAL VERSIONS: sanded to a point where the plaster read to me as rock that is worn enough that it is not jagged but not fully smooth – it retains raised areas or seams or soft bumps. See below:


Reflections October 23: I was uncomfortable with plaster work to start — unfamiliar, hard to control, and not much idea what to go after since I had little idea how malleable wet plaster would be nor how sanding would go. So, a decision to just go with the process, learn along the way. Earlier ideas that I would make it a very smooth surface weren’t workable given the thickness/lumpiness of my original plastering – so it became about exploring what texture could be interesting given the limits I was working in. And… I discovered (or really, re-discovered) that I like working within limits. I think it stimulates my curiosity to find the beautiful thing that exists inside those limits. Given (theoretically) no limits on what my hands or tools or medium could do, I think I’d freeze up from too many options. Limits are my friend. As for the mesh bag half of the project — it kind of slipped my main attention, because the plaster was such an overwhelming learning curve — but I will say that it had really pleasant echoes of Unit 1, being more like working with many lines all at once. The artists I had researched last unit made much use of woven wires or sheets of wire in their works — that’s what I was doing with the wire screening material for this bag. It’s something I might come back to. It would be interesting to include silver and black coloured wire mesh to amp up the shadowing possibilities.

FIN 130 Unit 1
UNIT 1 EXERCISE 1: Drawing in Space (everyday object)
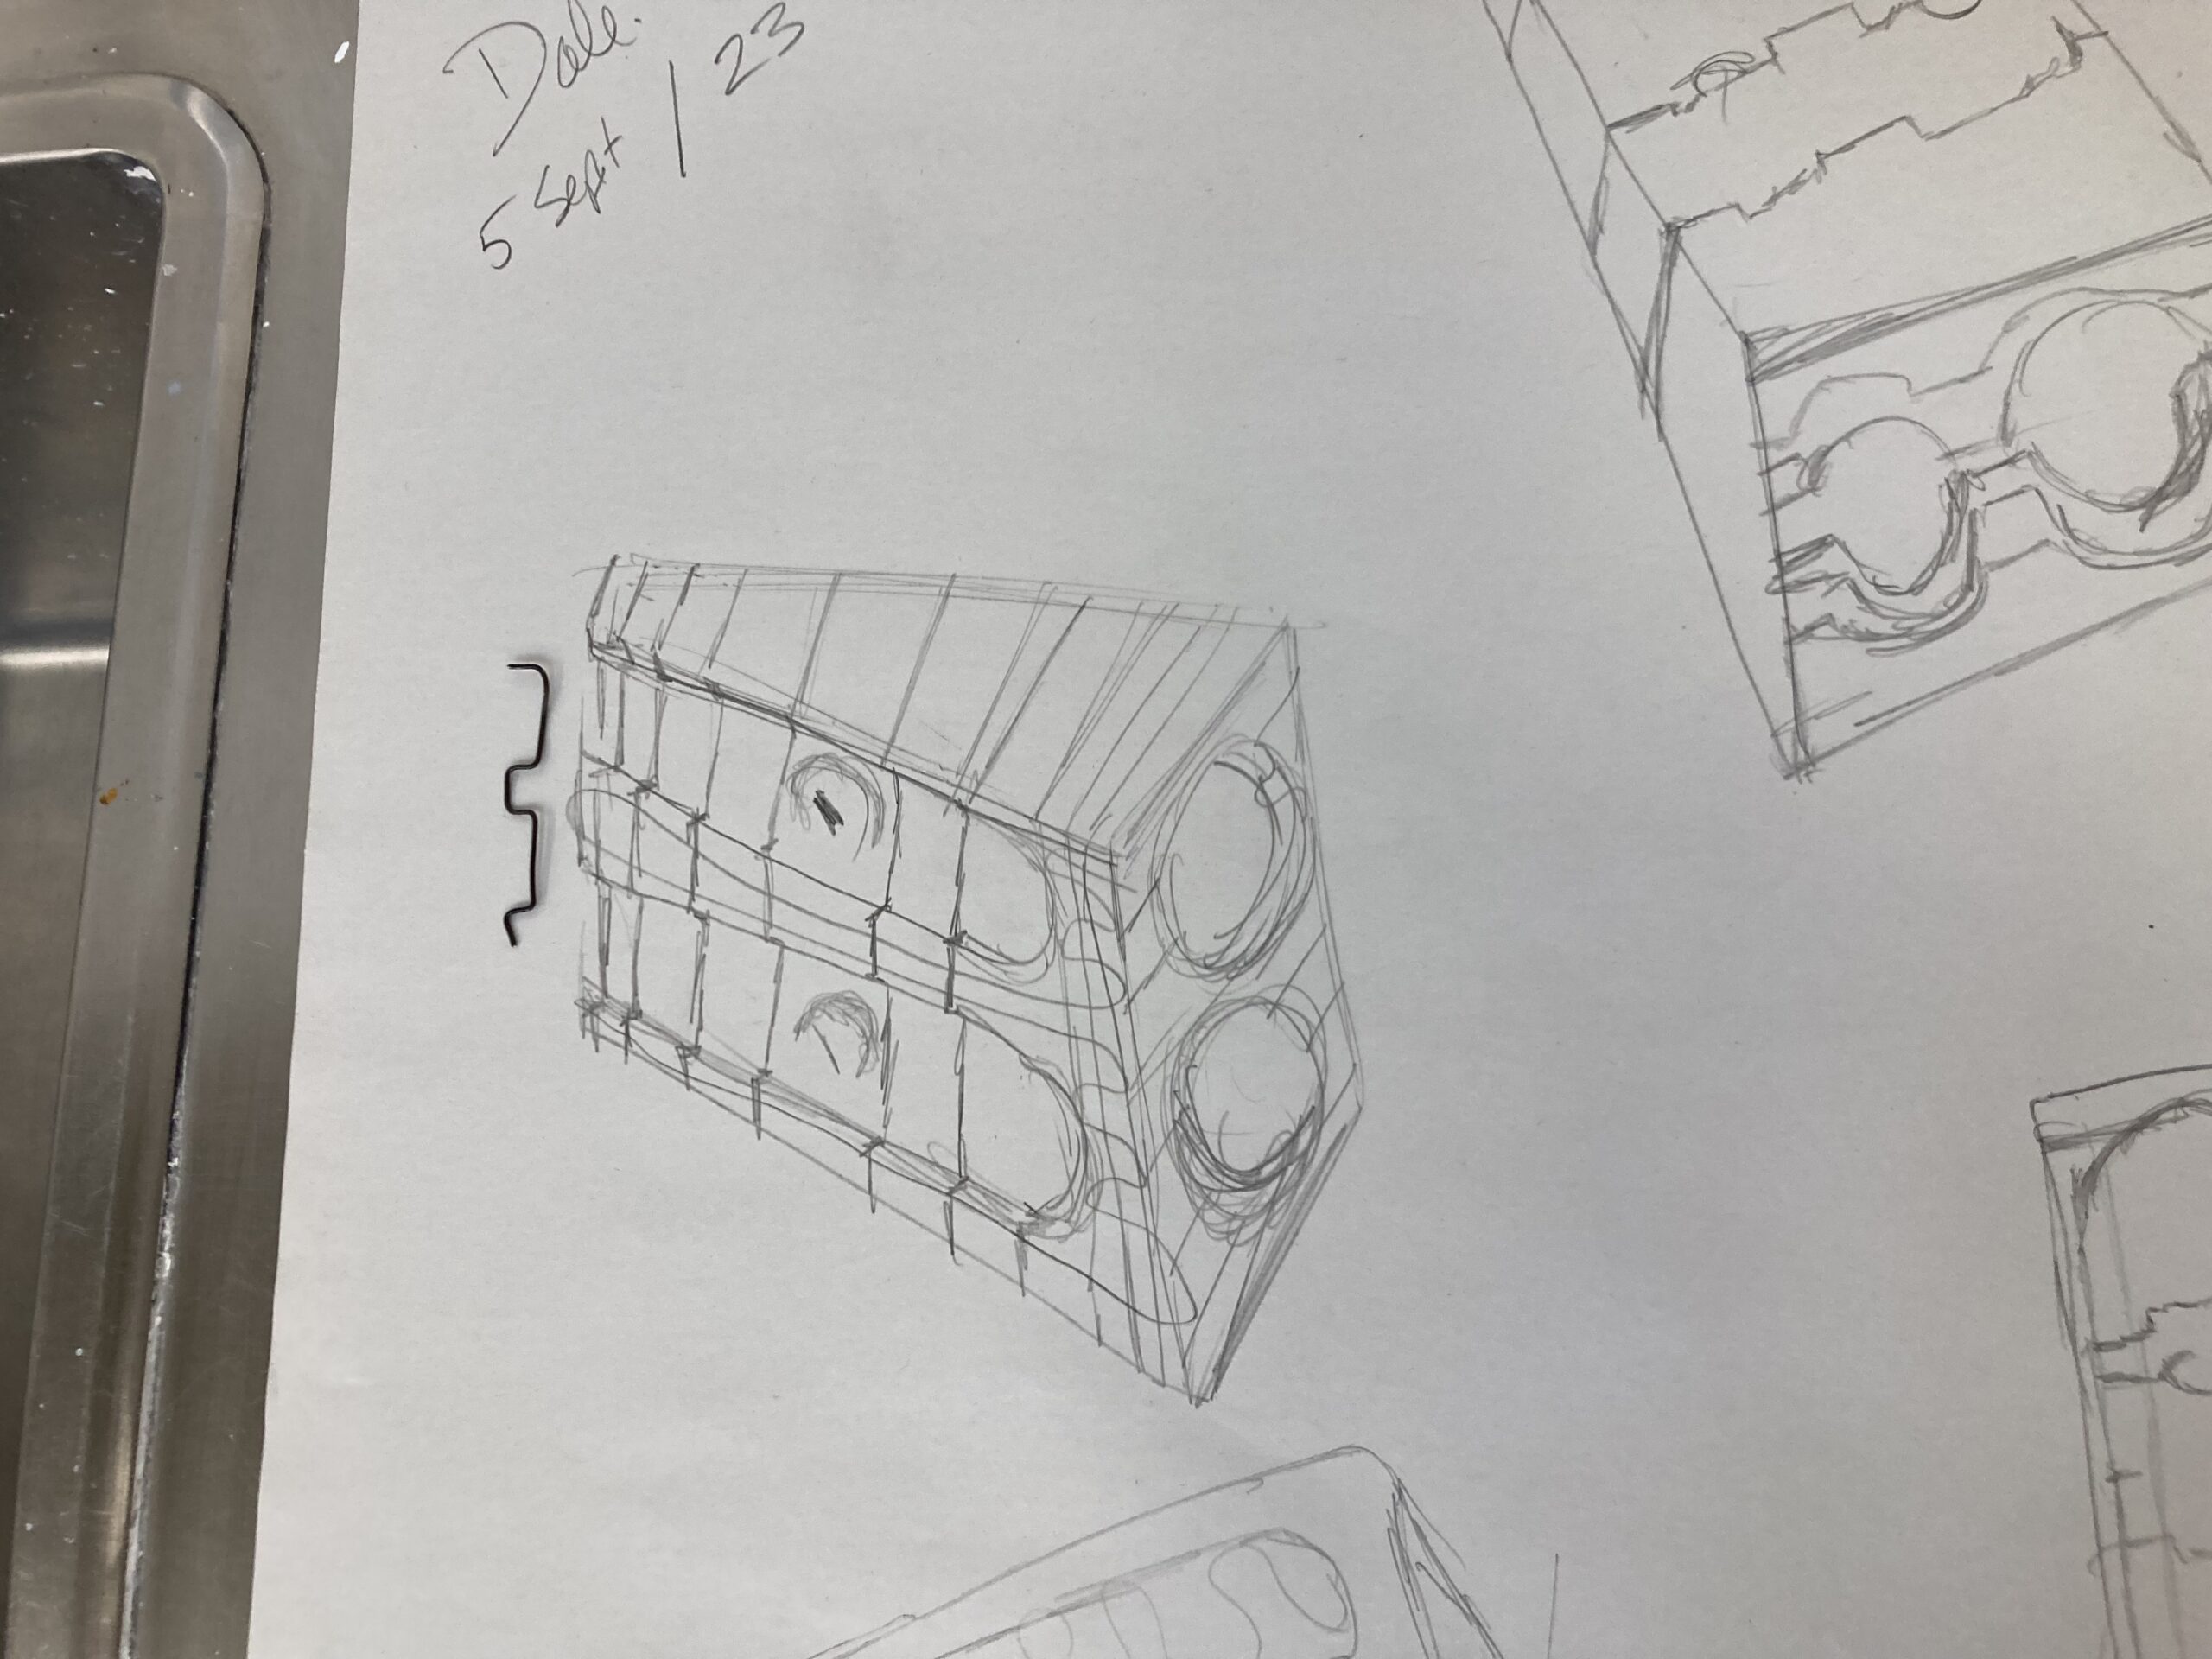
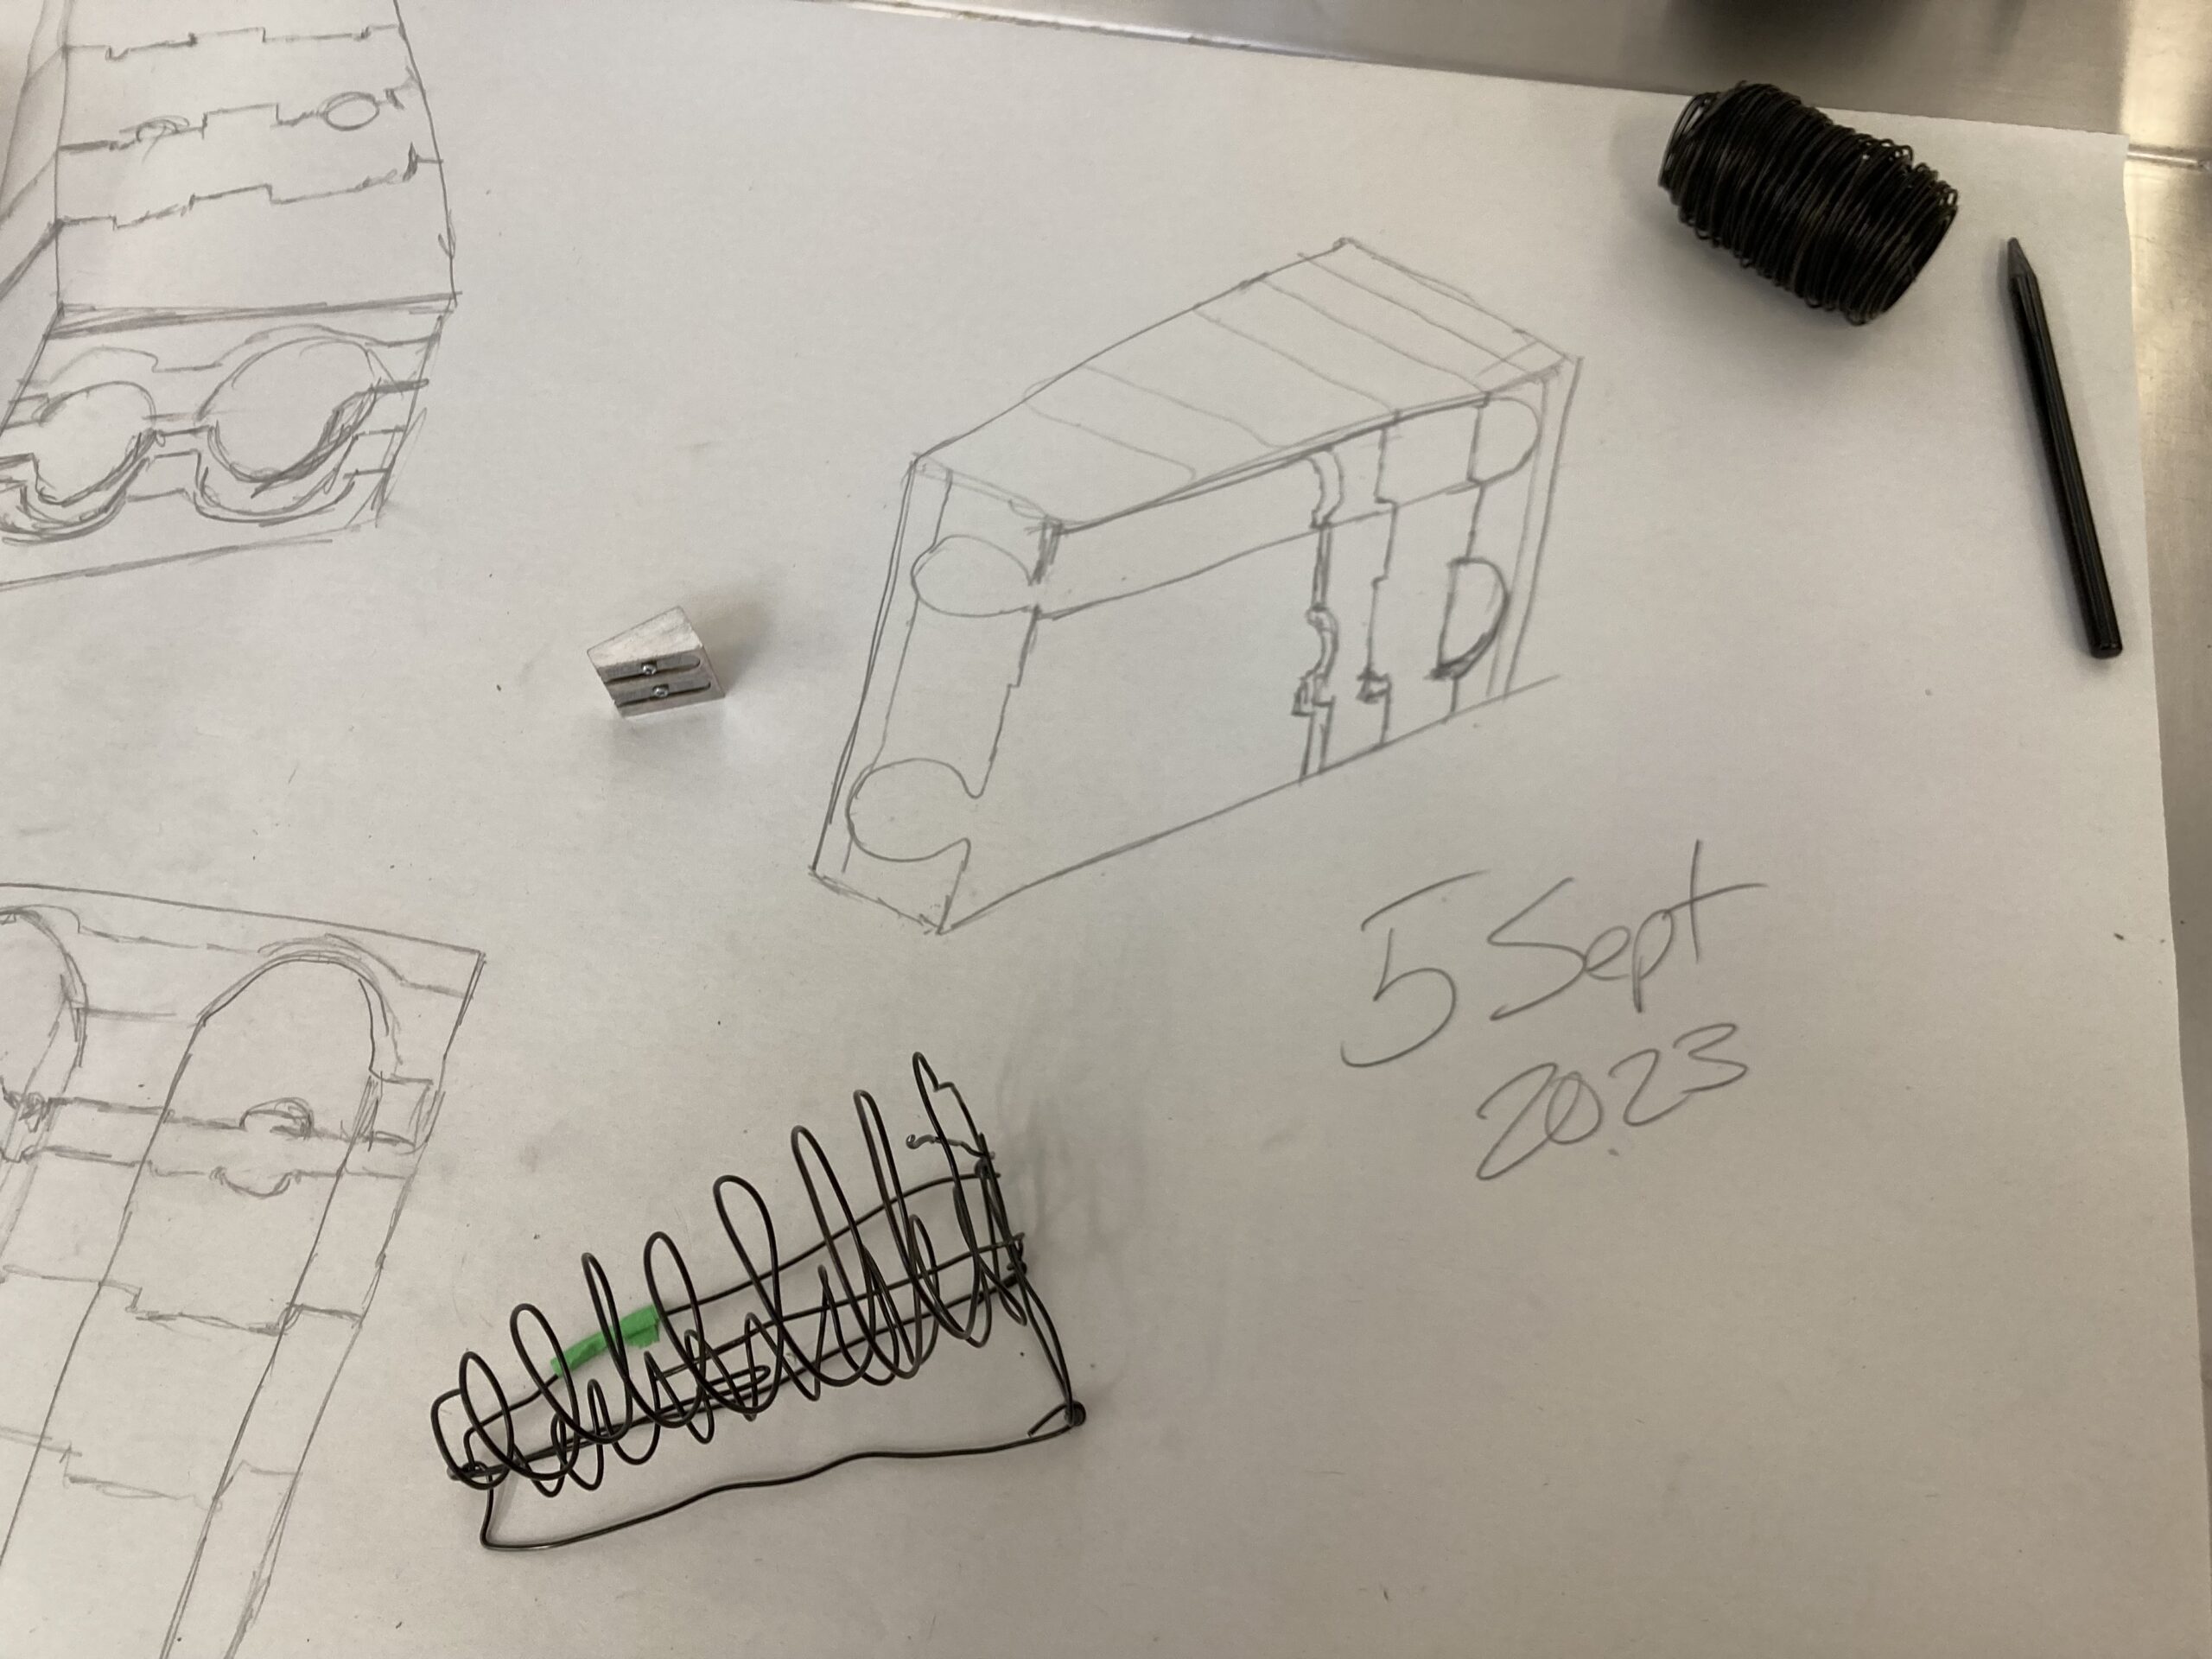
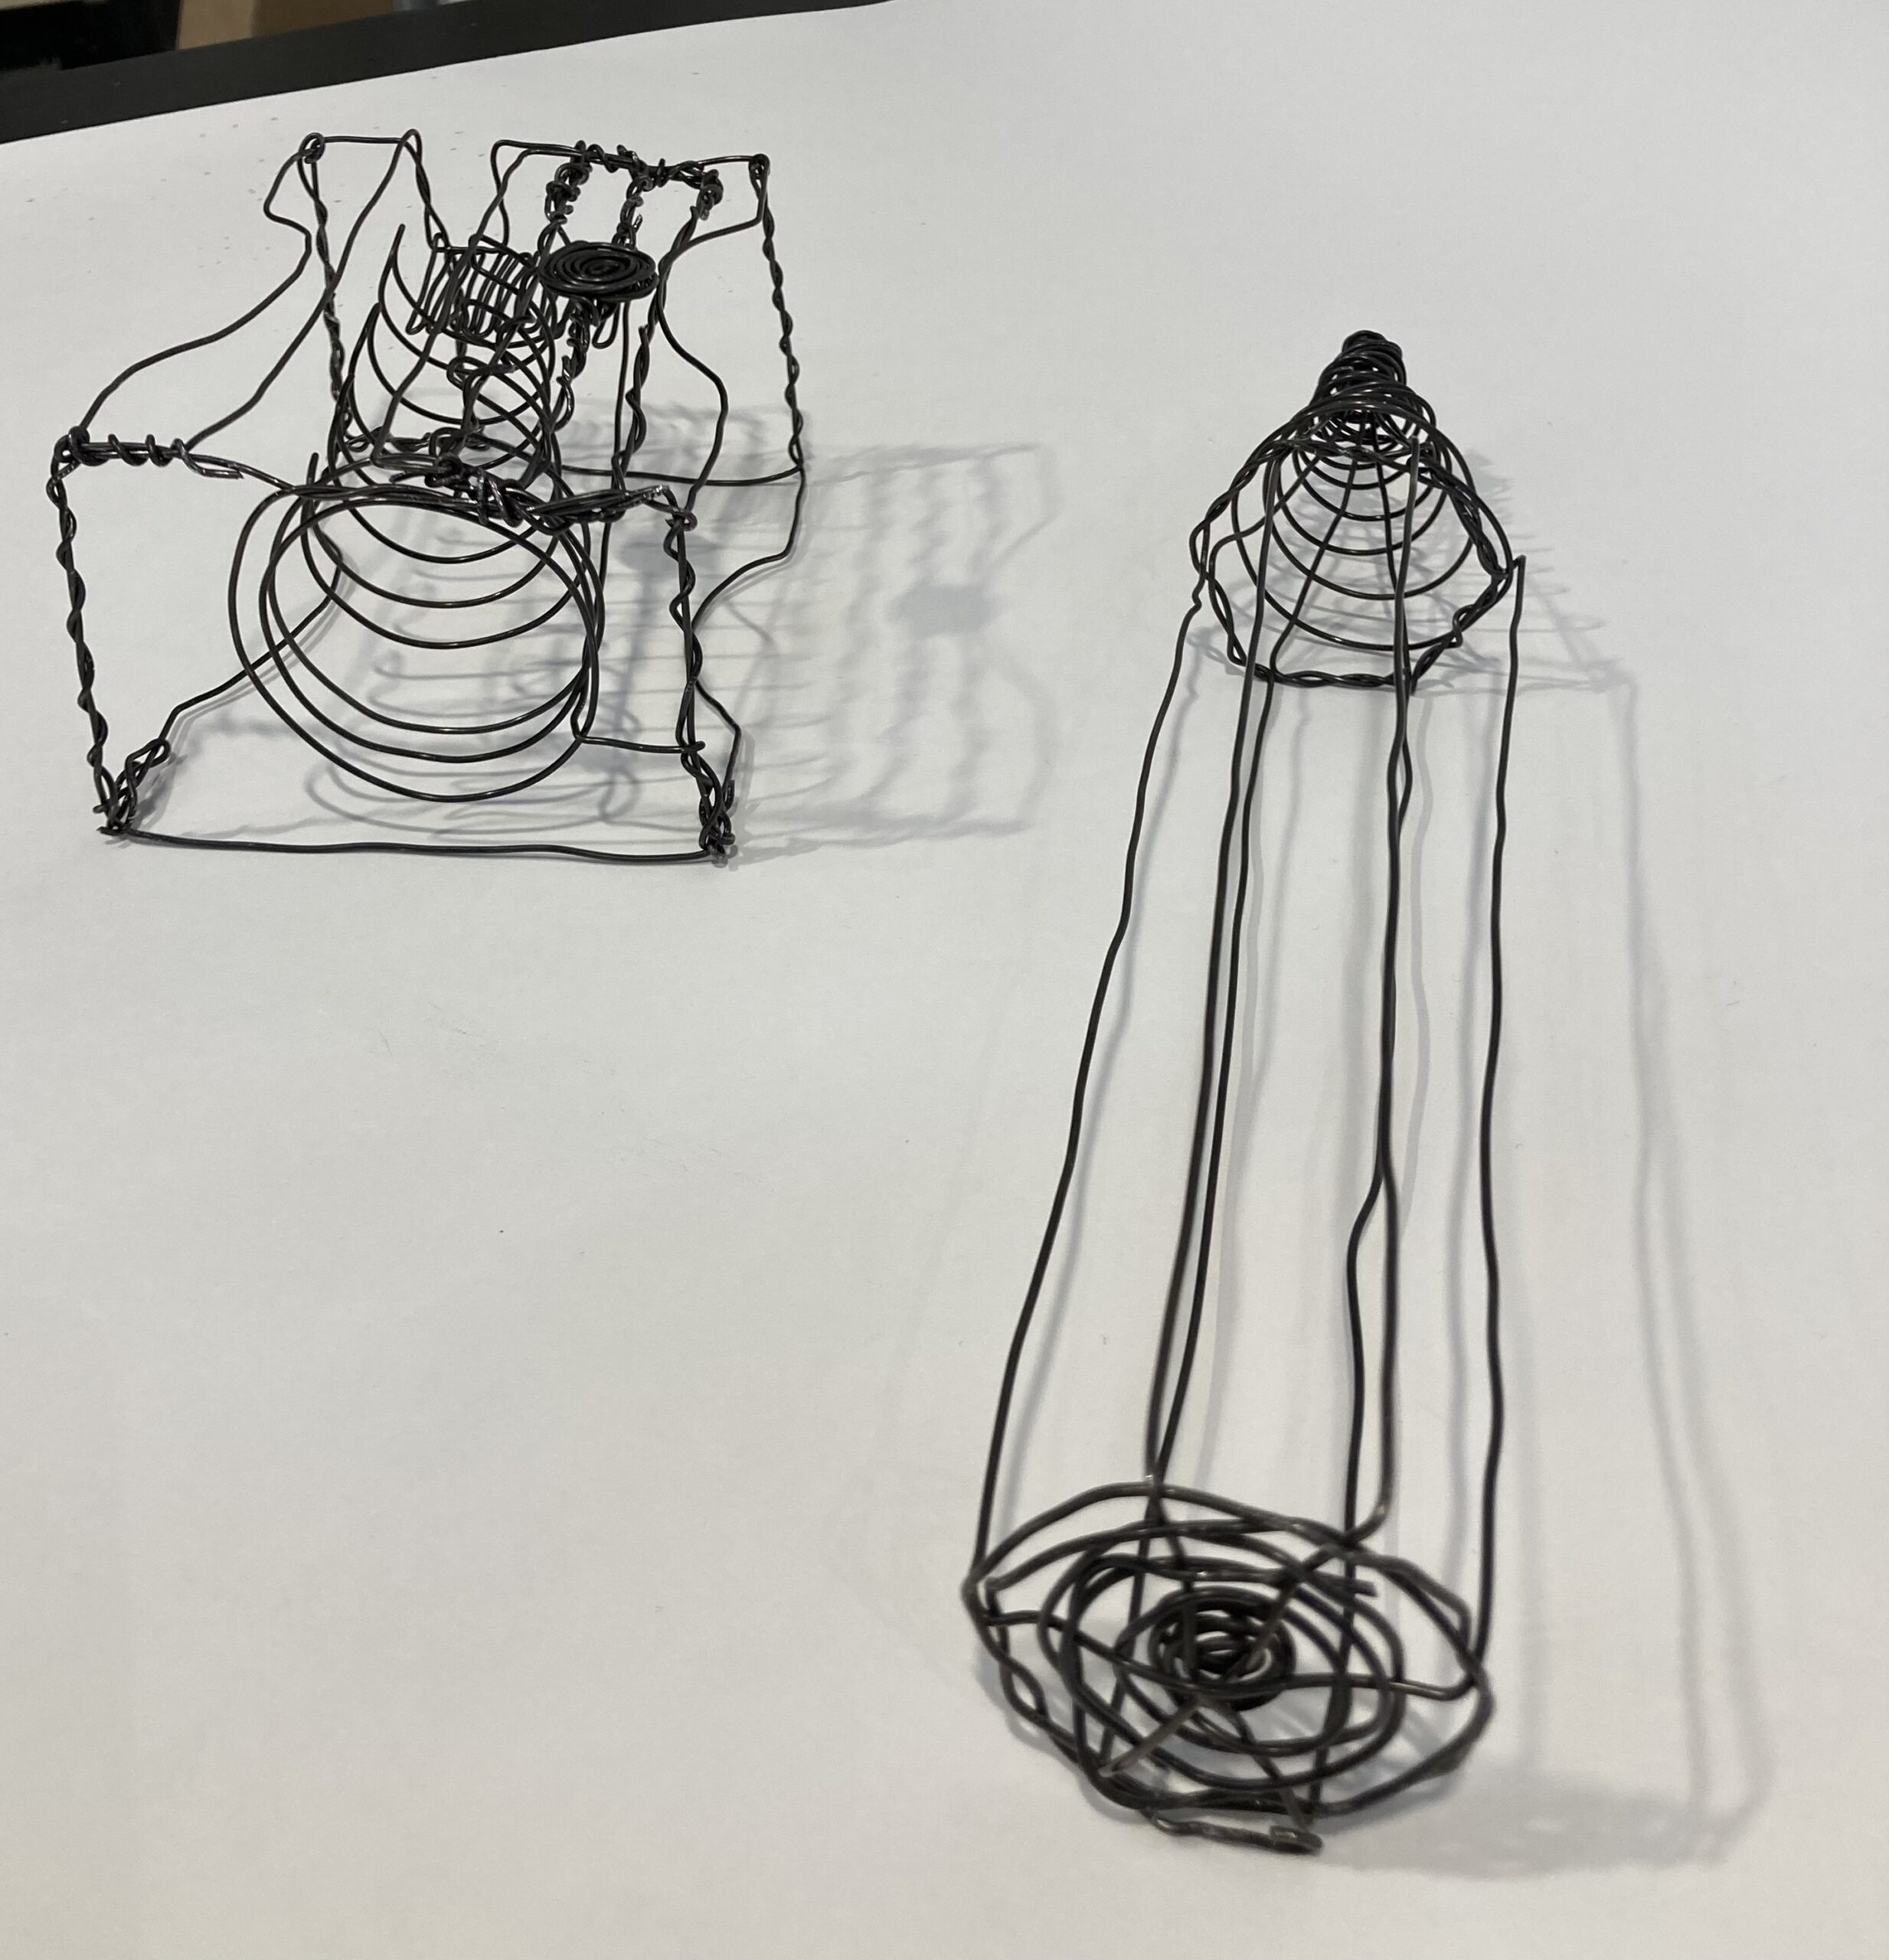
Work in-class from Sept 5th: pencil sharpener sketches and initial wire/3D line trials
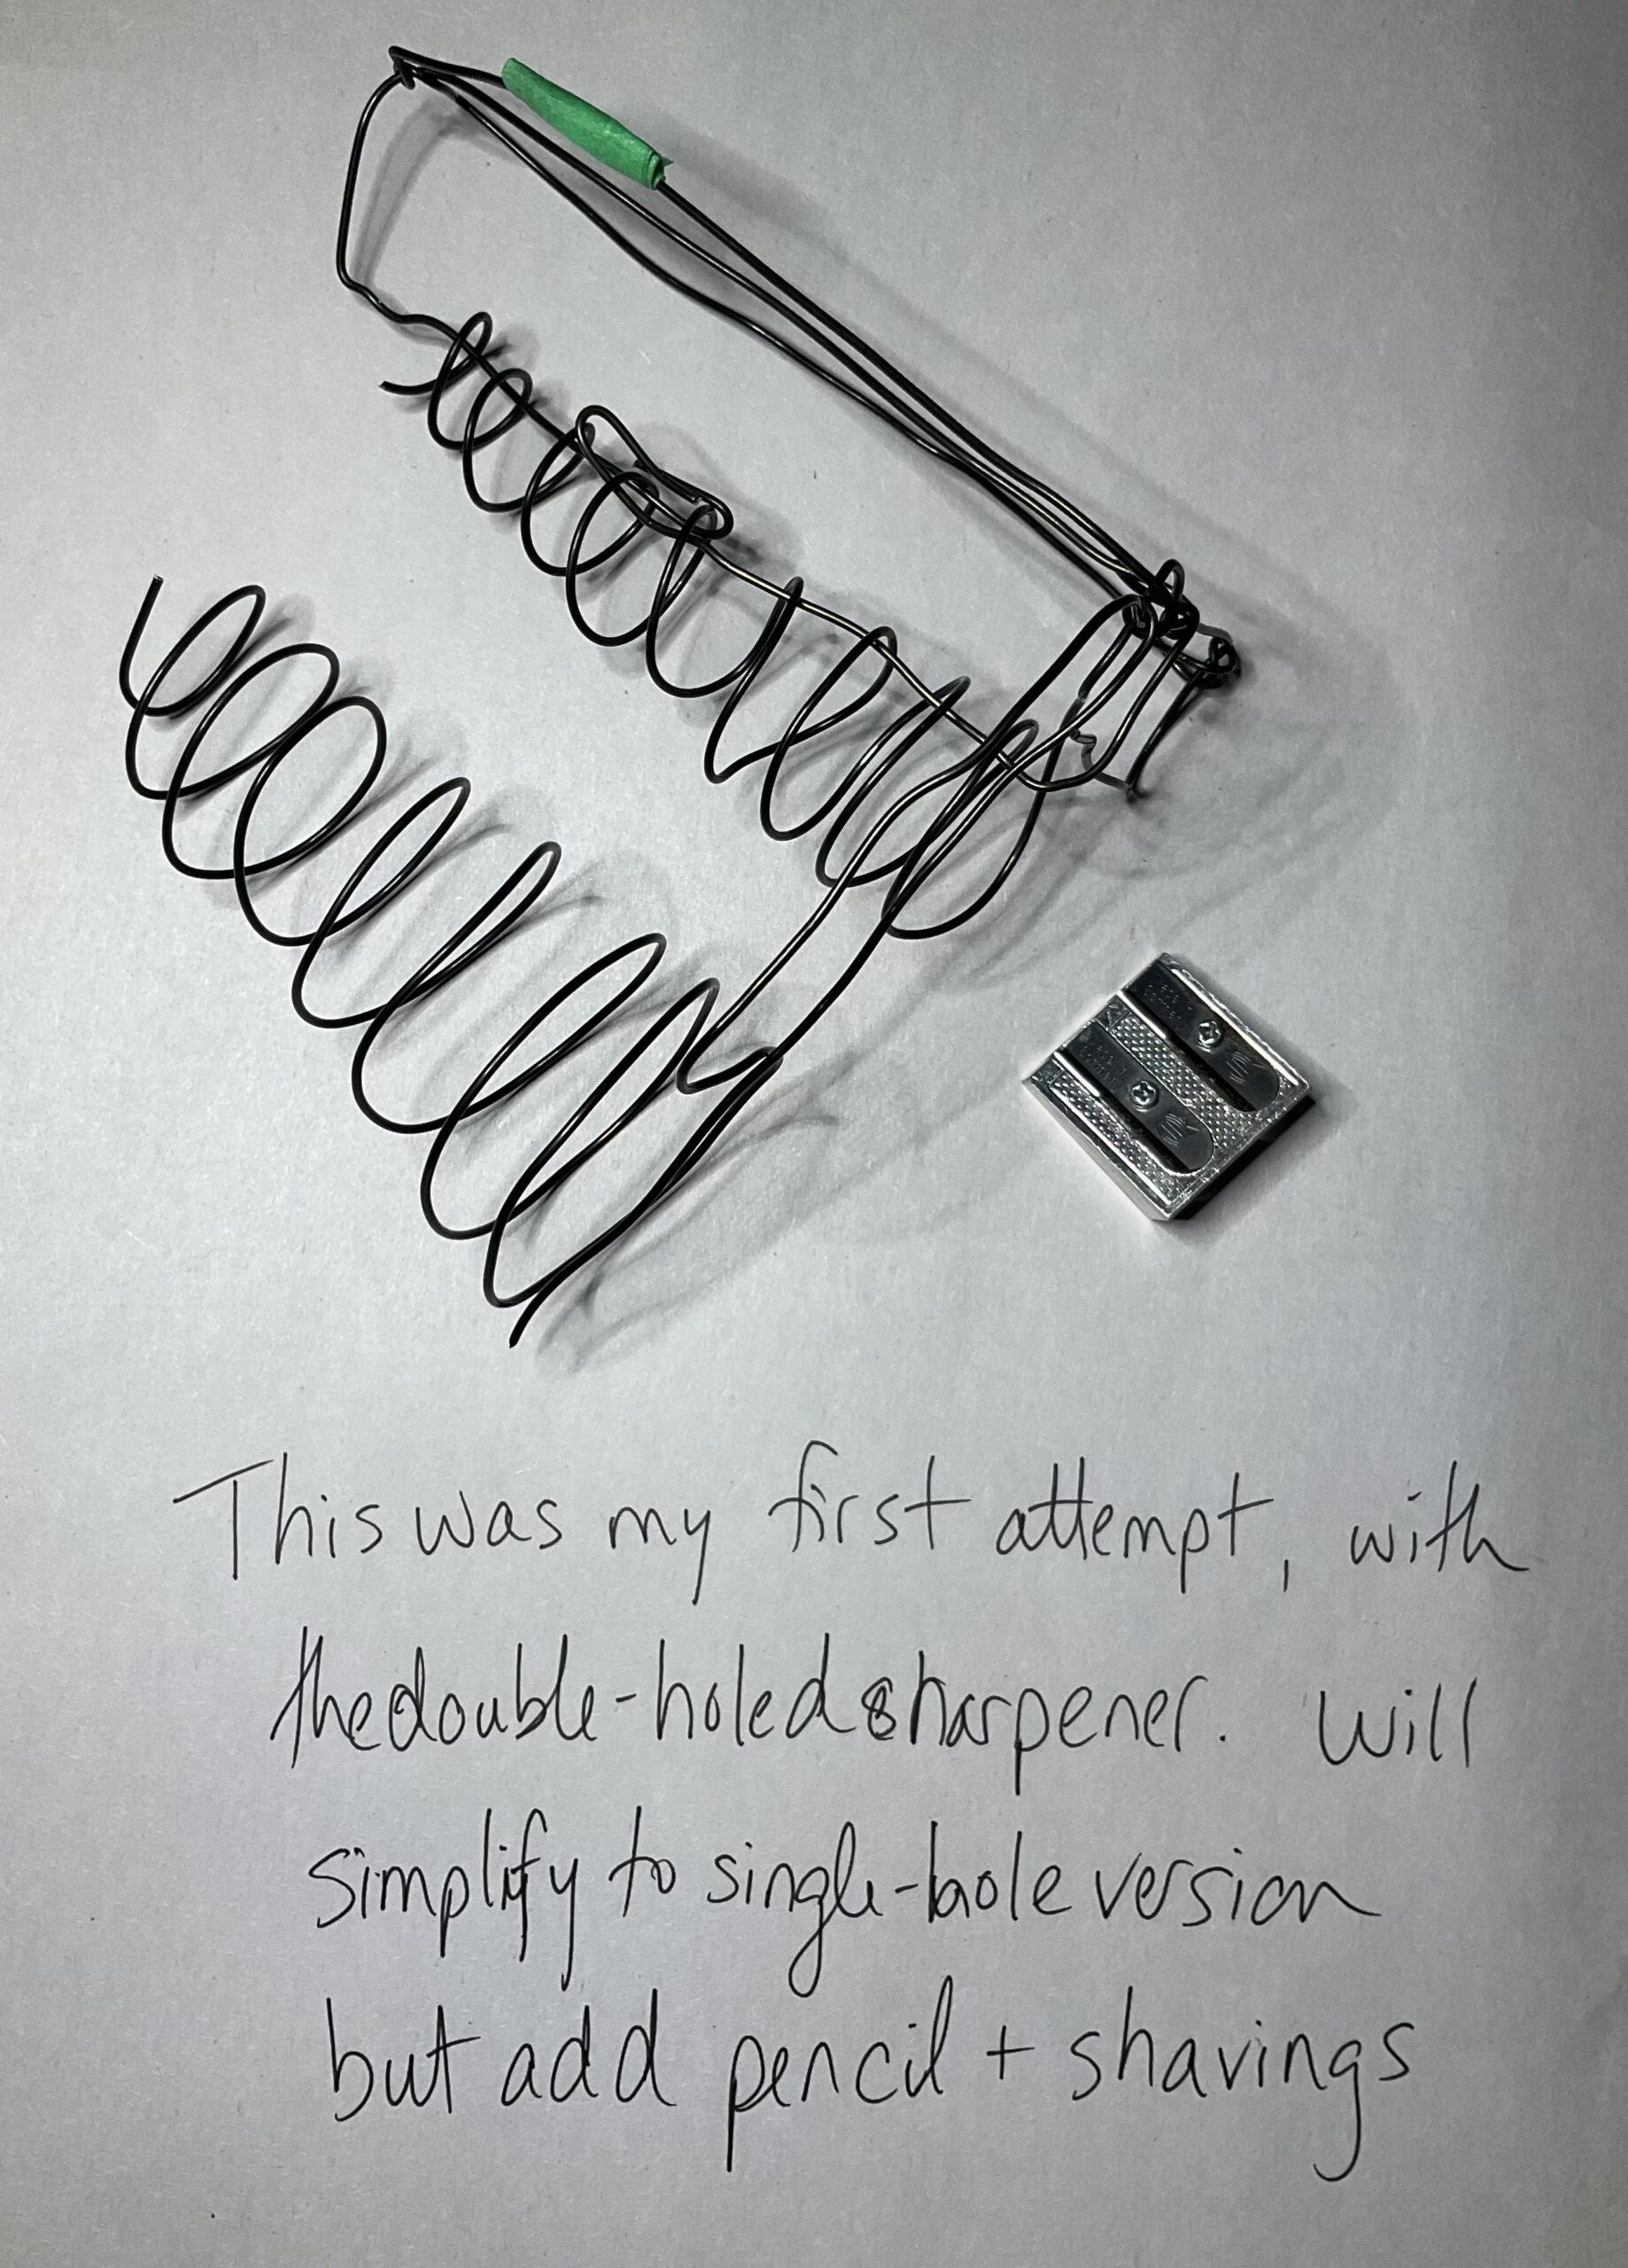
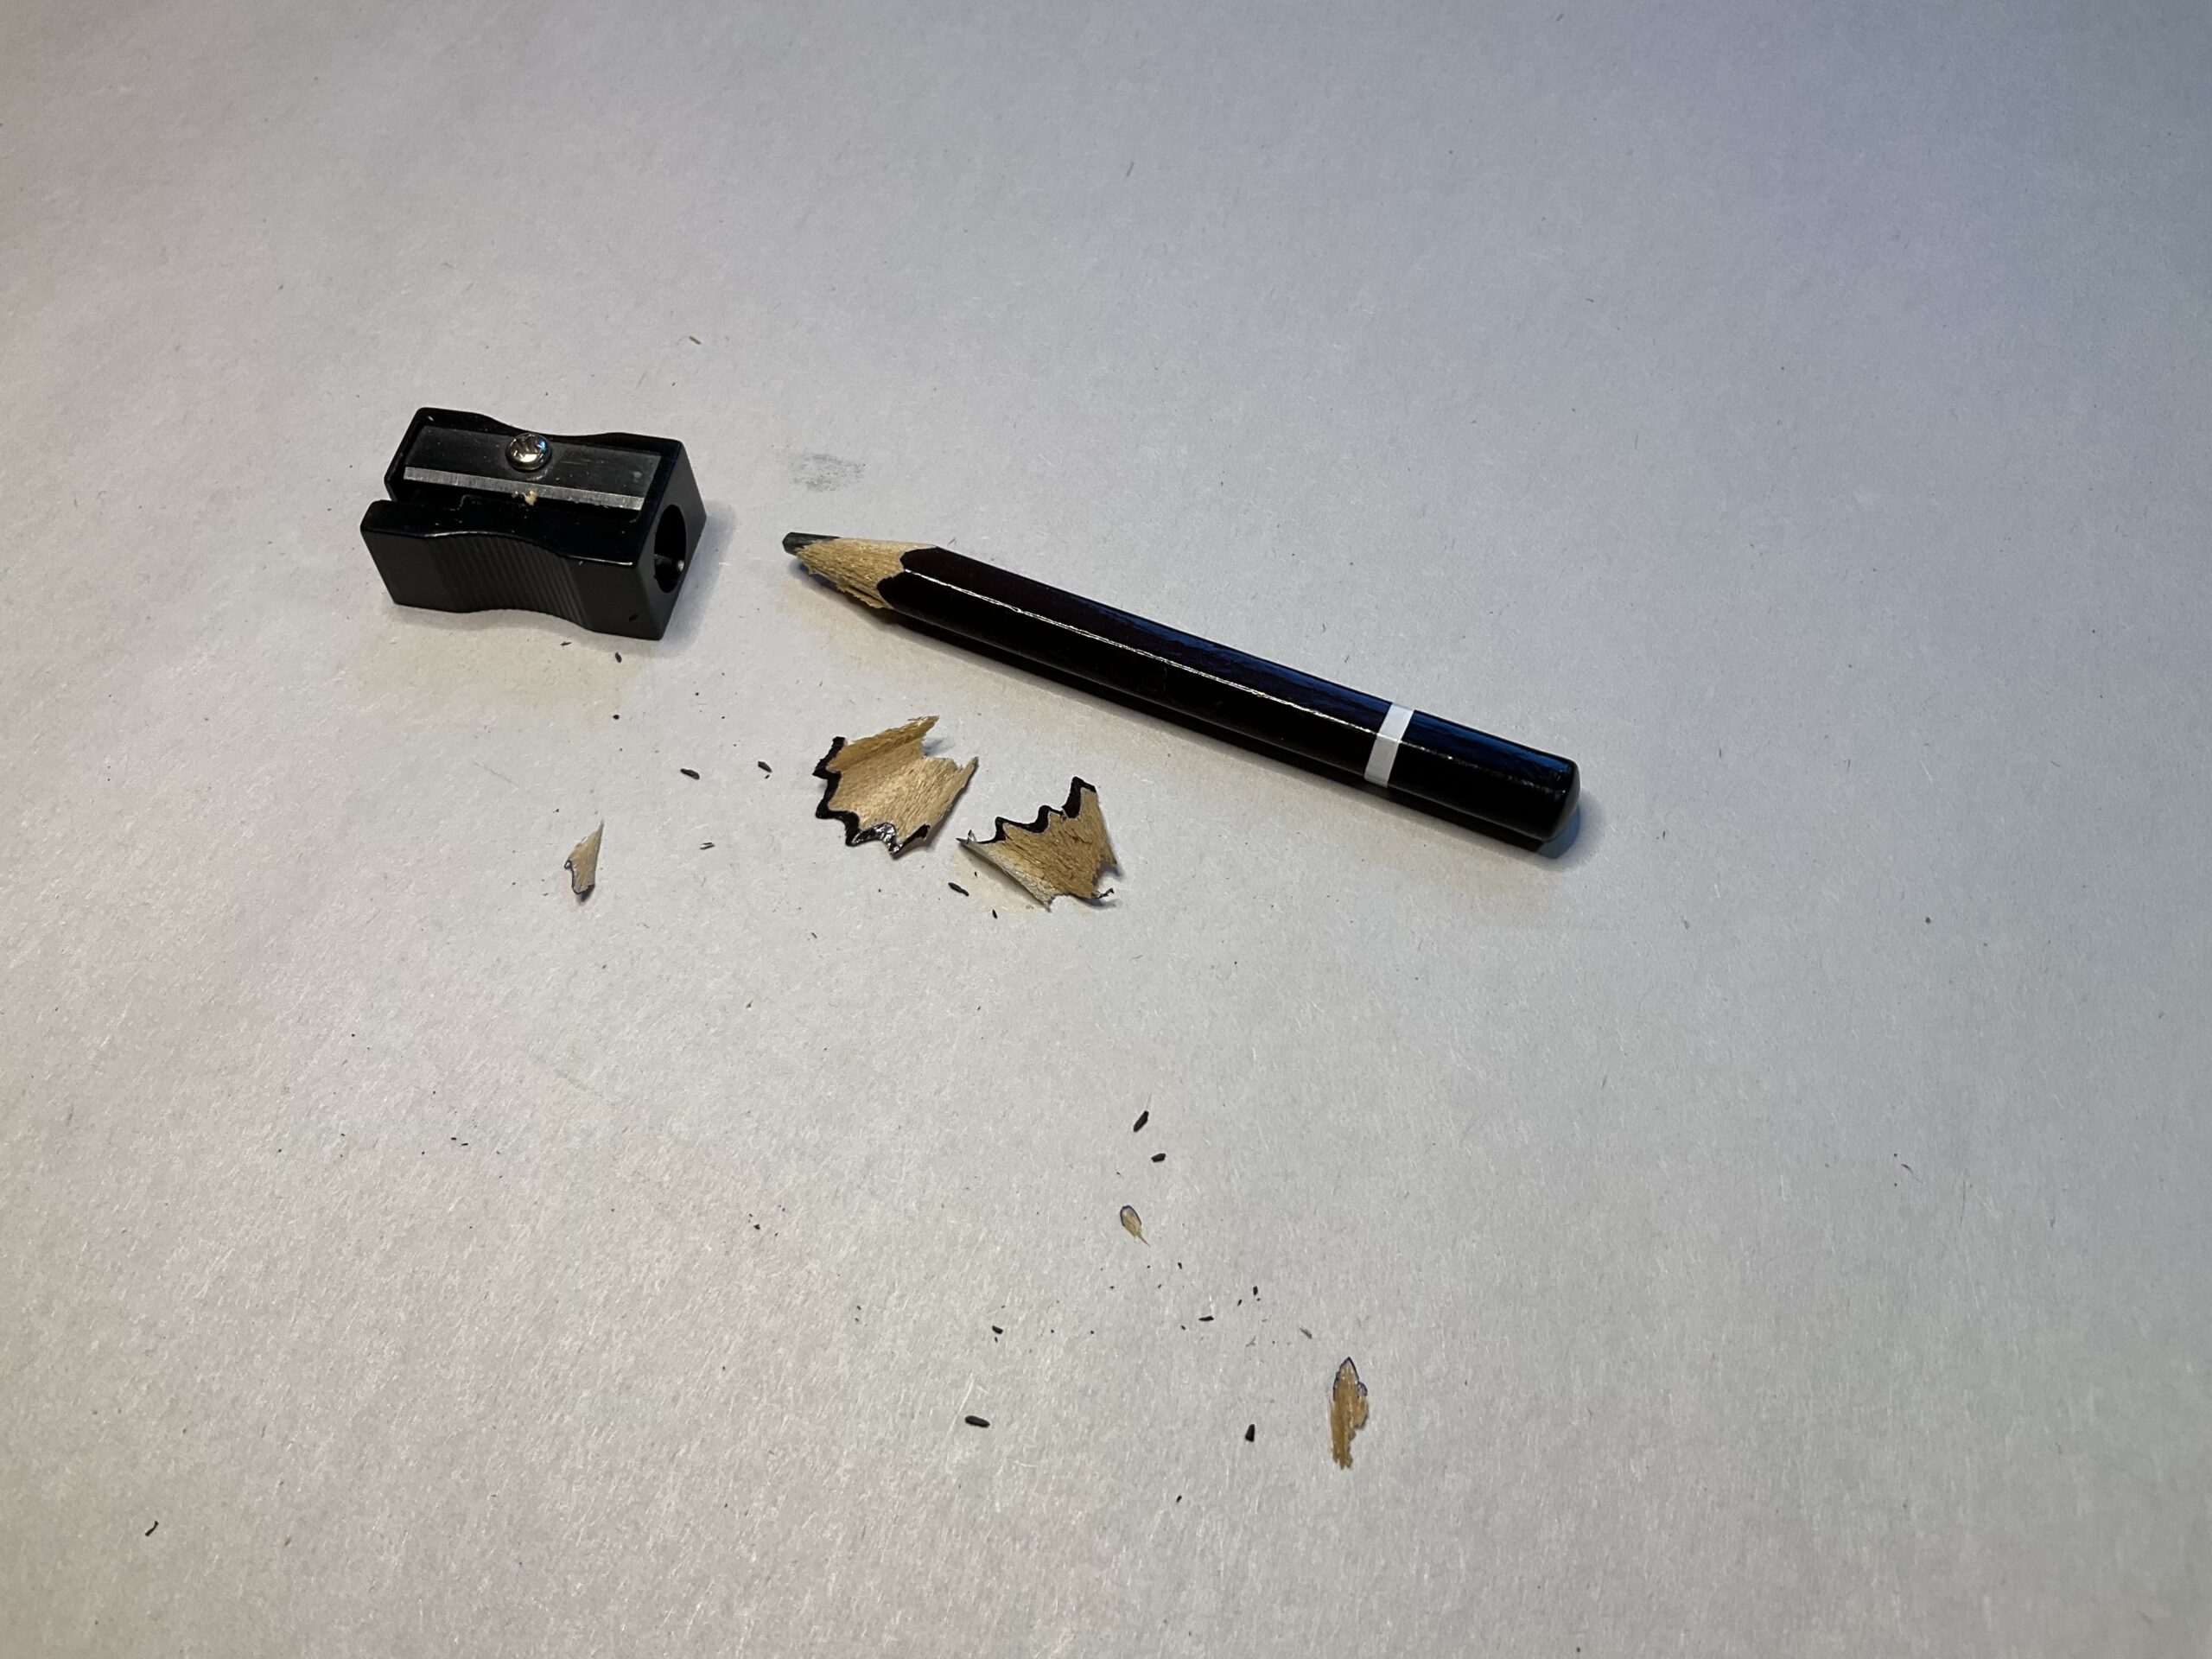
At home Sept 6 to 10: revise subject, new sketches, work in progress:


Sept 11: sharpener drawings, notes, in process
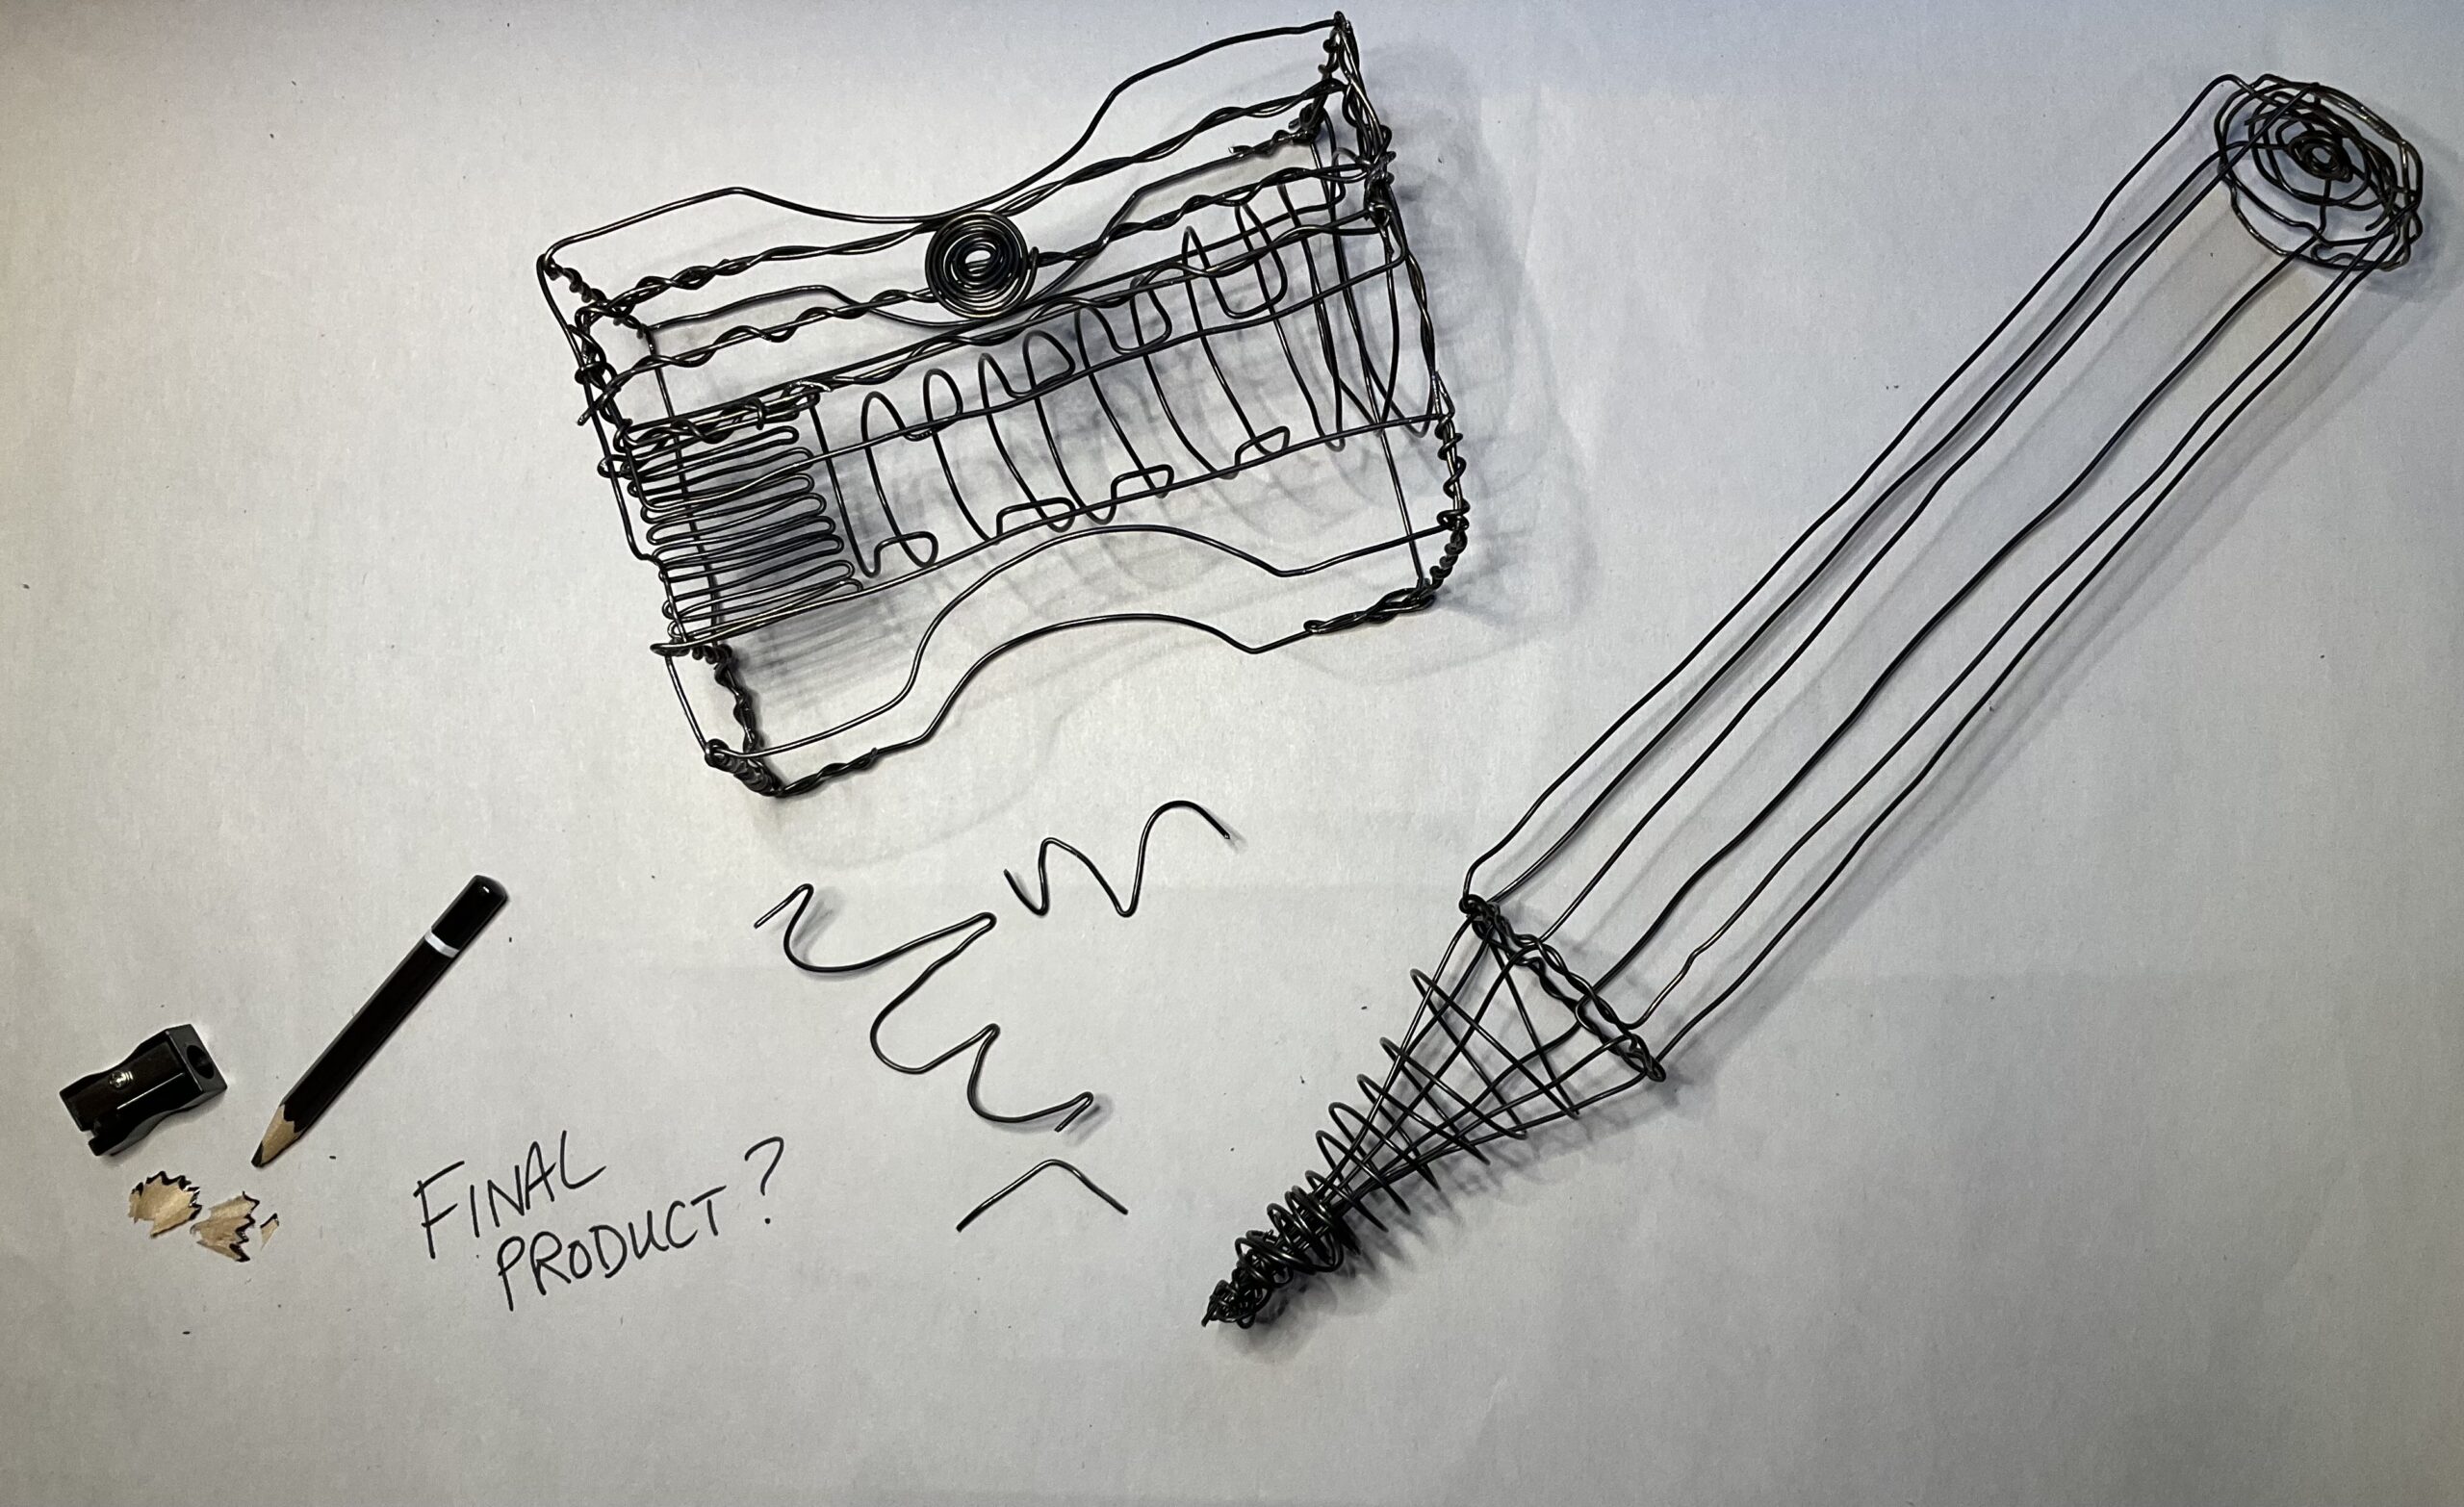
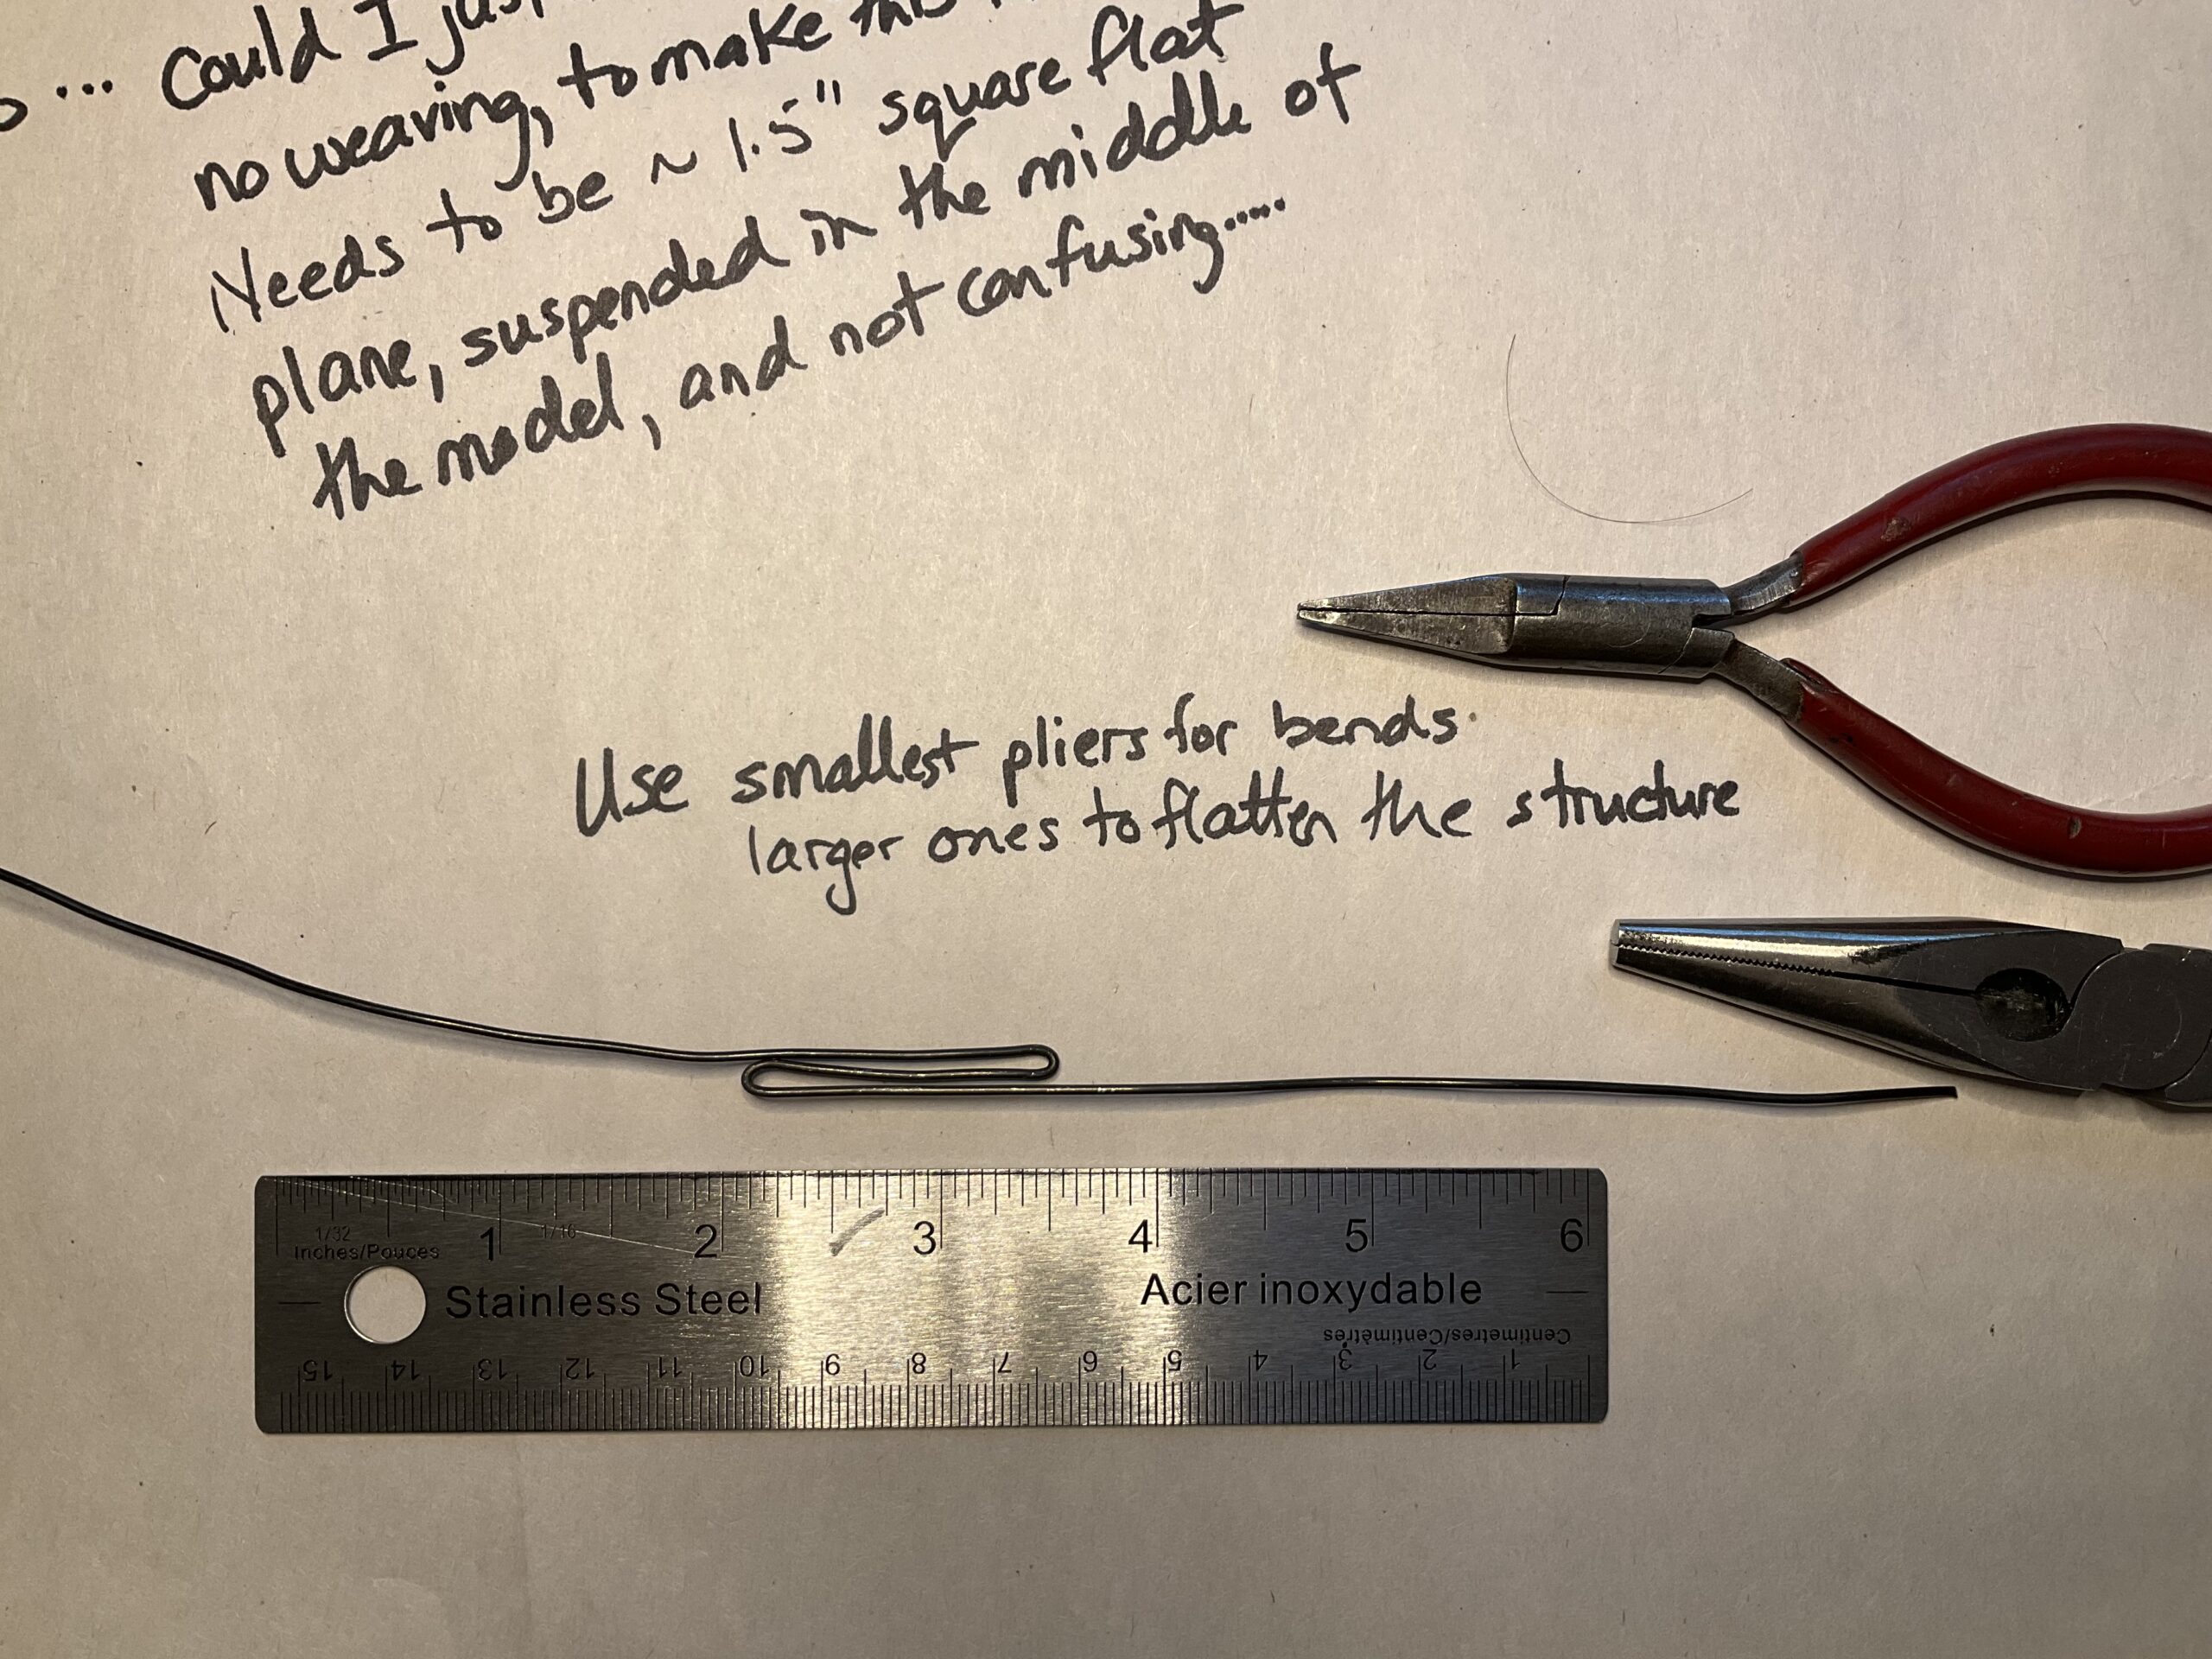
Will bring to class for Sept 12. My puzzles — is the sharpener’s transparency too confusing? Is the combination of a bare-bones external frame with 2 inner components (barrel and platform) adequate to convey the object? Is the blade intuitive enough, does it need to be more solid, more opaque? Would the pencil benefit from fashioning a dark core (as of graphite)? Do the shavings work?
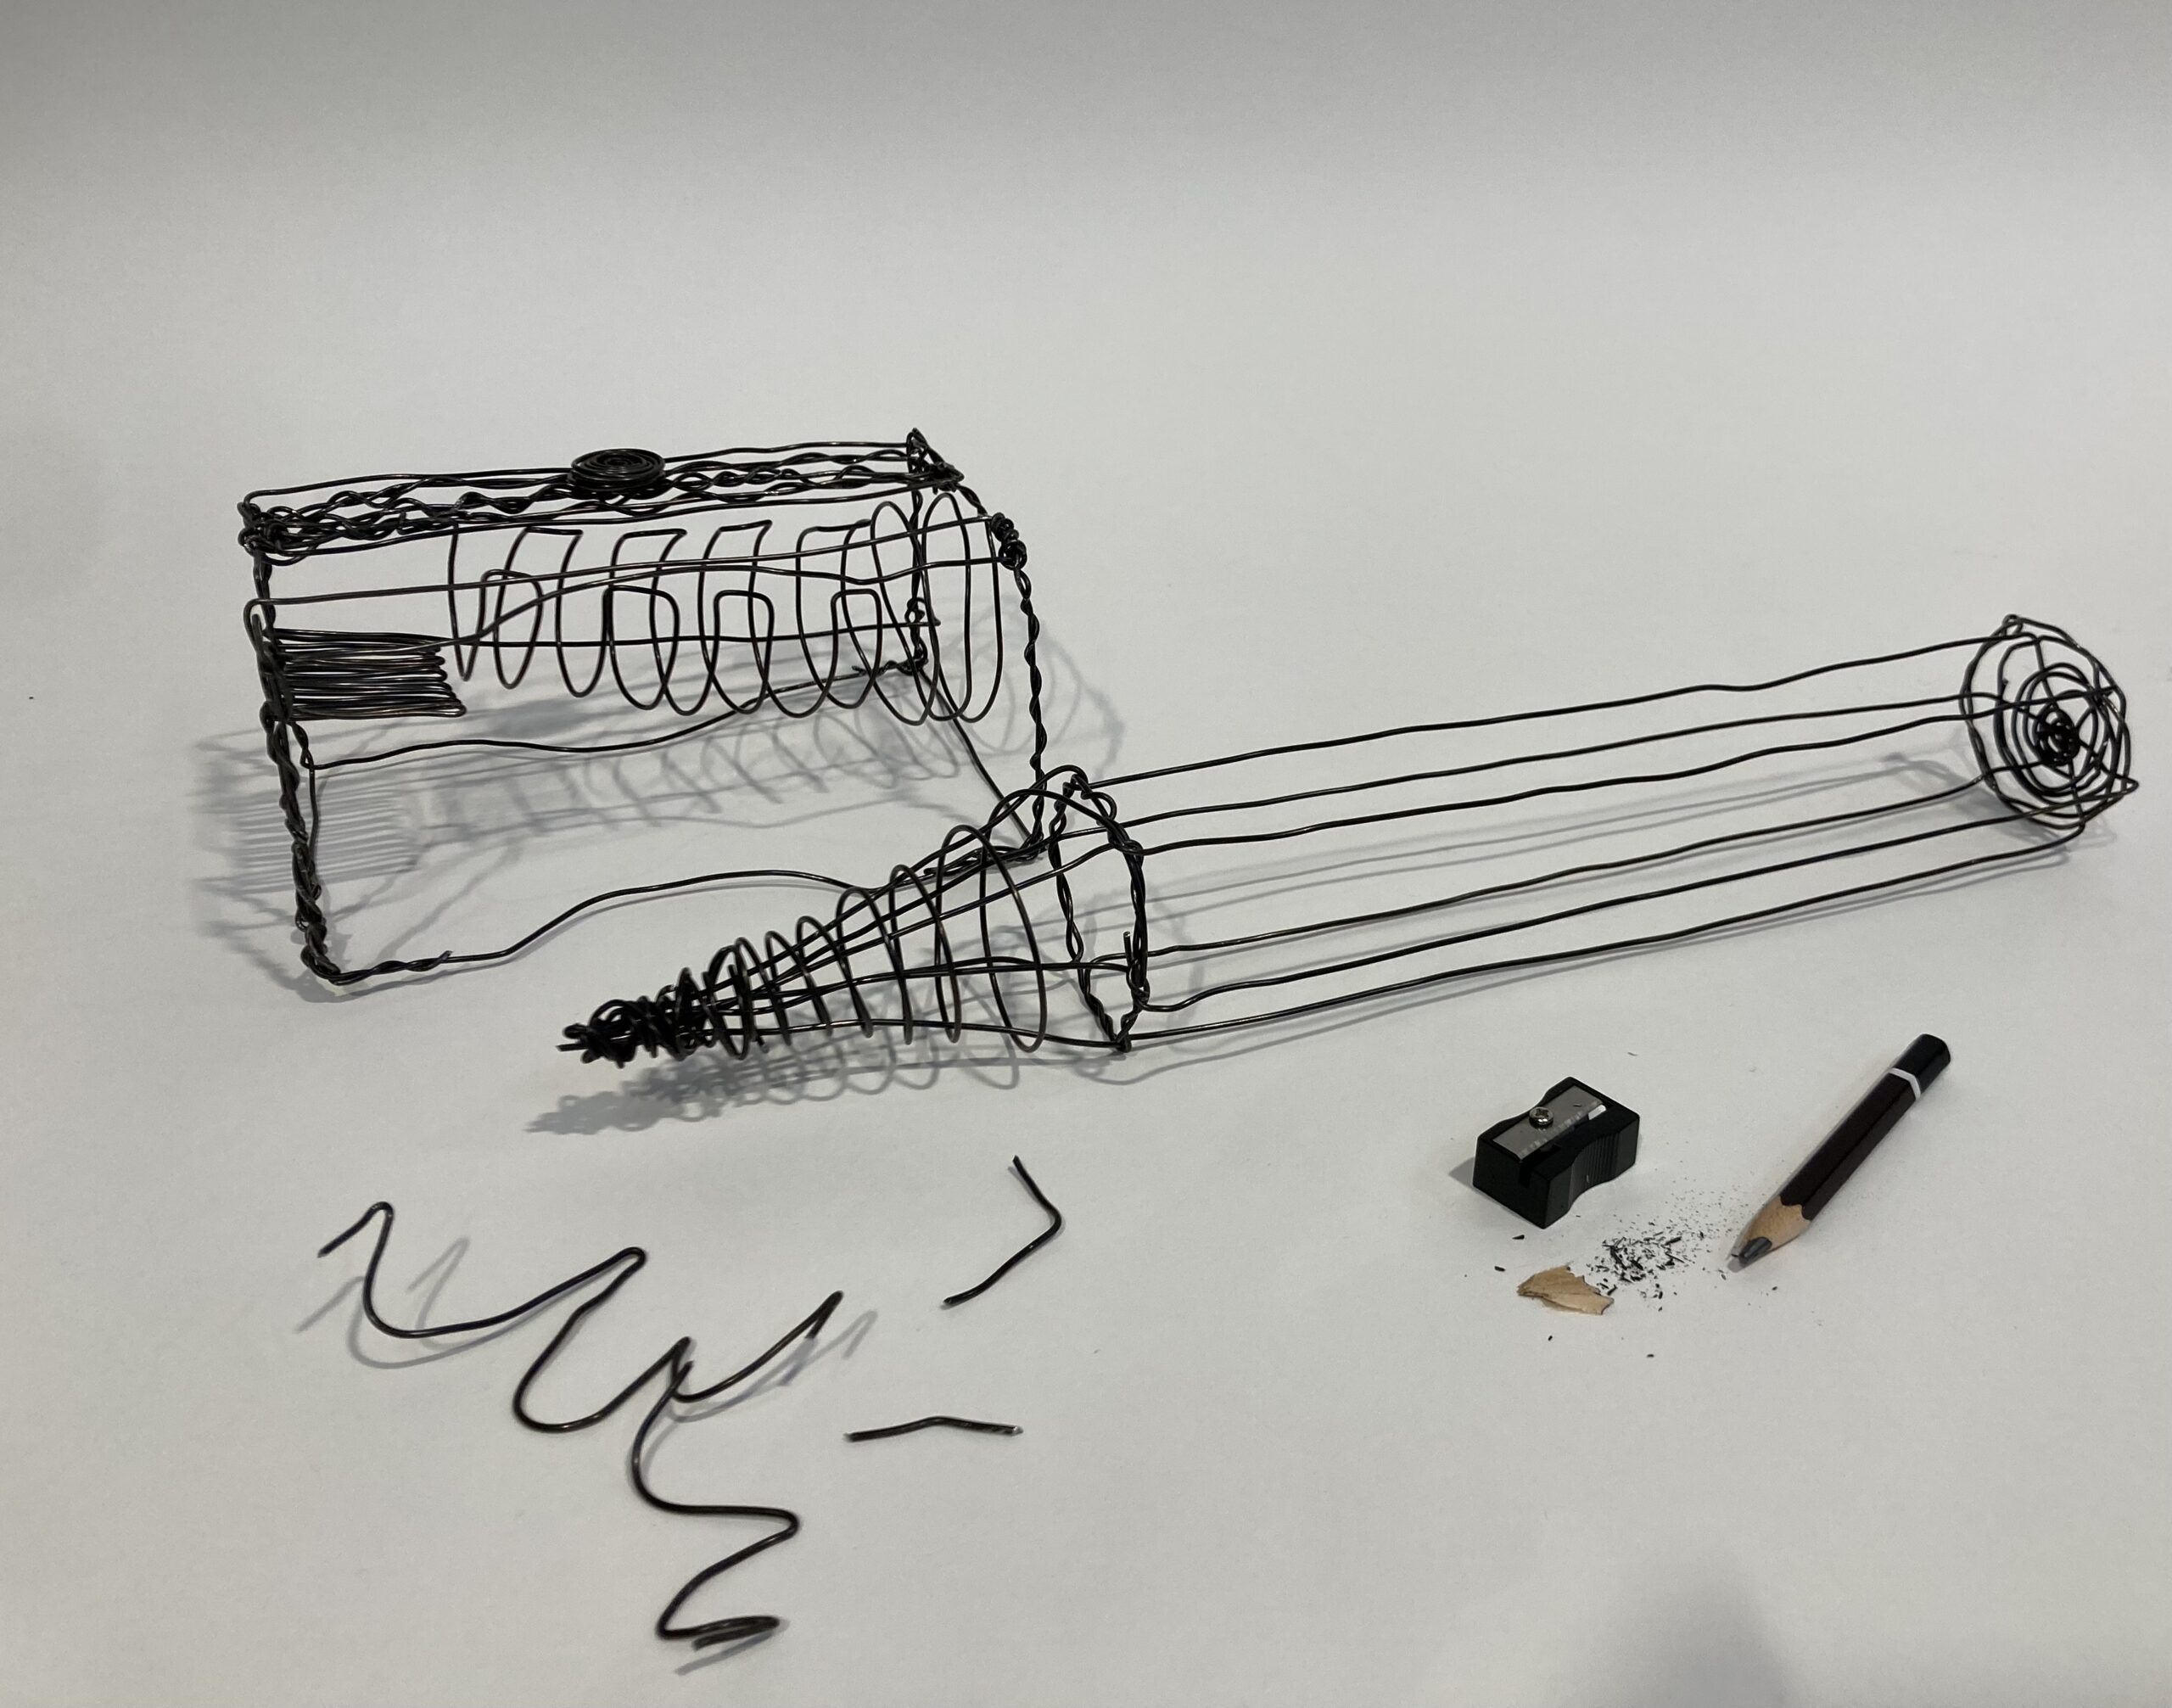
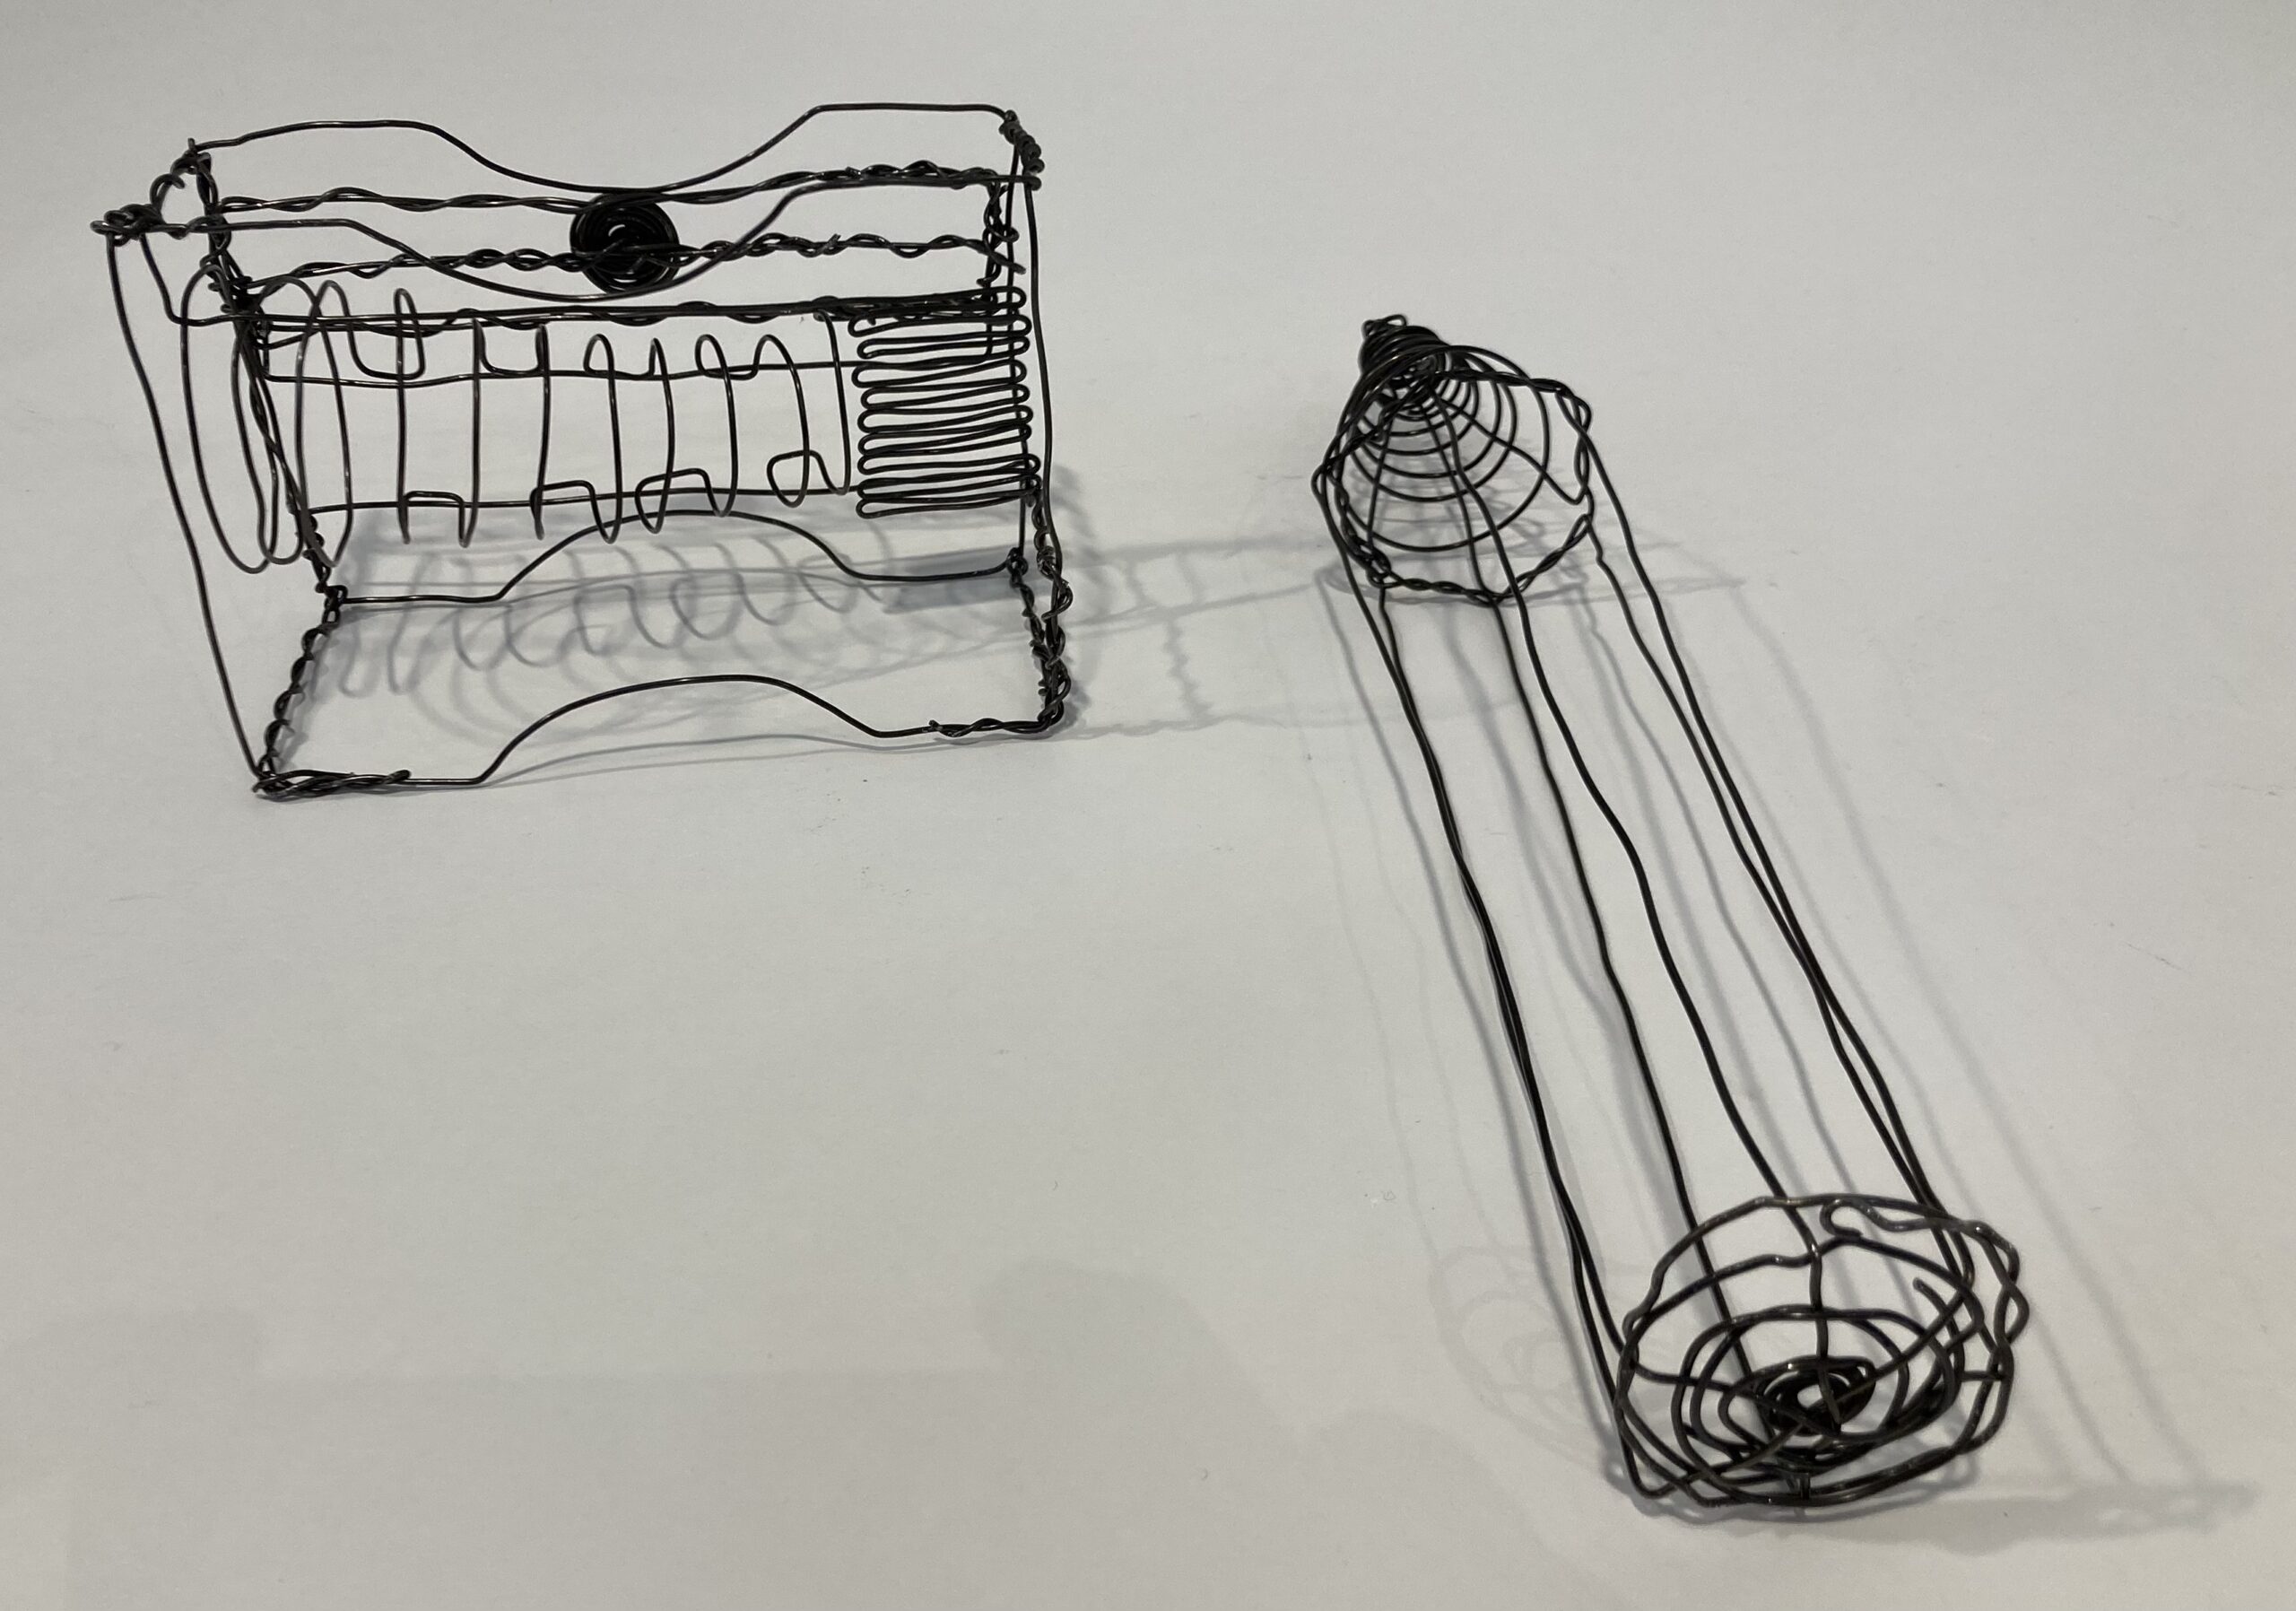
FINAL Unit 1 Exercise 1: six views
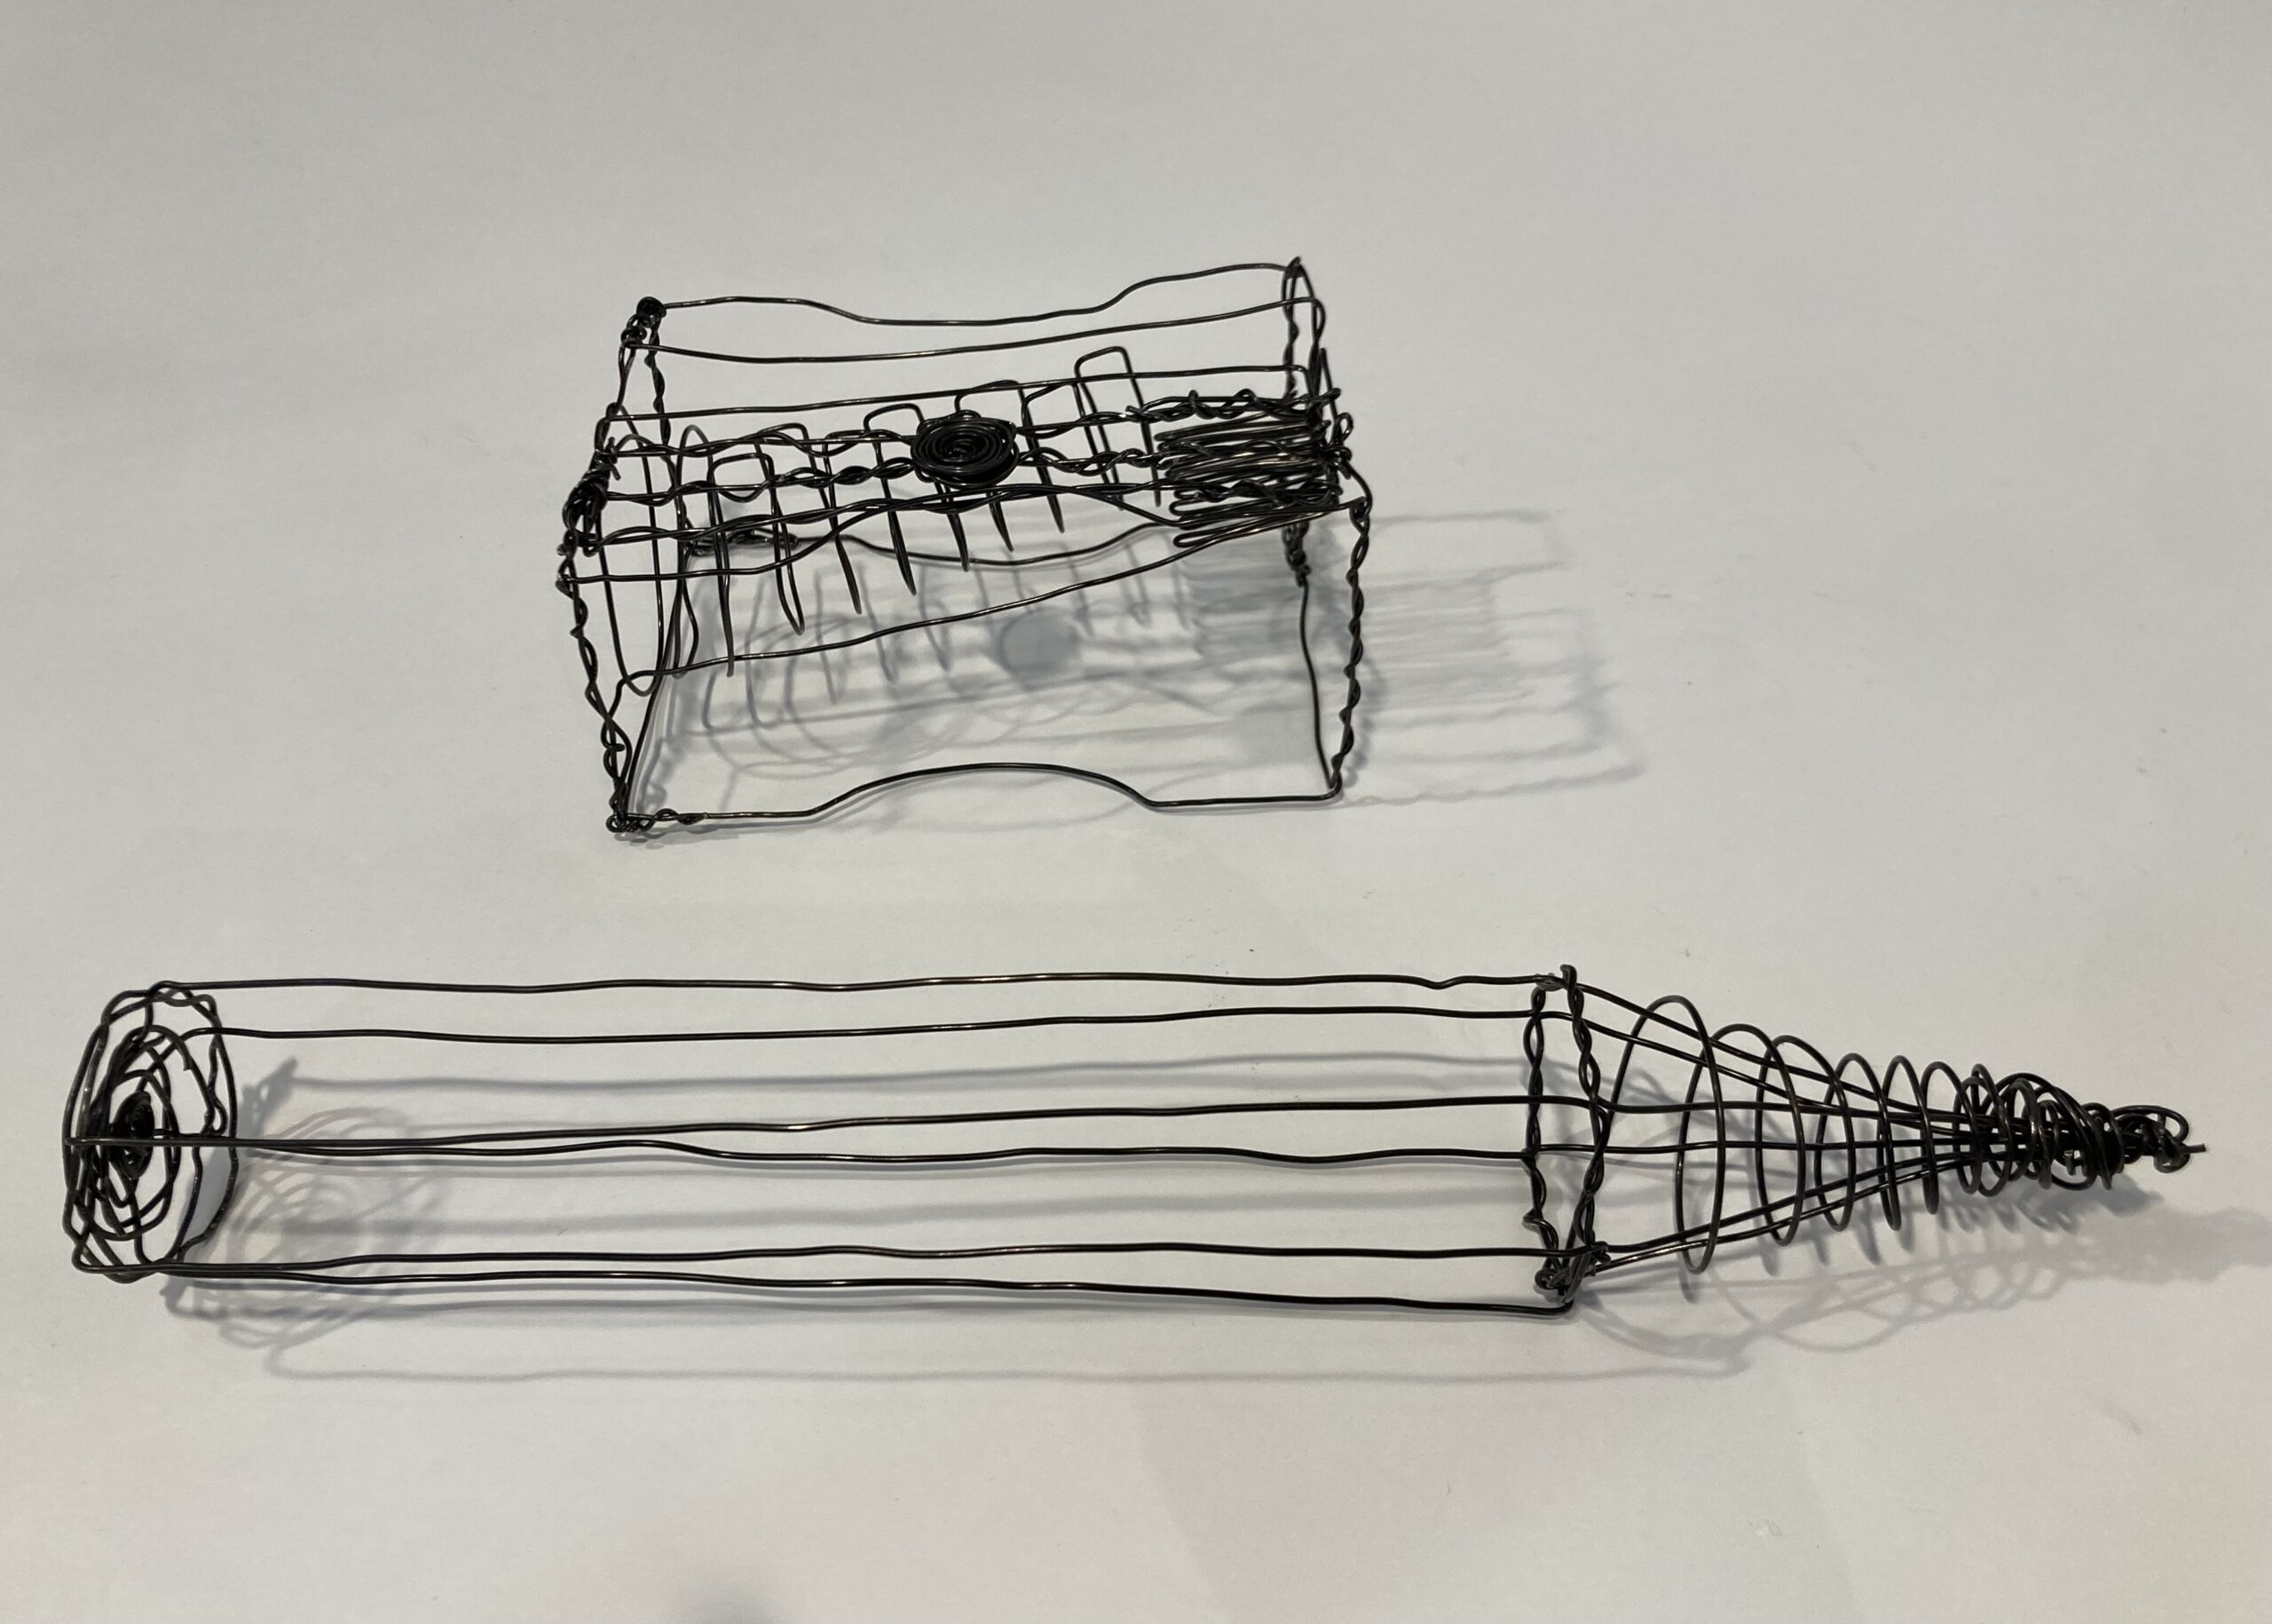

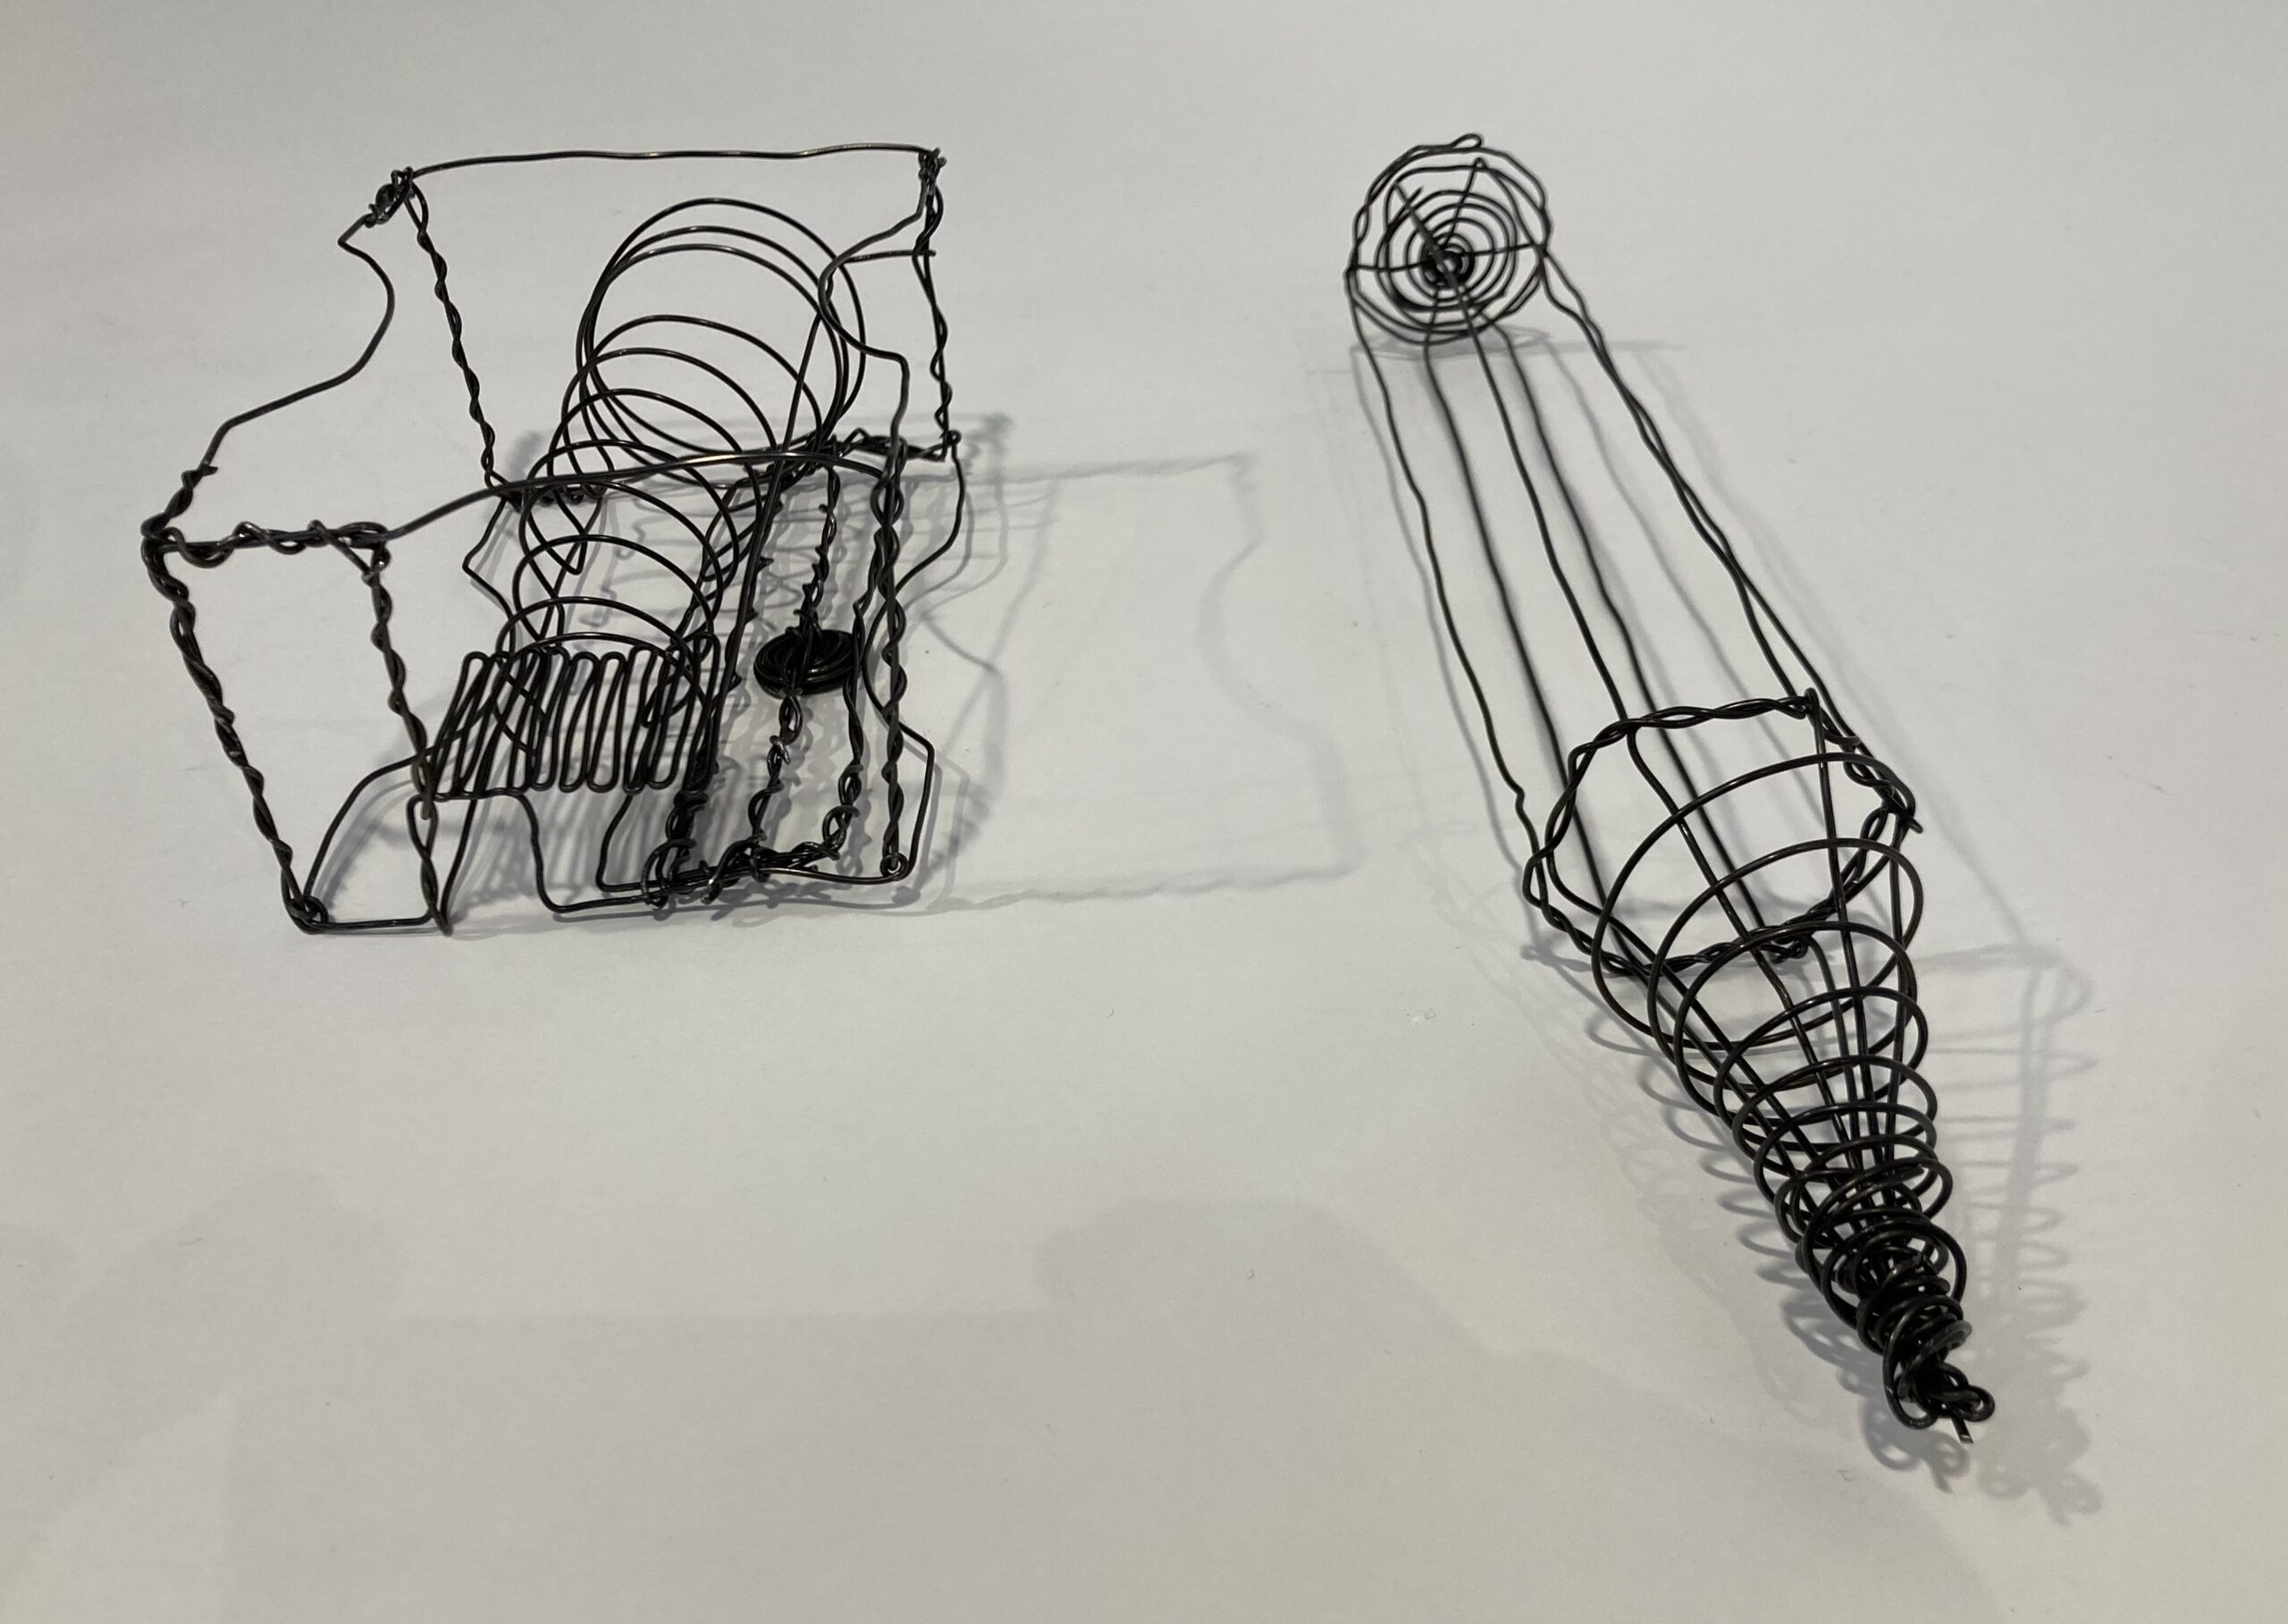
Reflections on the process: back-and-forth between drawing, ideation and production as I tested limits of tie wire. Some angst about whether it would be too confusing to include interior elements in some detail (the barrel, the small platform at end of barrel) with a pretty bare-bones external frame, but I think it worked. Still not sure about the opacity of the blade, might the function/design/purpose have been more evident if it had closer-together lines? Yet, the black wire didn’t really allow that unless I had done a repeat of the technique for the small platform (and I wanted those two elements to look very different from each other. Another option would have been different wire for the blade (armature wire would be perfect, more malleable and even grey in colour!)
ADDITIONAL REFLECTIONS, 2 weeks later… I really enjoyed scaling up the object to 5 or 6 times life-size. It gave me more creative freedom with varied wire shapes — curves for the sharpening barrel, corduroy-road-like dense lines for the flat inner platform of the sharpener, spaced-out parallel lines to imply the hexagon shape of the pencil’s body, tight spirals for the pencil flat end and the screw on the sharpener. I used a very technical, component-by-component approach for this project and the lines felt very defined, very shape-oriented, keyed in on accuracy. I paid attention to the function/purpose of the component — for example, it was important to me that the circular lines describing the barrel’s shape weren’t completely circumferential because in the sharpener itself, one side of the barrel is open to allow the pencil to contact the blade. I also wanted the pencil tip to fit inside the sharpener. Overall… thinking about my lines like they were technically accurate and apt, rather than as gestures or implied.
FIN 121 Unit 3
FINAL PROJECT – min size 24 by 36. Not on paper. Otherwise, my choice.
PLANNING DOCUMENT was due 27 March. I was out of town for medical stuff several days leading up to deadline so submitted a very early version, many revisions to follow, but here it is:
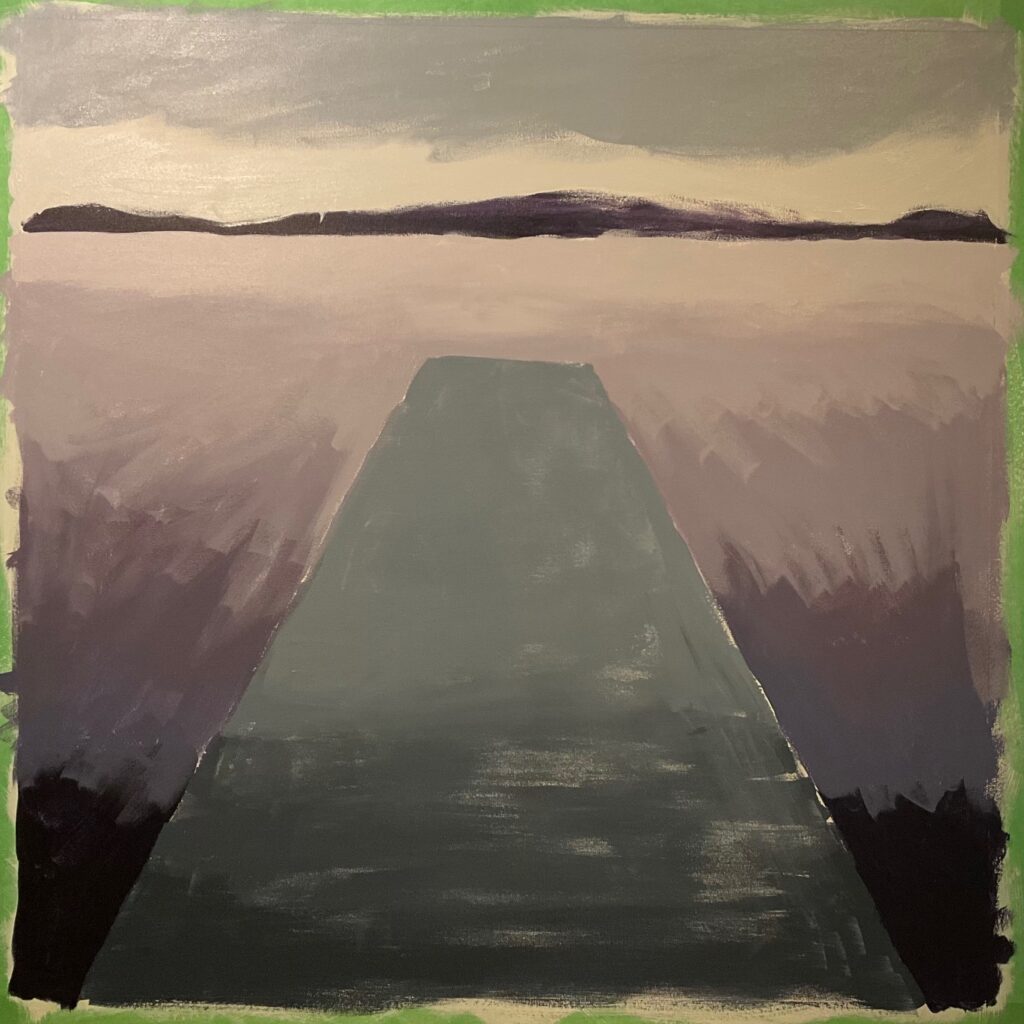
08-FIN121-Final-Painting-PlanningNEXT STEP Found a 36×36″ canvas to suit my goal to paint square. Taped a 1 3/8″ border with painters tape, and gessoed the canvas. Such a large expanse, I’m a bit intimidated. While it dried, I worked on colour trial mixes and dashed off quick experiments on paper.
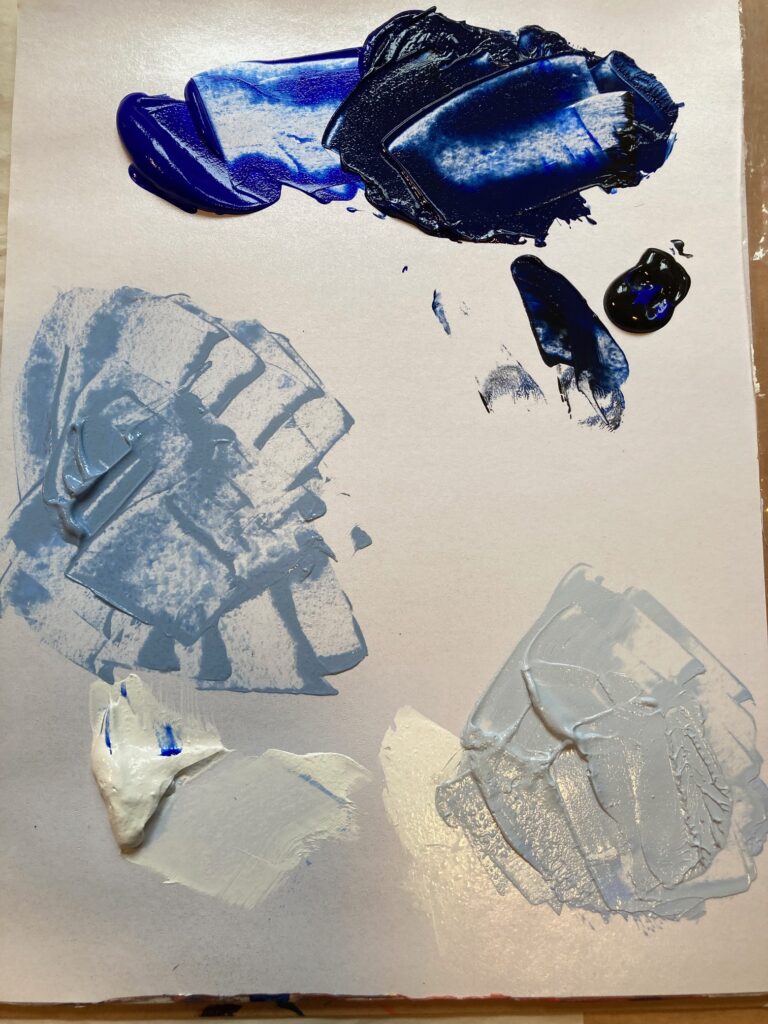
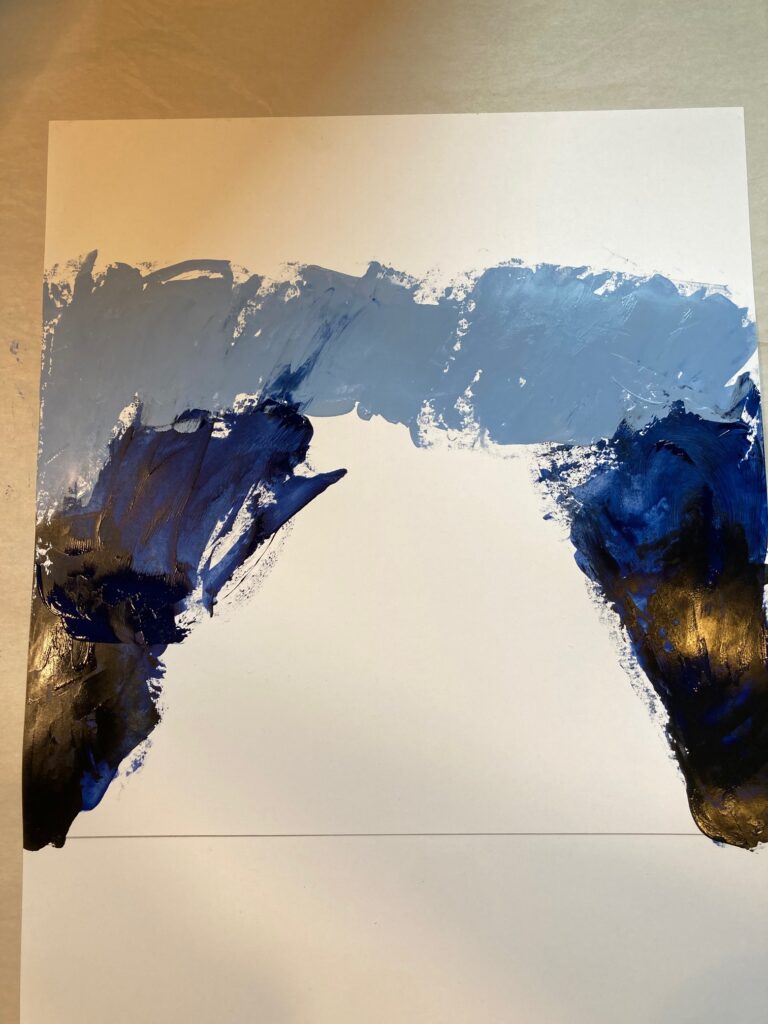
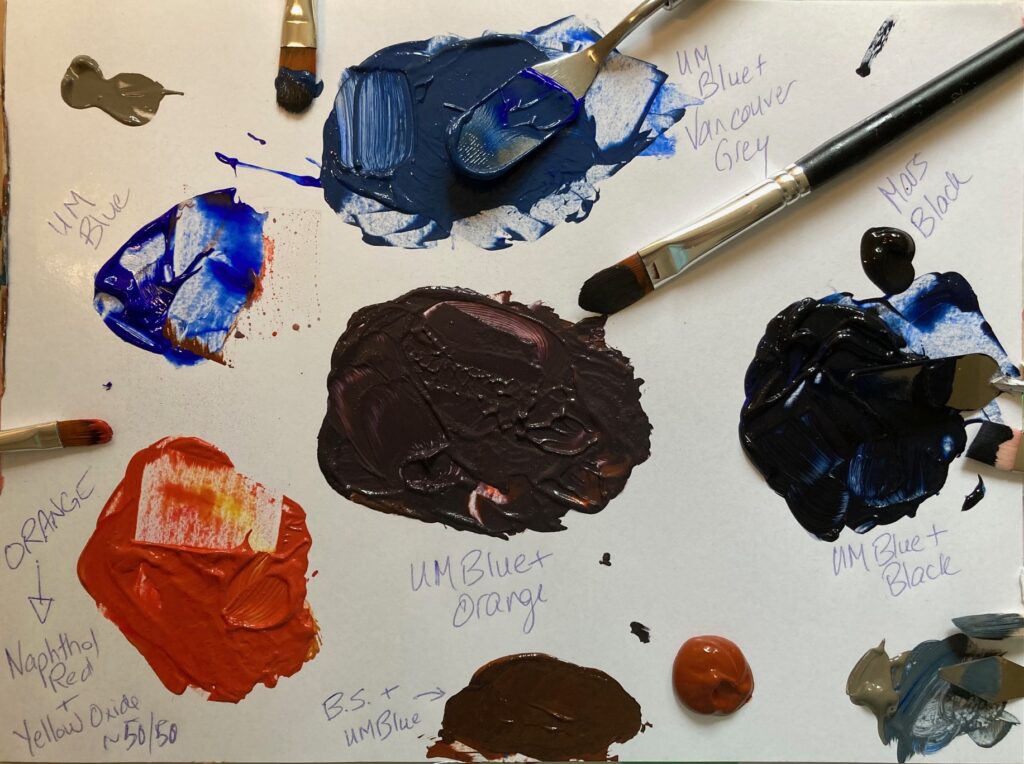
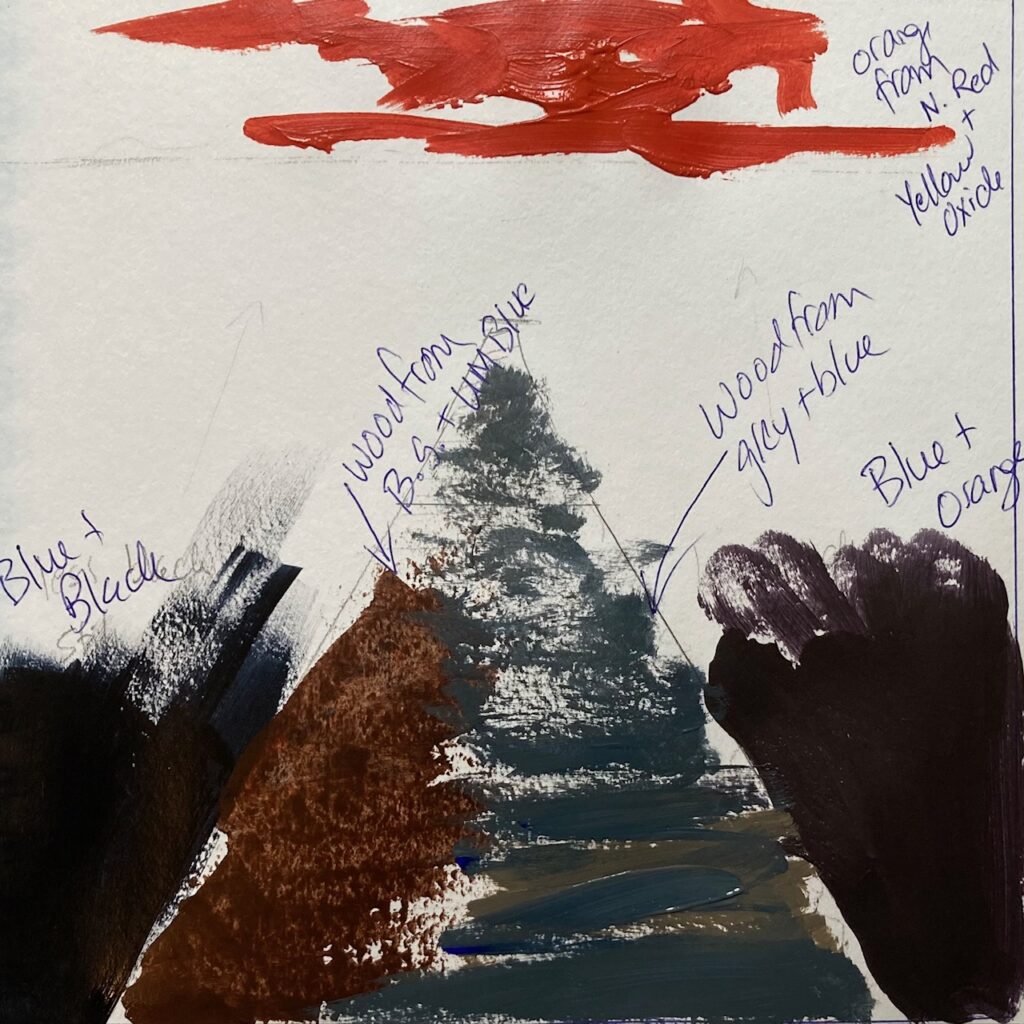
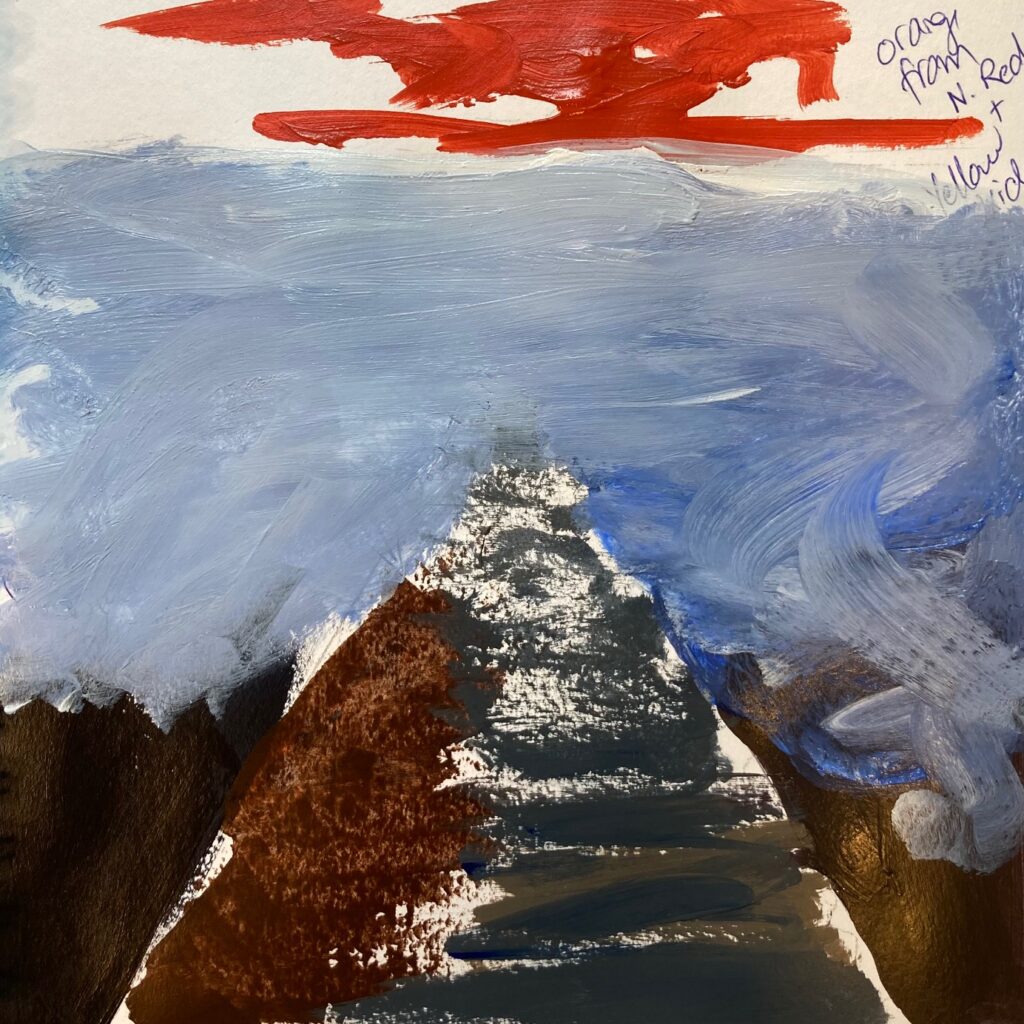
Second colour trials better: Compared dark sections of water with UM Blue/Black mixes compared with UM Blue/Orange mixes (orange made with approx 50/50 Yellow Oxide and Naphthol Red) and preferred the latter. Compared wood for the dock surface with burnt sienna mixes versus grey /blue mixes and preferred the latter. Made a trial of tinting down some of the blue/greys for light sections of the water, and added some matte and some shiny medium for quick testing — didn’t look ridiculously out of place, but I think will use sparingly and late in the process…
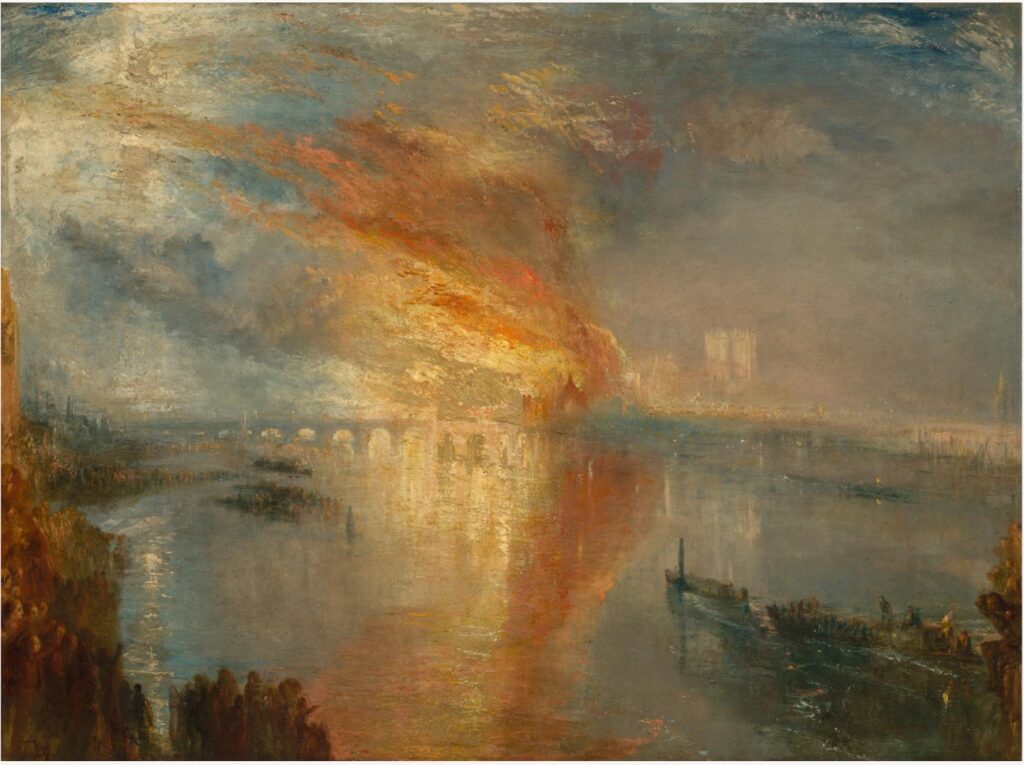
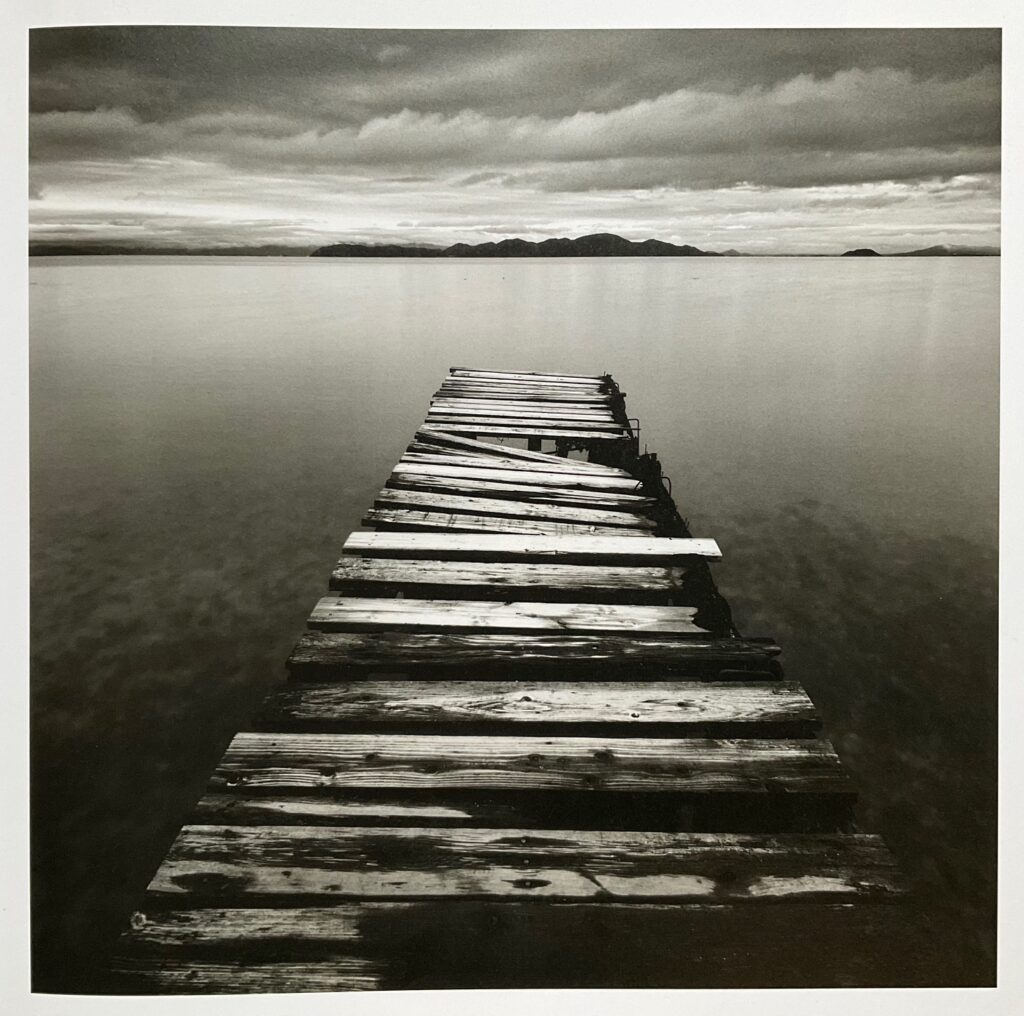
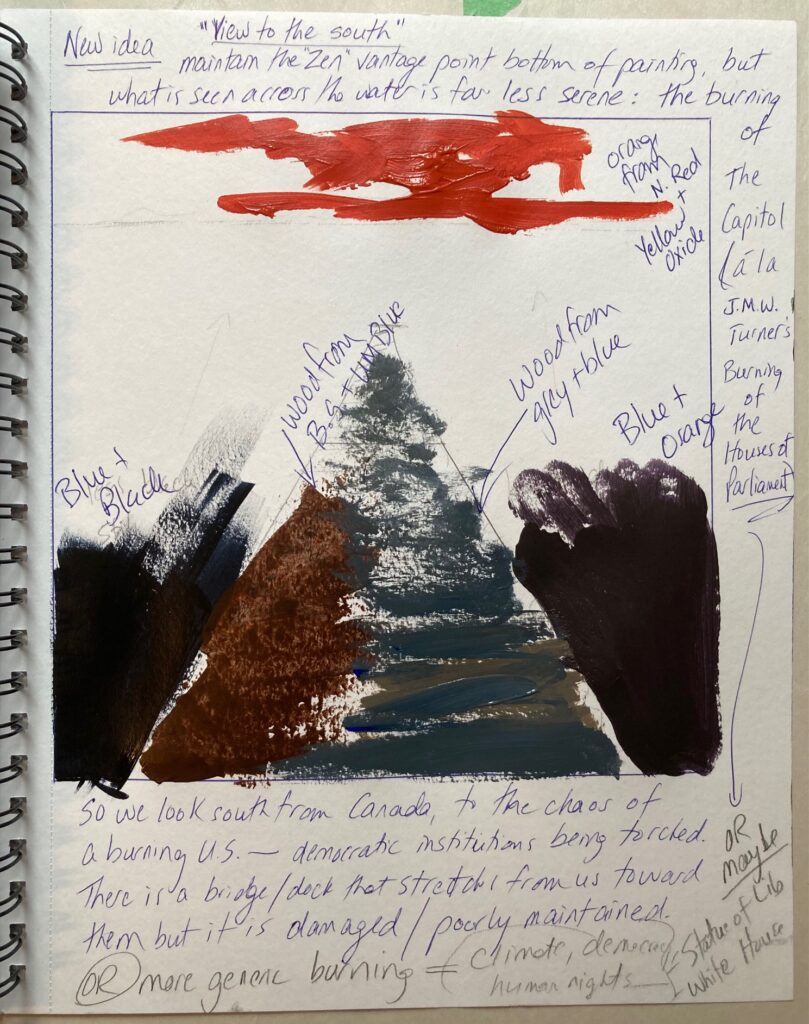
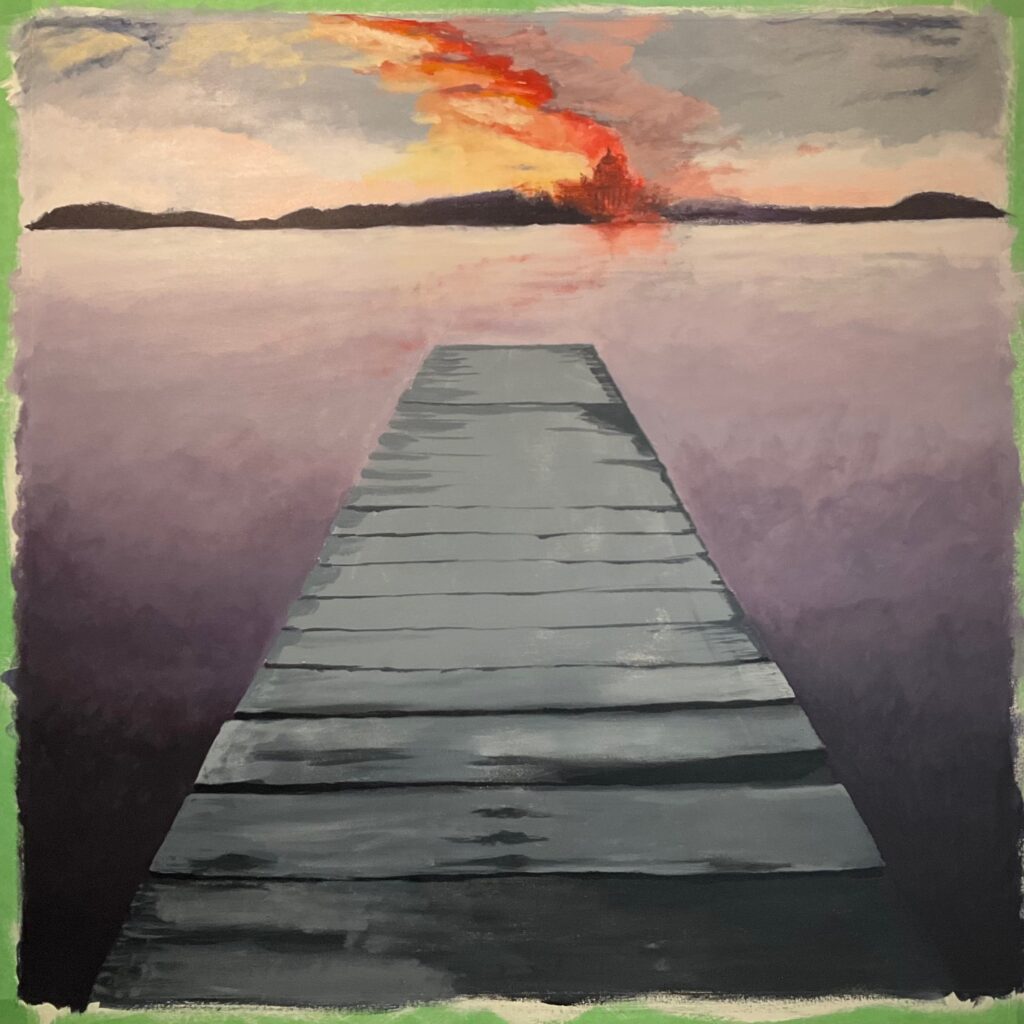
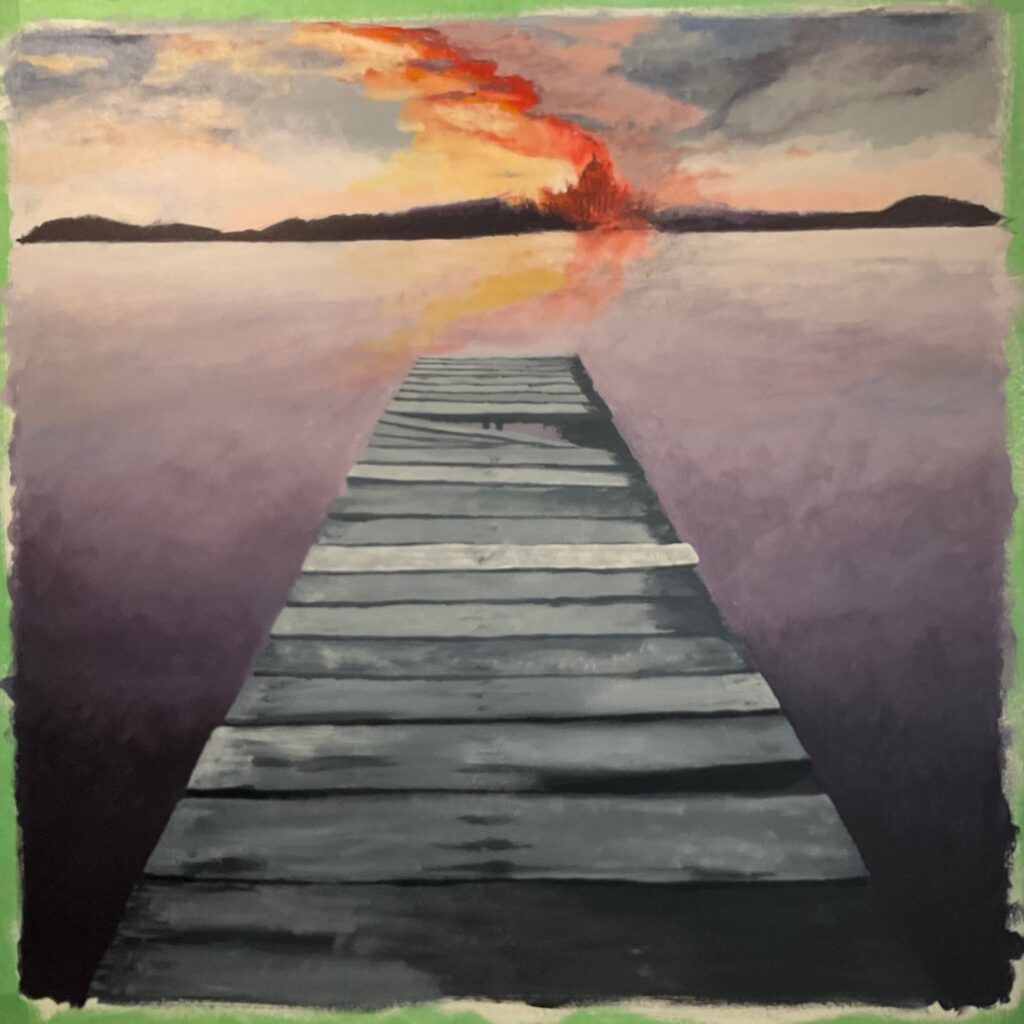
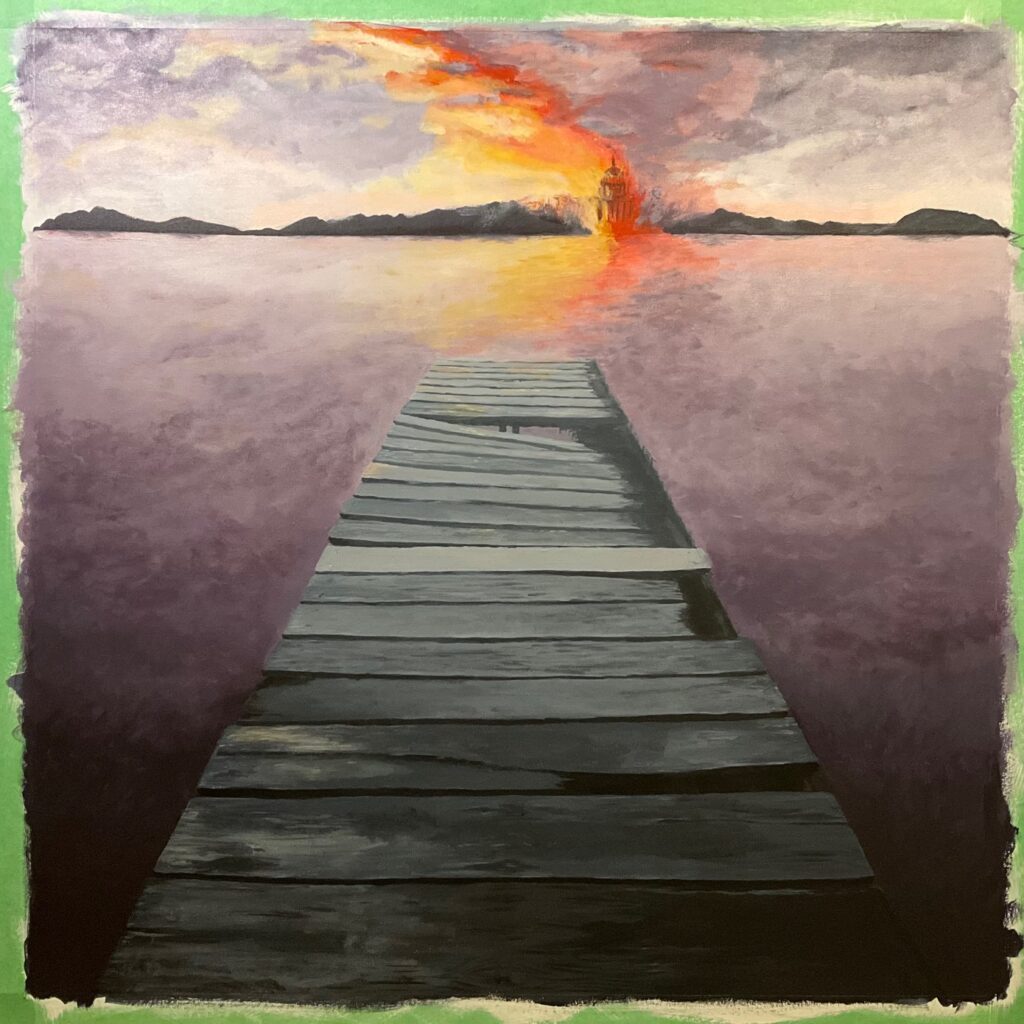
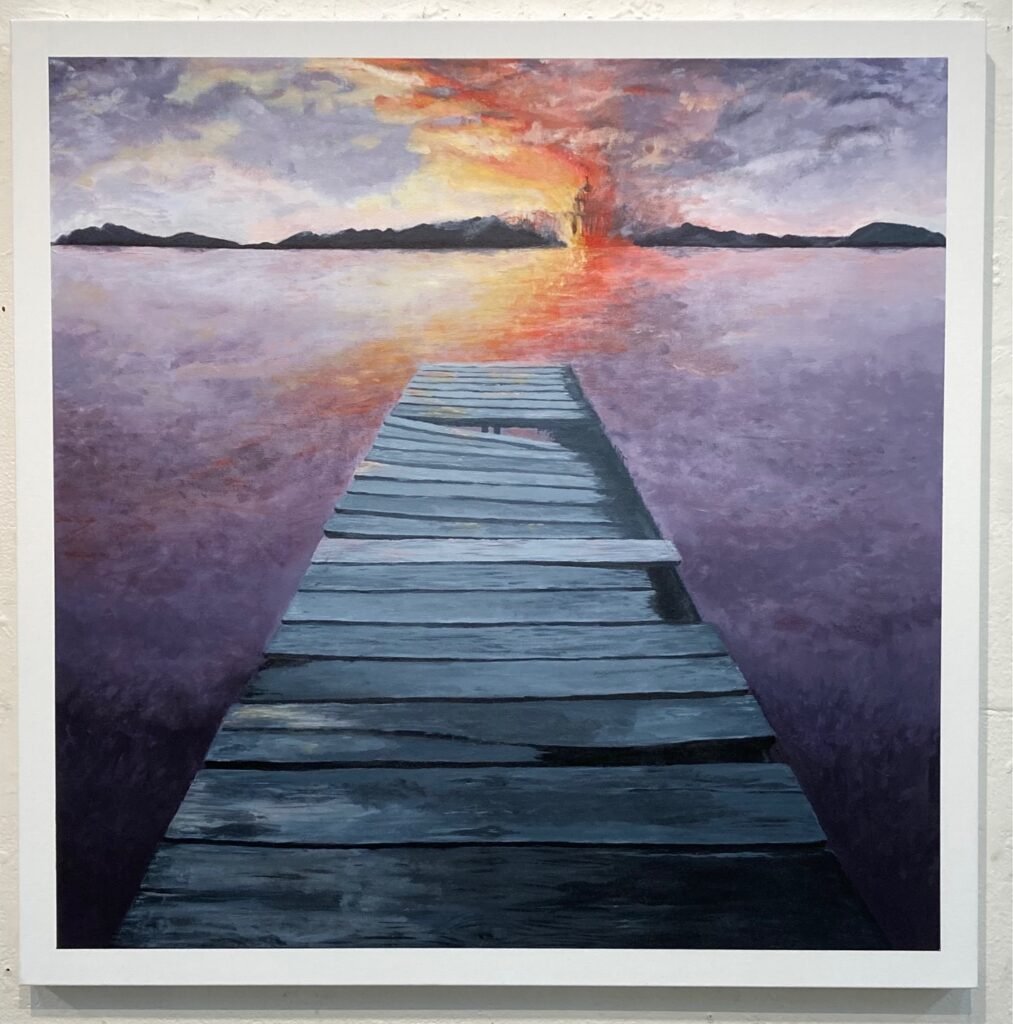
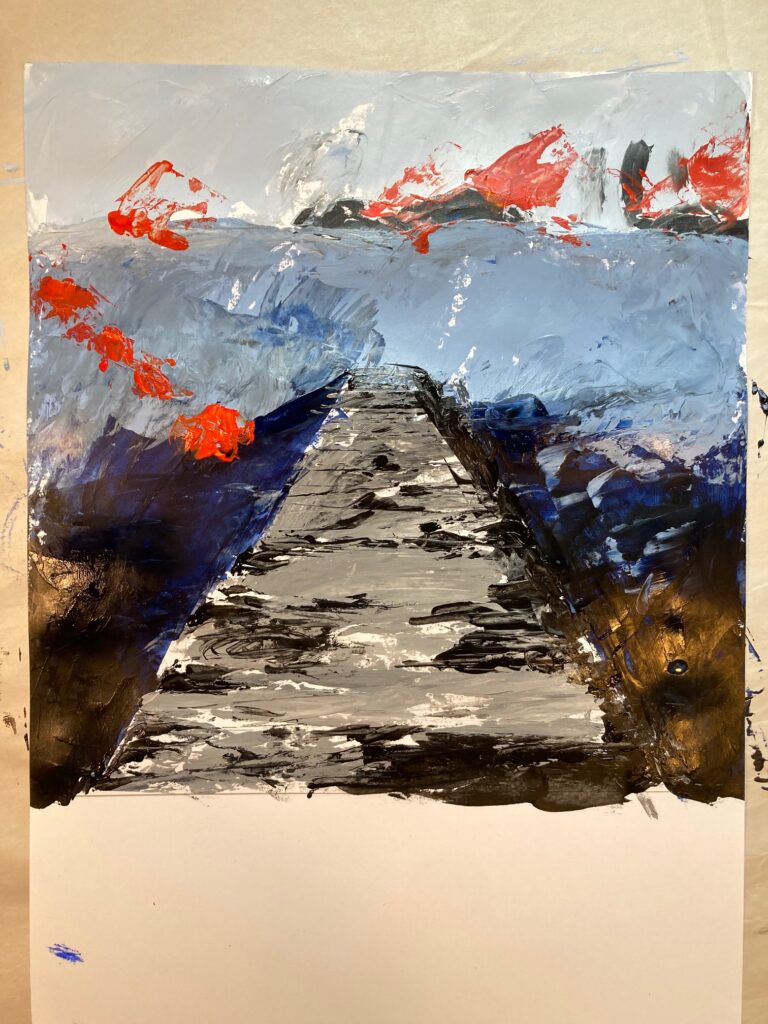
EVOLVING IDEAS: “View to the south”. As I worked with the colours, my ideas about the piece started to shift, dragged along by the politics and world events of the day. I began to see the painting’s foreground as my calm, rather Zen vantage point but the scene ahead of me undergoing disruption, chaotic forces. The view of orange across water took me to JMW Turner’s 1834 painting of the burning of the British House of Parliament and House of Lords. I imagined a mash-up of my contemplative Zen landscape with images from today’s chaos. Turner’s painting is explicit about what is burning — I considered working in explicit images, the shape of the US Capitol building, a Statue of Liberty reference, maybe it is her torch lighting the fire? Maybe it is a broader version of “on fire” I want — not just America seen from the perspective of Canada? Maybe my small strip of distant land can’t accommodate the evils I imagine it personifying? If I am emulating Turner to some degree, I am going to have to shift away from his 50/50 split sky and water, to have my viewer see the fire largely as reflection on water and dock, not much room for detail… Decided to block in the basics of the dock / water / horizon / sky, then test out the fiery chaos as I go.